Sealer Removal

Victorian Hallway Tiles Before After Restoration Doncaster

Victorian Hallway Tile Restoration at Ex Railway Property in Doncaster

Pictures below are from the restoration of Victorian Hallway Tiles that I carried out at a marvellous old property just south of Doncaster last year. The property was originally built and owed by the railways in fact its located metres away from the East Coast mainline which links Edinburgh with London and calls at places like Doncaster, York, and Newcastle.

The owner of this property was left a very old photograph by the previous owners showing two people stood by the front door and the floor tiles are just visible in the photograph.

Victorian Hallway Original Photo Doncaster Railway Property Victorian Hallway Before Renovation Doncaster Railway Property

Even though the house had been kept in great condition by the railways for well over one hundred years the large Victorian floor had unfortunately taken a hammering. In total around 130 damaged tiles would need removing and replacing with replicas. This would be a painstaking task but would make all the difference to the overall look of the floor.

Victorian Hallway Showing Damage Doncaster Railway Property

Replacing Victorian Hallway Tiles

The current owner was keen to have the floor renovated and I was asked to do the work, old floors like these are a sought-after period feature and can add a lot of value to a property once restored. Fortunately, Victorian tiles are still popular today, and I was able to source replacements without too much trouble.

I started the restoration by removing the old cracked tiles and cleaning up the base. With this done I started the lengthy process of carefully cutting tiles to fit the original pattern and then fixing them in place with a modern adhesive.

Victorian Hallway Showing Damage Repair Doncaster Railway Property

Deep Cleaning Victorian Hallway Tiles

After leaving the tile adhesive to set overnight I came back the next day to deep clean the floor, by cleaning the old and new tiles together it will ensure the floor has a consistent appearance when finished.

Sometime in the past layers and layers of an old sealer had been applied to the floor, the sealer was flaking off and holding on to decades of dirt. To remove the old sealers, we used Remove and Go, it was sprayed on to the tiles and then left it to dwell and soak in for ten minutes.

Victorian Hallway Before Renovation Showing Failed Sealer Doncaster Railway Property

The tiles were then scrubbed using a rotary floor buffer fitted with a 200-grit diamond pad which made short work of the old floor sealers. The floor was then treated with Tile Doctor Pro-Clean to clean the tiles further, again a diamond pad was used to go over the tiles.

Victorian Hallway During Sealer Removal Doncaster Railway Property

Once happy the Victorian tiles were as clean as the could be it was time to give the floor an acid wash which would remove any old mineral deposits including grout smears. We also recommended this for old Victorian floors which do not have a damp-proof membrane installed and can suffer from white efflorescent salt deposits as moisture rises through the tile. To do this Tile Doctor Acid Gel was scrubbed into the to the floor again using a 200-grit burnishing pad to make the acid gel work hard. Afterwards we rinsed the floor several times removing the slurry with a wet vacuum. This kept the mess to a minimum and the floor was already looking great.

Victorian Hallway During Renovation Doncaster Railway Property

Sealing Victorian Hallway Tiles

The property was left for a few days to let the floor dry out completely and when I returned seal the floor my first job was to check the moisture readings in the floor with a damp meter. I needed to ensure it was as dry as possible before applying a sealer and in this case, I didn’t have to worry.

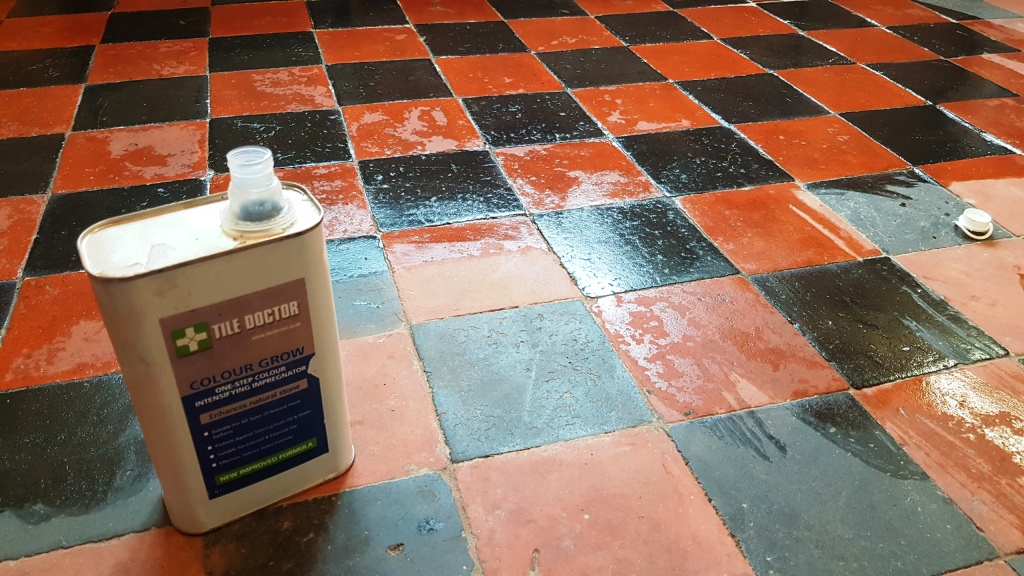
Next, I applied four coats of Tile Doctor Colour Grow which works by seeping into the pores of the tile protecting it from within. I consider this to be best choice for sealing old Victorian tiles like these as it does a nice job of improving colour and its fully breathable. Being breathable is important due to the lack of the damp proof membrane and will allow moisture to pass through the tile and sealer and not become trapped under the floor where it could spread to the walls and cause rising damp.

Victorian Hallway After Renovation Doncaster Railway Property

PS.. If you have ever wondered if you have applied enough sealer all you need to do is drop some water onto the floor, if the tile is sealed sufficiently the water will form a bubble on the surface.

Victorian Hallway After Sealing Water Test Doncaster Railway Property


Professional Renovation of a Victorian Hallway Tiles in Doncaster

Victorian Hallway Tile Restoration at Ex Railway Property in Doncaster Read More »

Sandstone Tiled Kitchen Floor Before After Renovation Mapplewell

Sandstone Tiled Kitchen Floor Renovated in Mapplewell, Barnsley

We were contacted by a family in the Barnsley area of South Yorkshire who were tearing their hair out trying to keep their Sandstone Tiled floor clean. The kitchen area was especially grubby and once the island had been removed during recent renovations, the dirty floor really stood out.

The house was located on the Northern tip of Barnsley in Mapplewell, close to the border of South and West Yorkshire, an area which is steeped in coal mining history. Even though all the coal mines have gone there’s still lots of evidence of its’ proud mining history in the area.

Sandstone Tiled Floor Before Renovation in Mapplewell

After inspecting the tiles, I could see their problem revolved around the fact that the Sandstone had a texture to it and the previous sealer used was an impregnating sealer, as a result the dirt had no problem sticking to the stone as you can see from the picture. At Tile Doctor we see Sandstone/flagstones used a lot as Kitchen flooring, it is a popular choice due to it being so hardwearing, however as with any natural stone it needs to be sealed to protect it and bring out its beauty and colour.

I demonstrated the cleaning process on a small part of the floor, which they were very satisfied with. The testing also enables me to understand what it would take to renovate the whole floor and provide them with an accurate price. They were happy with my proposal and keen for me to begin the work which would take two days to complete, one day to clean the floor and returning a further day to complete the sealing of the floor.

Cleaning a Sandstone Tiled Kitchen Floor

On arrival at the agreed date I set about preparing the working area by removing the kickboards and protecting other surfaces that might come into contact with the cleaning products and equipment.

My process for cleaning the floor was to spray the floor first with a strong dilution of Tile Doctor Remove and Go which was left to soak into the stone for ten minutes so it could breakdown old sealers and dirt. The solution was then scrubbed into the stone using a rotary floor buffer fitted with a 400-grit diamond encrusted burnishing pad. It didn’t take long for solution to turn grey with the soil that was released from the floor and the true beauty of the Sandstone started to appear. The dirty slurry was extracted with a wet vacuum and the floor given a thorough inspection. Stubborn stains were spot-treated using the same process and once I was satisfied the floor was given a thorough rinse to remove any trace of cleaning product and dirt. The floor was dried as much as possible with the wet vacuum and then assisted with fans left to dry off fully overnight. It was clear to me at this stage that the floor was already showing significant improvement.

Sandstone Tiled Kitchen Floor After Cleaning in Mapplewell

Sealing a Sandstone Tiled Kitchen Floor

The next day I tested the stone for moisture using a damp meter to ensure it was dry before sealing. It confirmed that the floor had dried overnight and would be able to start applying the sealer.

It was already clear that an impregnating sealer was not the best choice for a textured stone so a topical sealer would be the best option, not only does it bring out the colours of the stone it also adds a barrier between the fine pores of the stone and dirt. Six coats of Tile Doctors Seal & Go were applied to ensure the stone was fully sealed, which took some time as you have to wait for the first coat to dry before applying the next. Seal and Go is a water based acrylic satin sealer which is perfect for this type of floor. It gives a nice natural finish but allows the natural colour and beauty of the floor to shine through.

Sandstone Tiled Floor During Sealing in Mapplewell

The sandstone now looks much lighter and cleaner, certainly my client was very happy with the transformation of the floor, especially where the island had been. In fact, we have agreed with the customer we will return every year to maintain the floor to keep it looking in perfect condition. In the meantime, they should be able to easily keep it clean using Tile Doctor Neutral Tile Cleaner which is designed for the regular cleaning for sealed floors like this.

Sandstone Tiled Floor After Renovation in Mapplewell


Professional Restoration of a Sandstone Tiled Floor in South Yorkshire

Sandstone Tiled Kitchen Floor Renovated in Mapplewell, Barnsley Read More »

Victorian Quarry Tiled Floor Before and After Renovation Nether Edge

Victorian Quarry Tiled Floor Fully Restored in Nether Edge, Sheffield

We were called to this beautiful Victorian house in Nether Edge, Sheffield. The house sits on a tree lined street full of big Victorian homes and dates back to 1898. The current owners were keen to preserve the properties old charm and character and had made quite a few improvements sympathetic to the age of the property. They had begun by removing some tasteless ceramic tiles that had been installed sometime in the 1990’s and were shocked when the original quarry tiled floor was uncovered buried beneath two layers of tile adhesive and a layer of bitumen! They gave us a call and asked us to come and have a look and see if we could restore the floor.

Quarry Tiled Floor Sheffield Before Restoration

I went to the property and as they had described the floor was in need of some help.
After several test cleans we came to the conclusion that all the damage was repairable, and the floor was able to be rescued. I offered them a quote to complete this restoration work which they gladly accepted. Due to the nature of the work involved the job would take four days to complete.

Quarry Tiled Floor Sheffield Before Restoration

The client was also having their kitchen re fitted, so we discussed that we could use some of the original tiles that were going to be covered by a new island by lifting them up and storing them until we needed them to patch the holes up and replace the cracked tiles. The owners also managed to source some reclaimed tiles which were also a perfect match.

Quarry Tiled Floor Sheffield Before Restoration

Cleaning and Restoring a Quarry Tiled Kitchen Floor

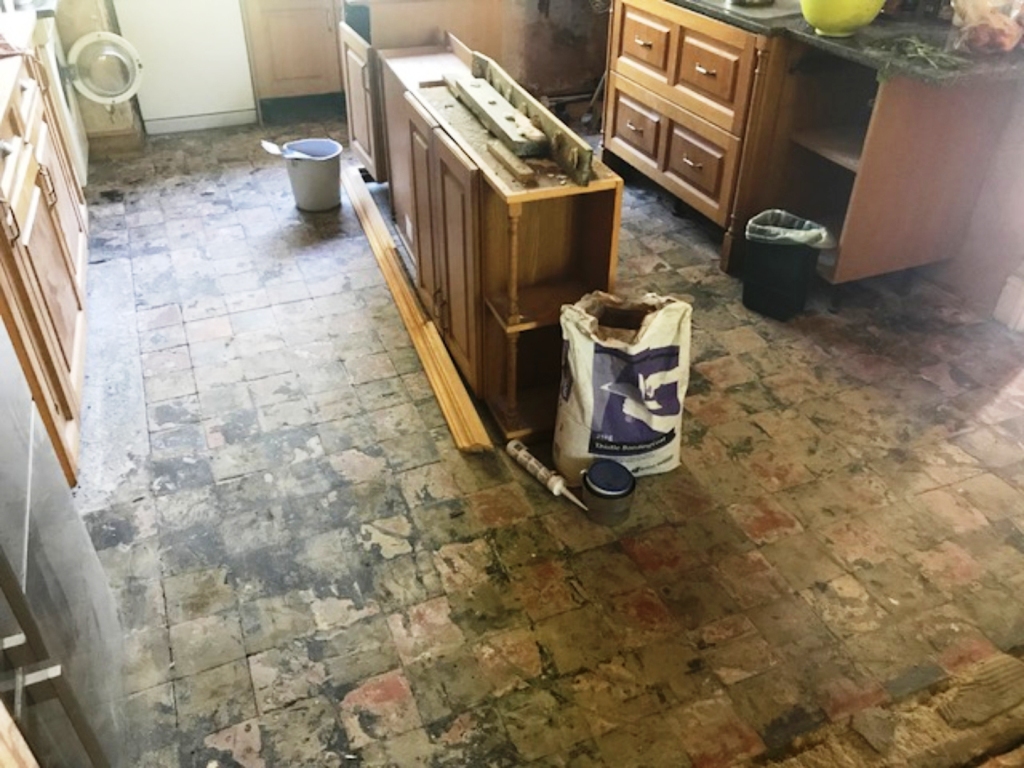
We began by removing the old adhesives and bitumen with a combination of Tile Doctor Grout Clean-up with Pro-Clean and assisted with steam, a heat gun and good old-fashioned elbow grease. It was painstaking work but after 2 days we had uncovered the floor.

Quarry Tiled Floor Sheffield During Restoration Day 2 After Steam Cleaning

There were areas of damage, areas with no tiles, patches of loose tiles and areas where tiles had never been, like the two doorways which weren’t original, so tiles were never placed there. We used the rescued tiles and the reclaimed tiles to repair these areas, once the tiles were in you wouldn’t have known any damage had existed. There were many areas of missing grout, so we installed new grout and gave the floor one last wash. As you can see from all the pictures there was a lot to do.

Quarry Tiled Floor Sheffield During Restoration Day 3 Removing More Damaged Tiles

Sealing a Quarry Tiled Kitchen Floor

Once the floor had dried completely we returned to seal the floor, we applied one coat of Tile Doctor Colour Grow, a colour enhancing impregnating sealer which we left to soak in and cure. Then we applied 5 coats of a satin breathable sealer Tile Doctor Seal & Go Extra leaving the floor with a beautiful natural finish.

Quarry Tiled Floor Sheffield During Restoration Day 4 Applying Colour Grow

It was a long job that took four days to completed but the transformation we achieved was well worth the effort. Our clients certainly thought so and were over the moon that an original and unknown part of their house was now restored back to its’ former glory and will hopefully last another 120 years. They even left the following comment on the Tile Doctor feedback system.

”We found a layer of quarry tiles under our kitchen floor – covered in bitumen and tile adhesive. After four days of cleaning, patching gaps & replacing cracked quarry tiles we have a shiny, characterful and ‘new Victorian floor!”

Quarry Tiled Floor Sheffield During Restoration Day 4 After Sealing


Professional Restoration of a Quarry Tiled Kitchen in South Yorkshire

Victorian Quarry Tiled Floor Fully Restored in Nether Edge, Sheffield Read More »

Scroll to Top