Author name: Matthew Lovett

Covering South Yorkshire, Matthew Lovett is your local specialist for tile cleaning, stone cleaning, grout cleaning and tile, stone and grout sealing covering the restoration of all types of stone and tiled flooring including Ceramic, Limestone, Marble, Porcelain, Quarry, Sandstone, Slate, Terracotta, Terrazzo, Travertine and Victorian tile.

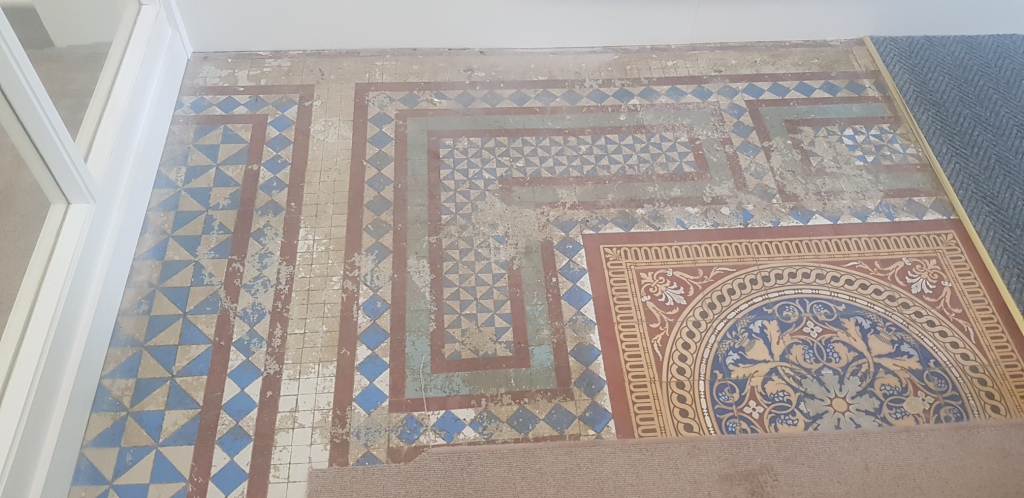
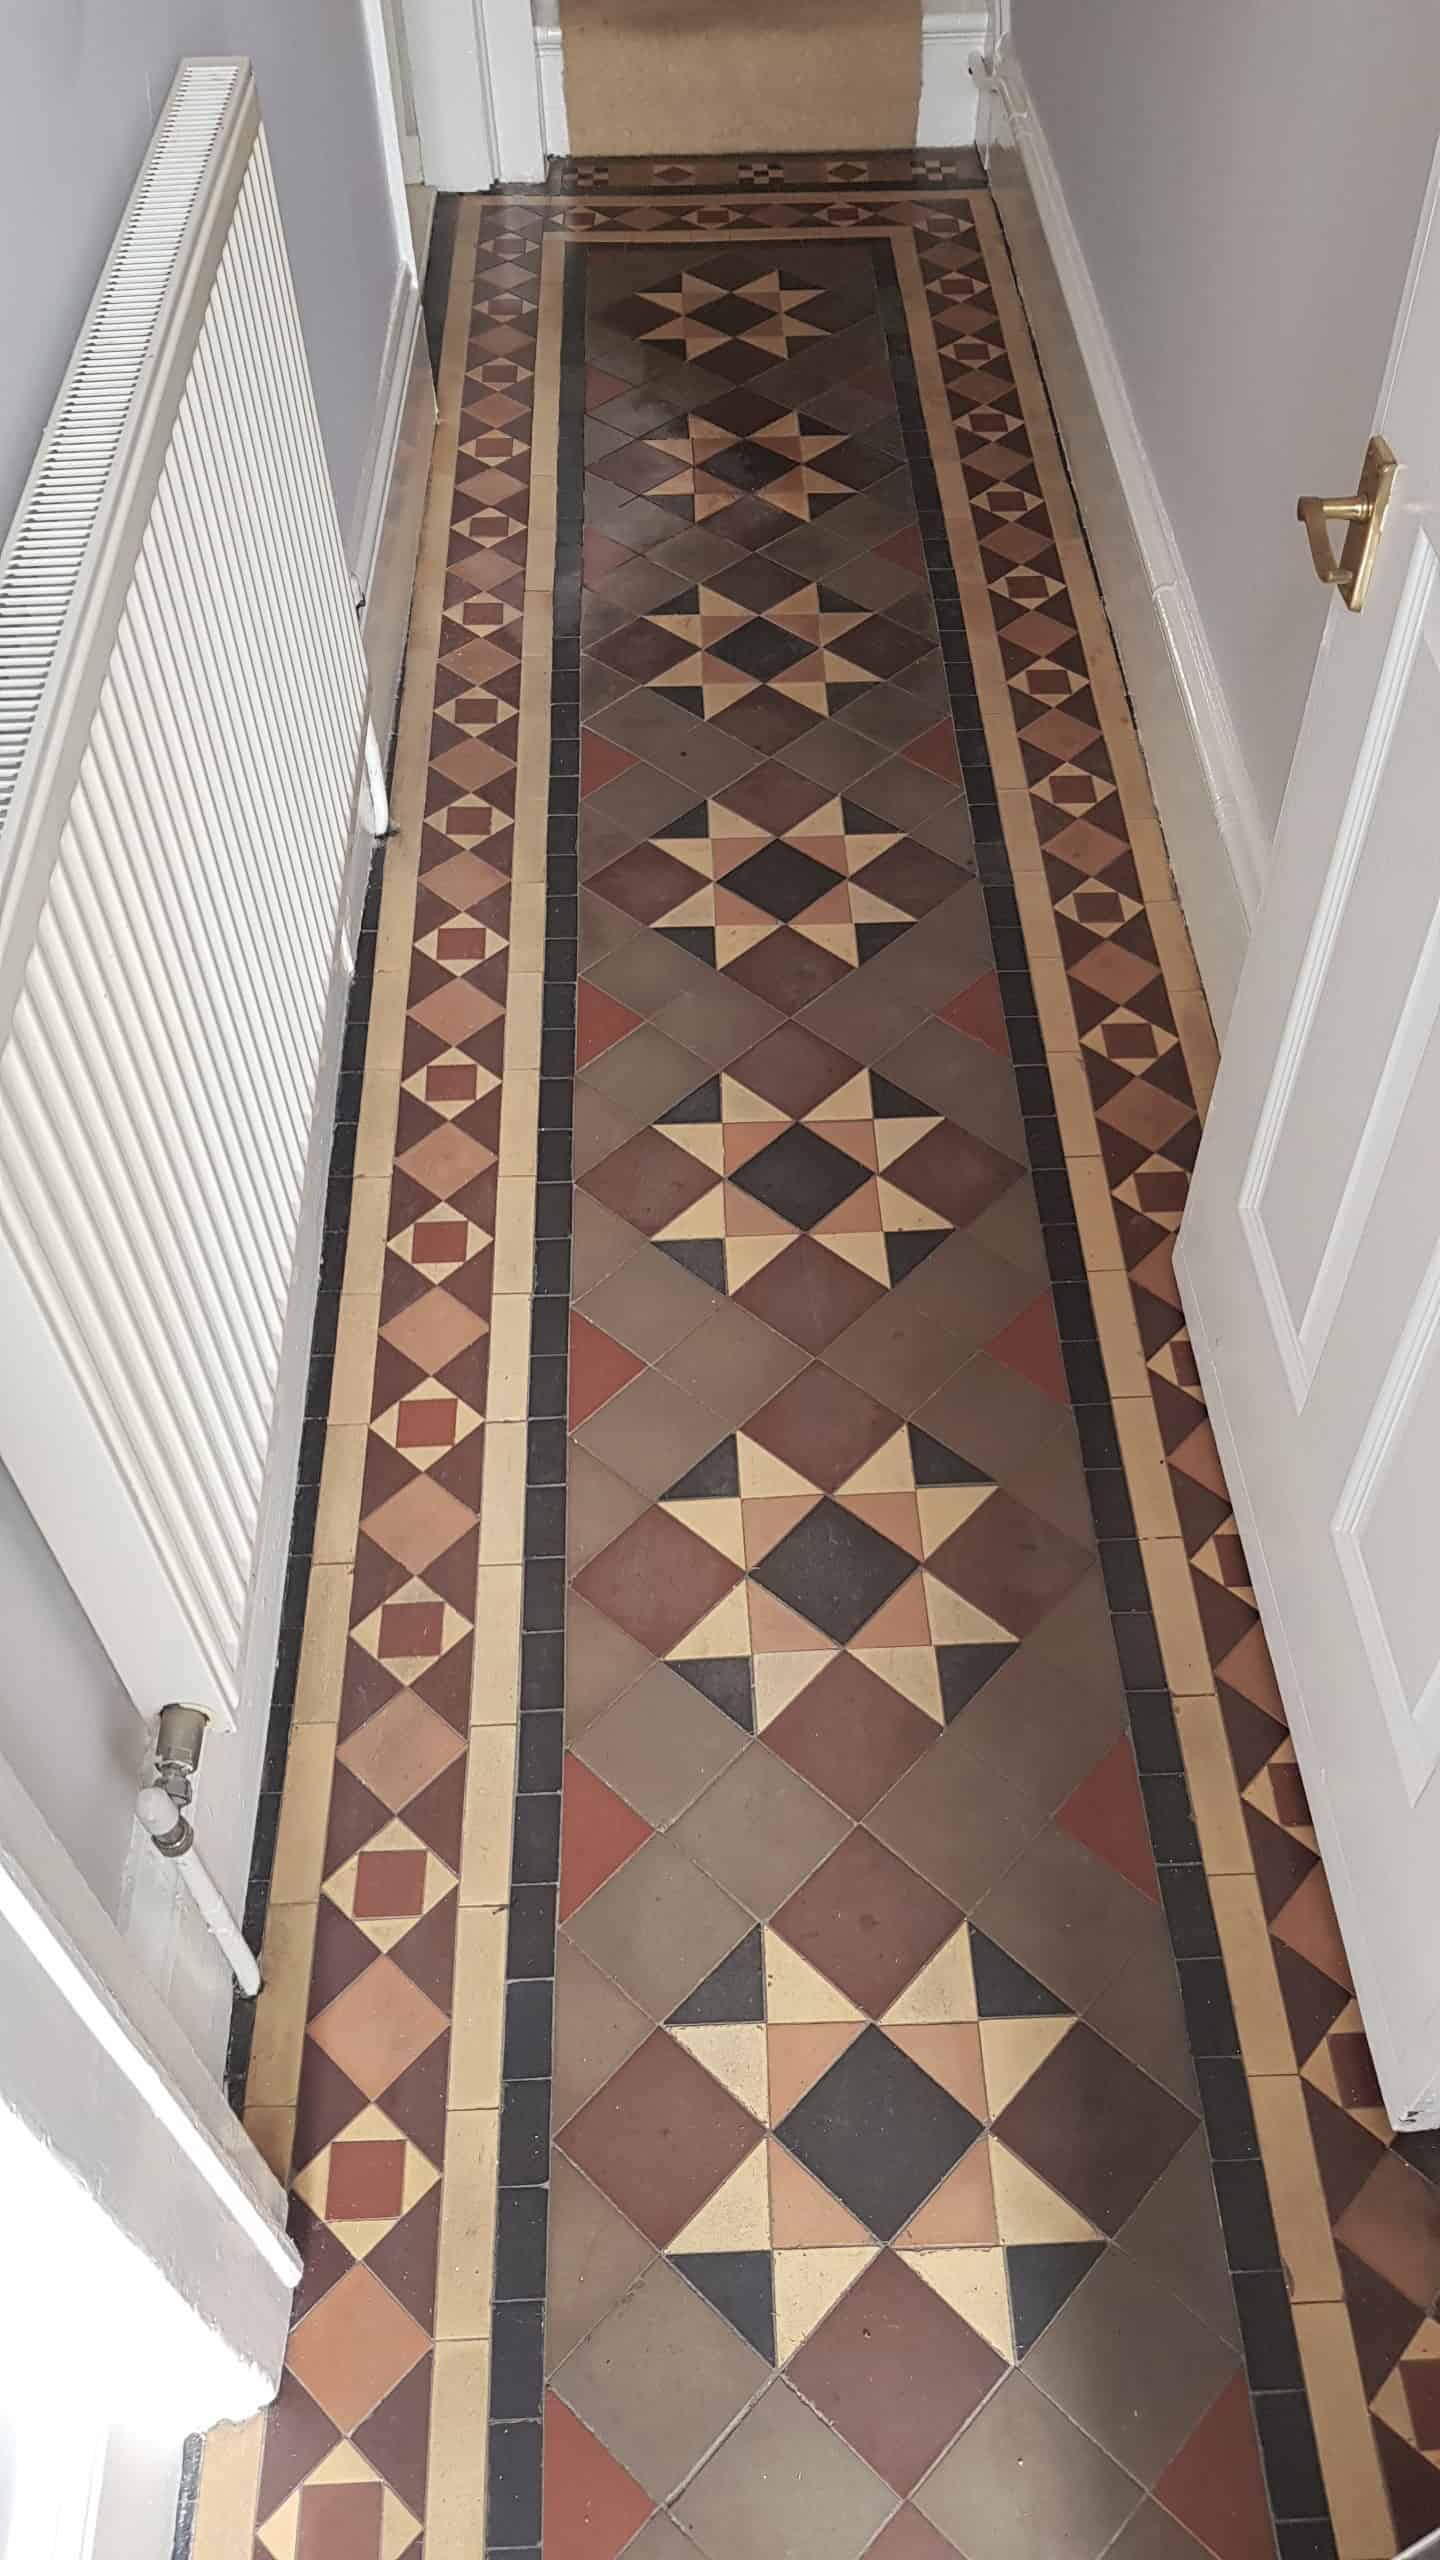
Victorian Tiled Hallway Floor Before and After Restoration Doncaster

Restoring Victorian Hallway Tiles in Doncaster

This beautiful Victorian tiled hallway was in desperate need of some TLC. The house had recently changed hands and the new owners of the house were having the entire property renovated. The last part of the renovation plan was to have the Victorian hallway tiles restoring back to their former glory. Floors are always best left until last, especially hallways as last as workmen don’t usually take a lot of care in my experience.

The house was built in the early 1900’s and was situated close to Doncaster town centre a couple of streets away in fact from the famous Doncaster Racecourse which dates to the late 1500’s.

Victorian Hallway Tiles Before Renovation Doncaster

Cleaning/Repairing a Victorian Tiled Hallway Floor

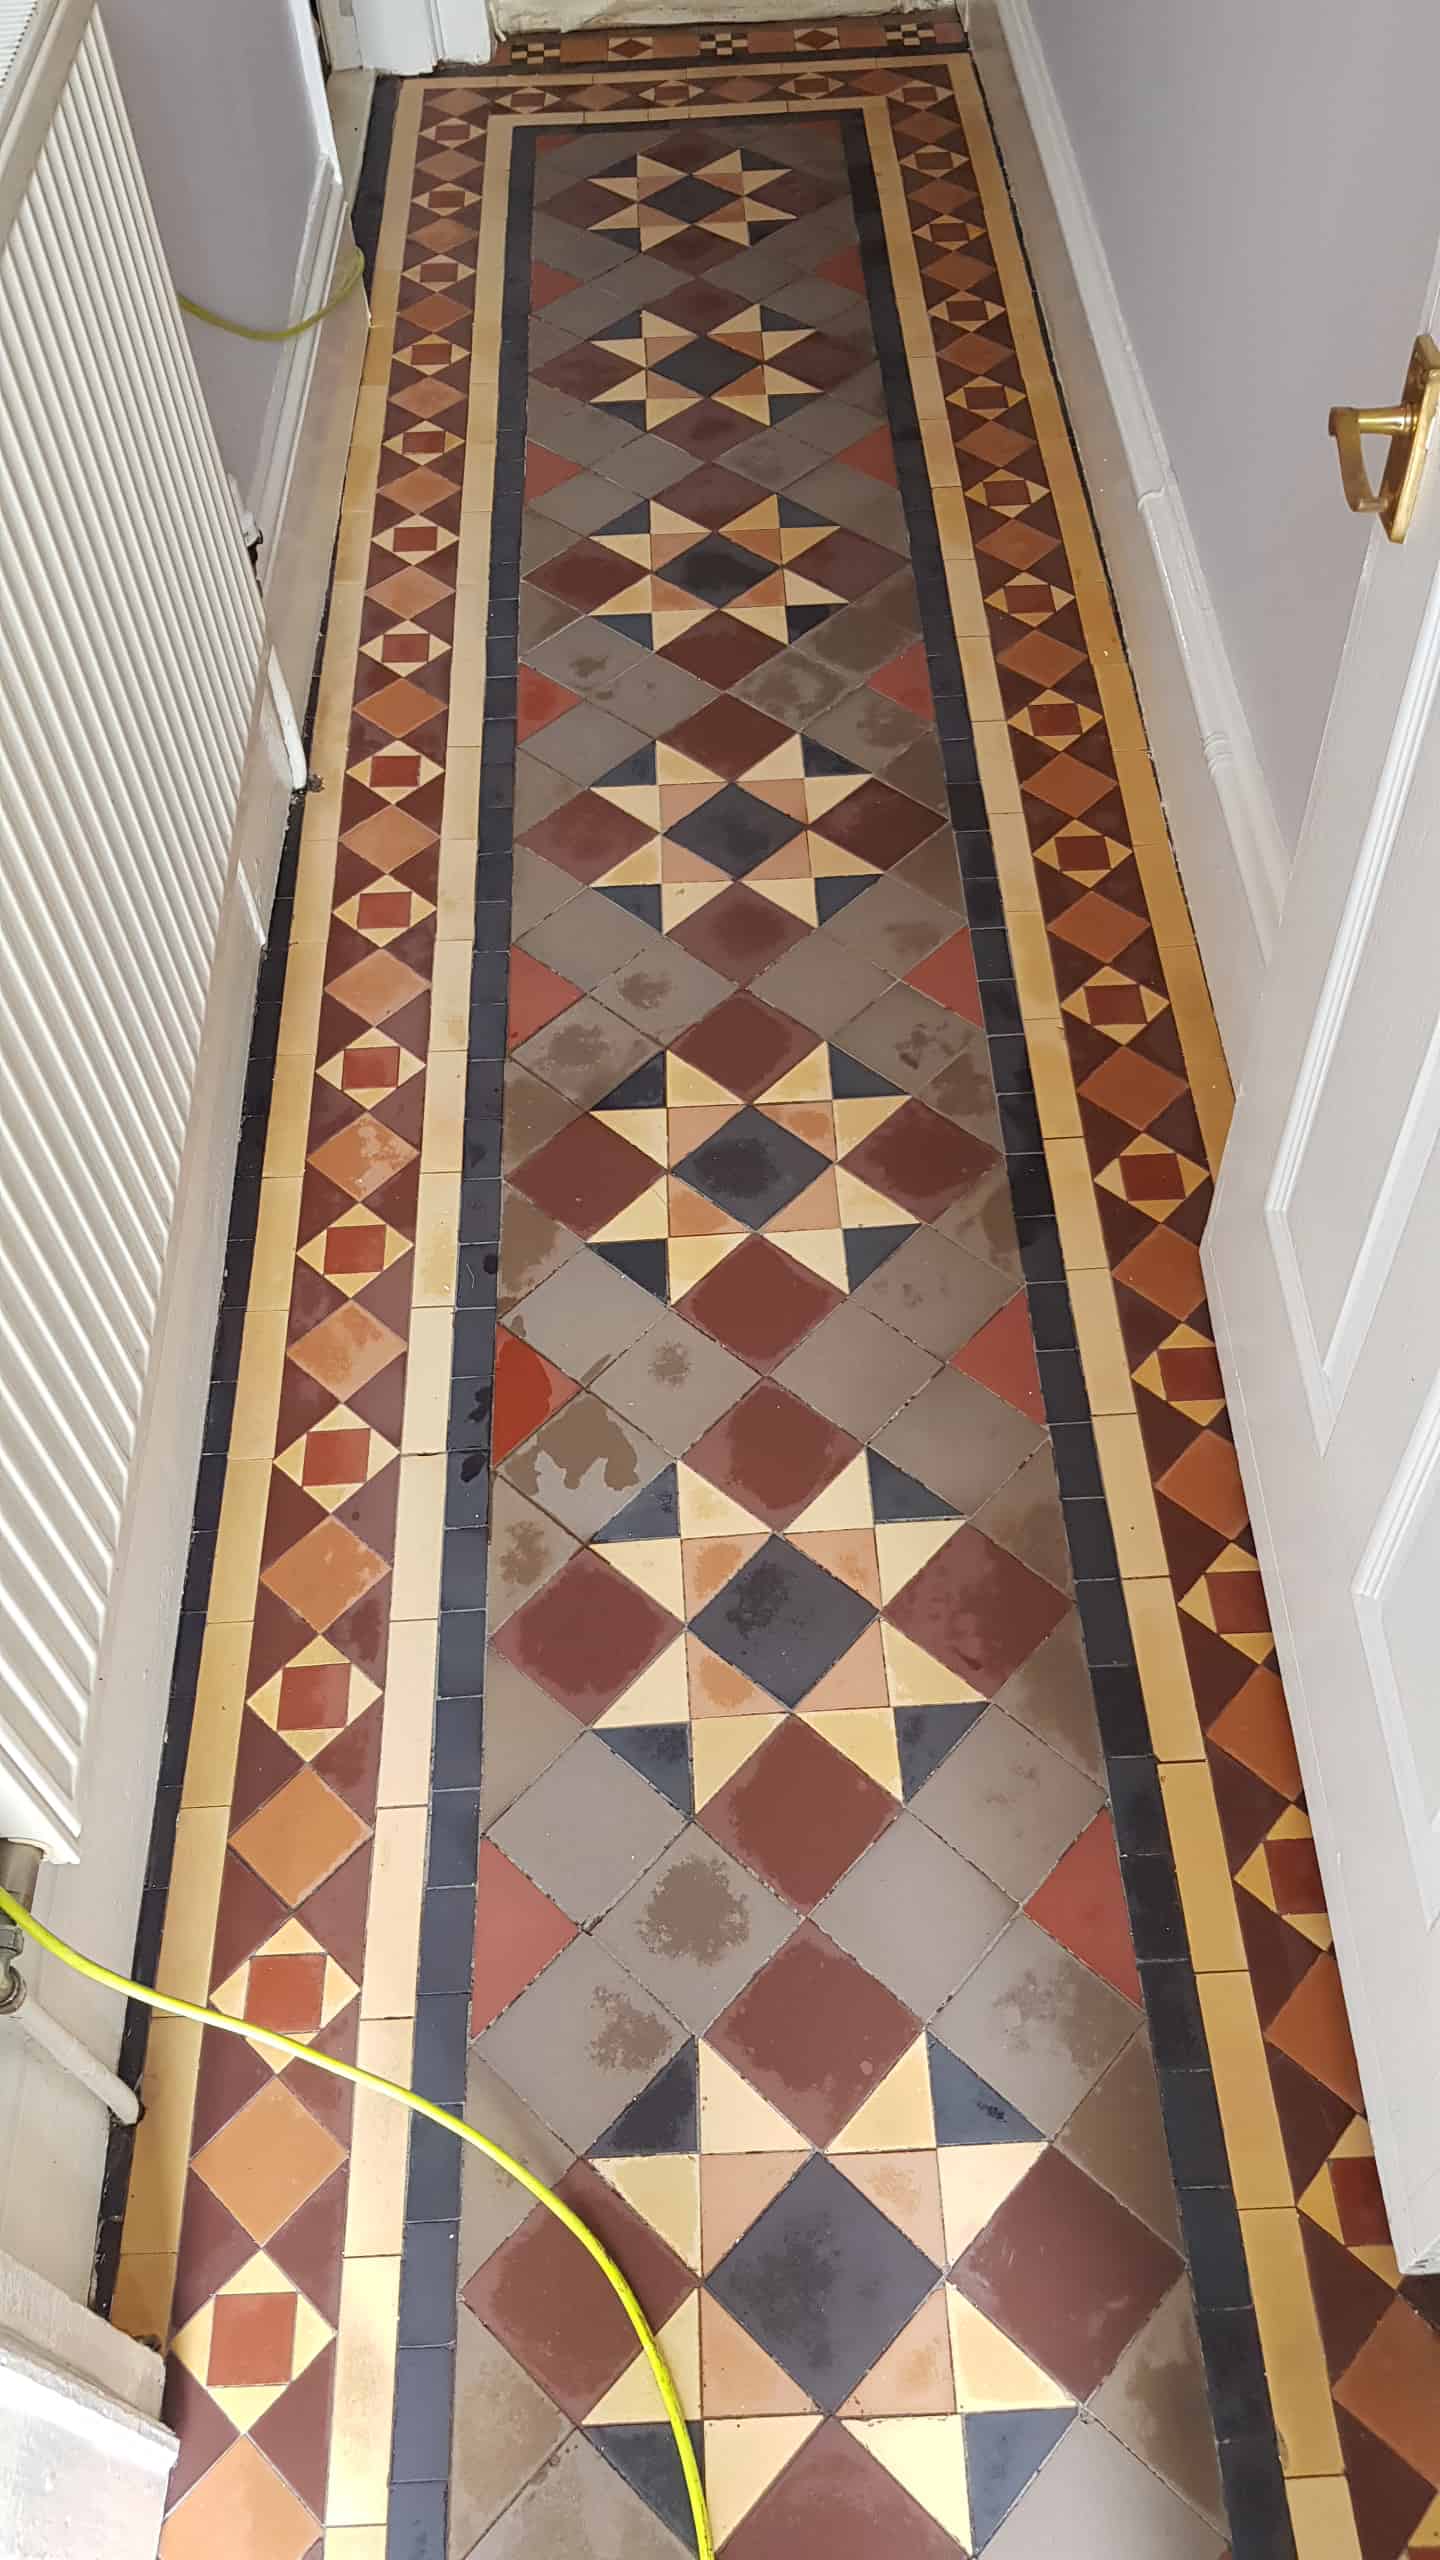
There were a few areas of damage to the floor that would need dealing with first. This is not surprising given the age of the floor which must have seen a lot of comings and goings over the years. Our first task therefore was to repair the damage using replica tiles sourced to be as close a match to the originals as possible. We usually find any slight differences disappear once the floor has been deep cleaned and sealed. Once removing the damaged tile and cleaning the base we use a fast setting adhesive to fix the replacement tiles in place so we can get on with the cleaning as soon as possible.

Victorian Tiled Hallway Floor Repair Doncaster

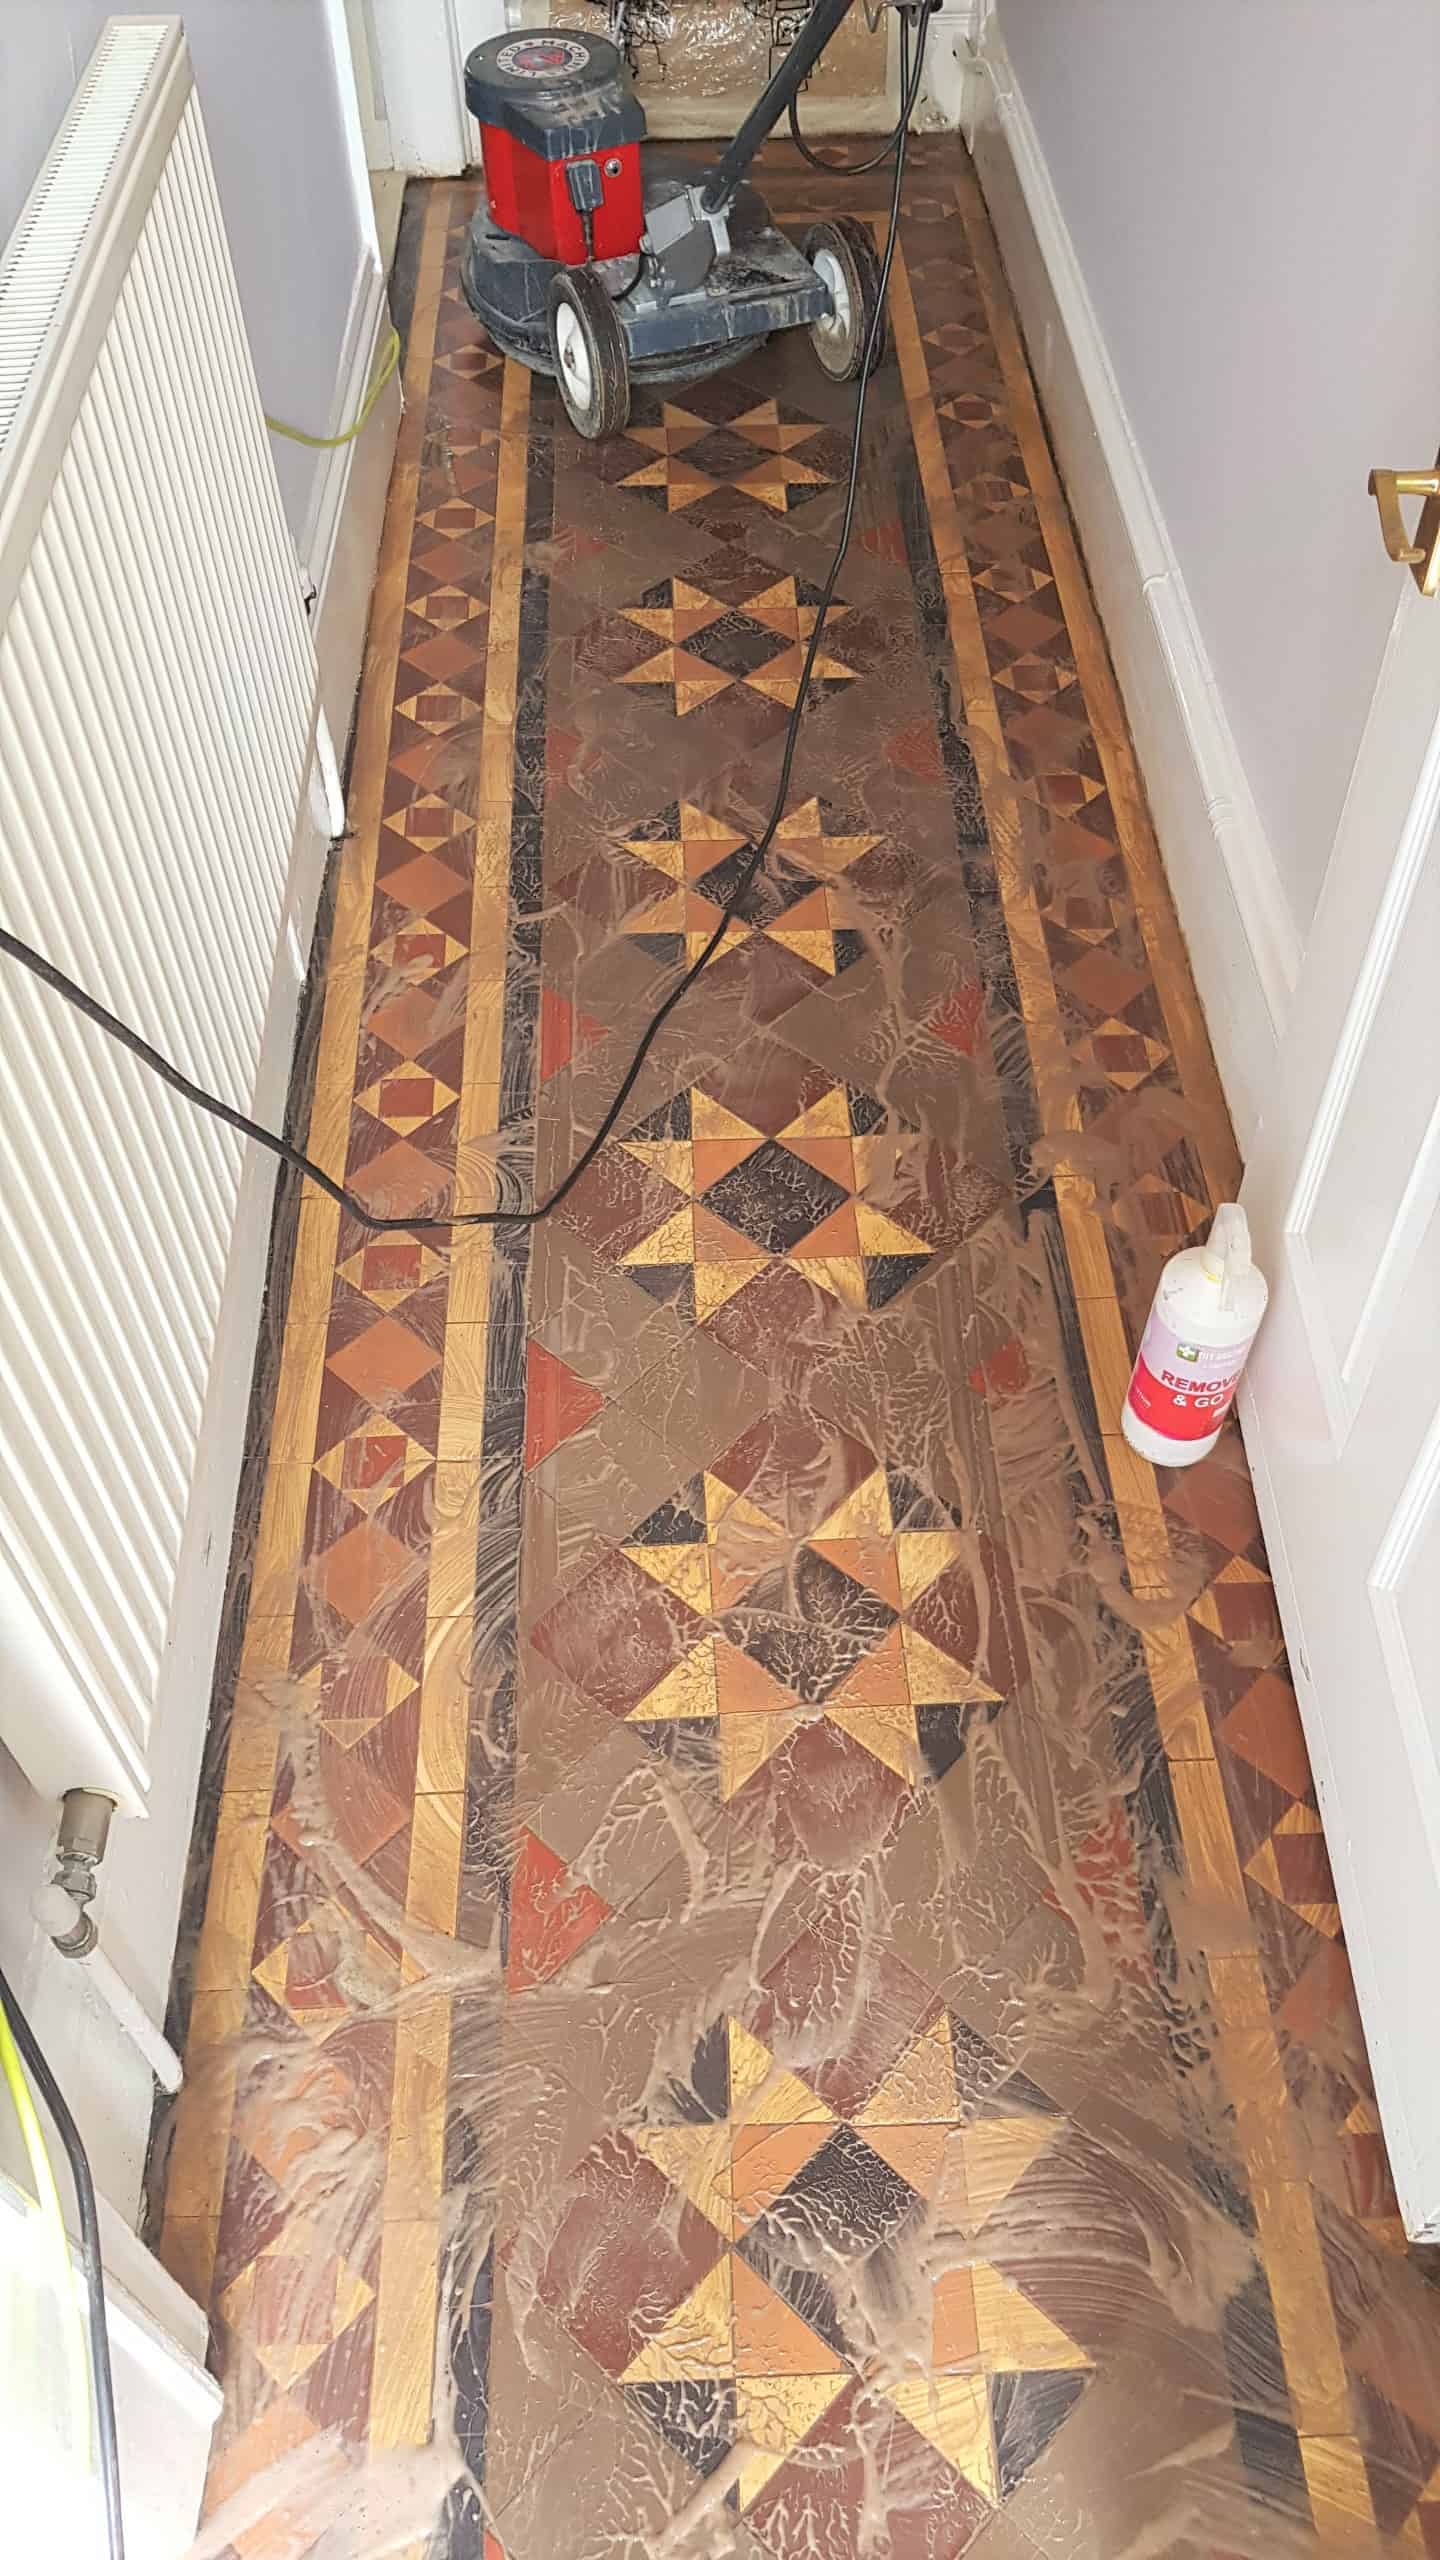
Once the replacement tiles had set, we unloaded our slow speed rotary floor machine and large wet vacuum which would be used during the cleaning. To start the cleaning the floor was sprayed with Tile Doctor Remove & Go and this was left to dwell on the tiles for twenty minutes. This gives time for the product to break down old floor coatings and grime, this was followed by scrubbing the tiles with a 200-grit diamond pad fitted to the floor machine and assisted with the addition of more water to help lubricate the process. This process generates a lot of slurry as the dirt and old sealers etc are released from the tiles and this is extracted from the surface of the floor using the wet vacuum.

The next step was to give the floor an acid wash using Tile Doctor Acid Gel which is applied to the tiles and left to dwell for fifteen minutes and scrubbed in again with the floor buffer and 200-grit diamond pad. Once done the floor was rinsed with water and then dried using the wet vacuum to extract as much moisture as possible. This last process is designed to counter any alkaline salts that may be present in the floor which may cause efflorescence to appear later. It also removes old mineral deposits and generally get the tiles looking much brighter. Once complete the floor was left to dry off naturally overnight.

Sealing a Victorian Tiled Hallway Floor

I came back the next day to seal the tiles first checking the floor was dry using a moisture meter. Satisfied that the floor was ready for sealing I started to seal the tiles using multiple coats of Tile Doctor Seal and Go Extra which is a fully breathable sealer which is important for old floors like this. Seal and Go Extra also leaves a lovely satin finish which works well on Victorian tiles and brings the floor alive.
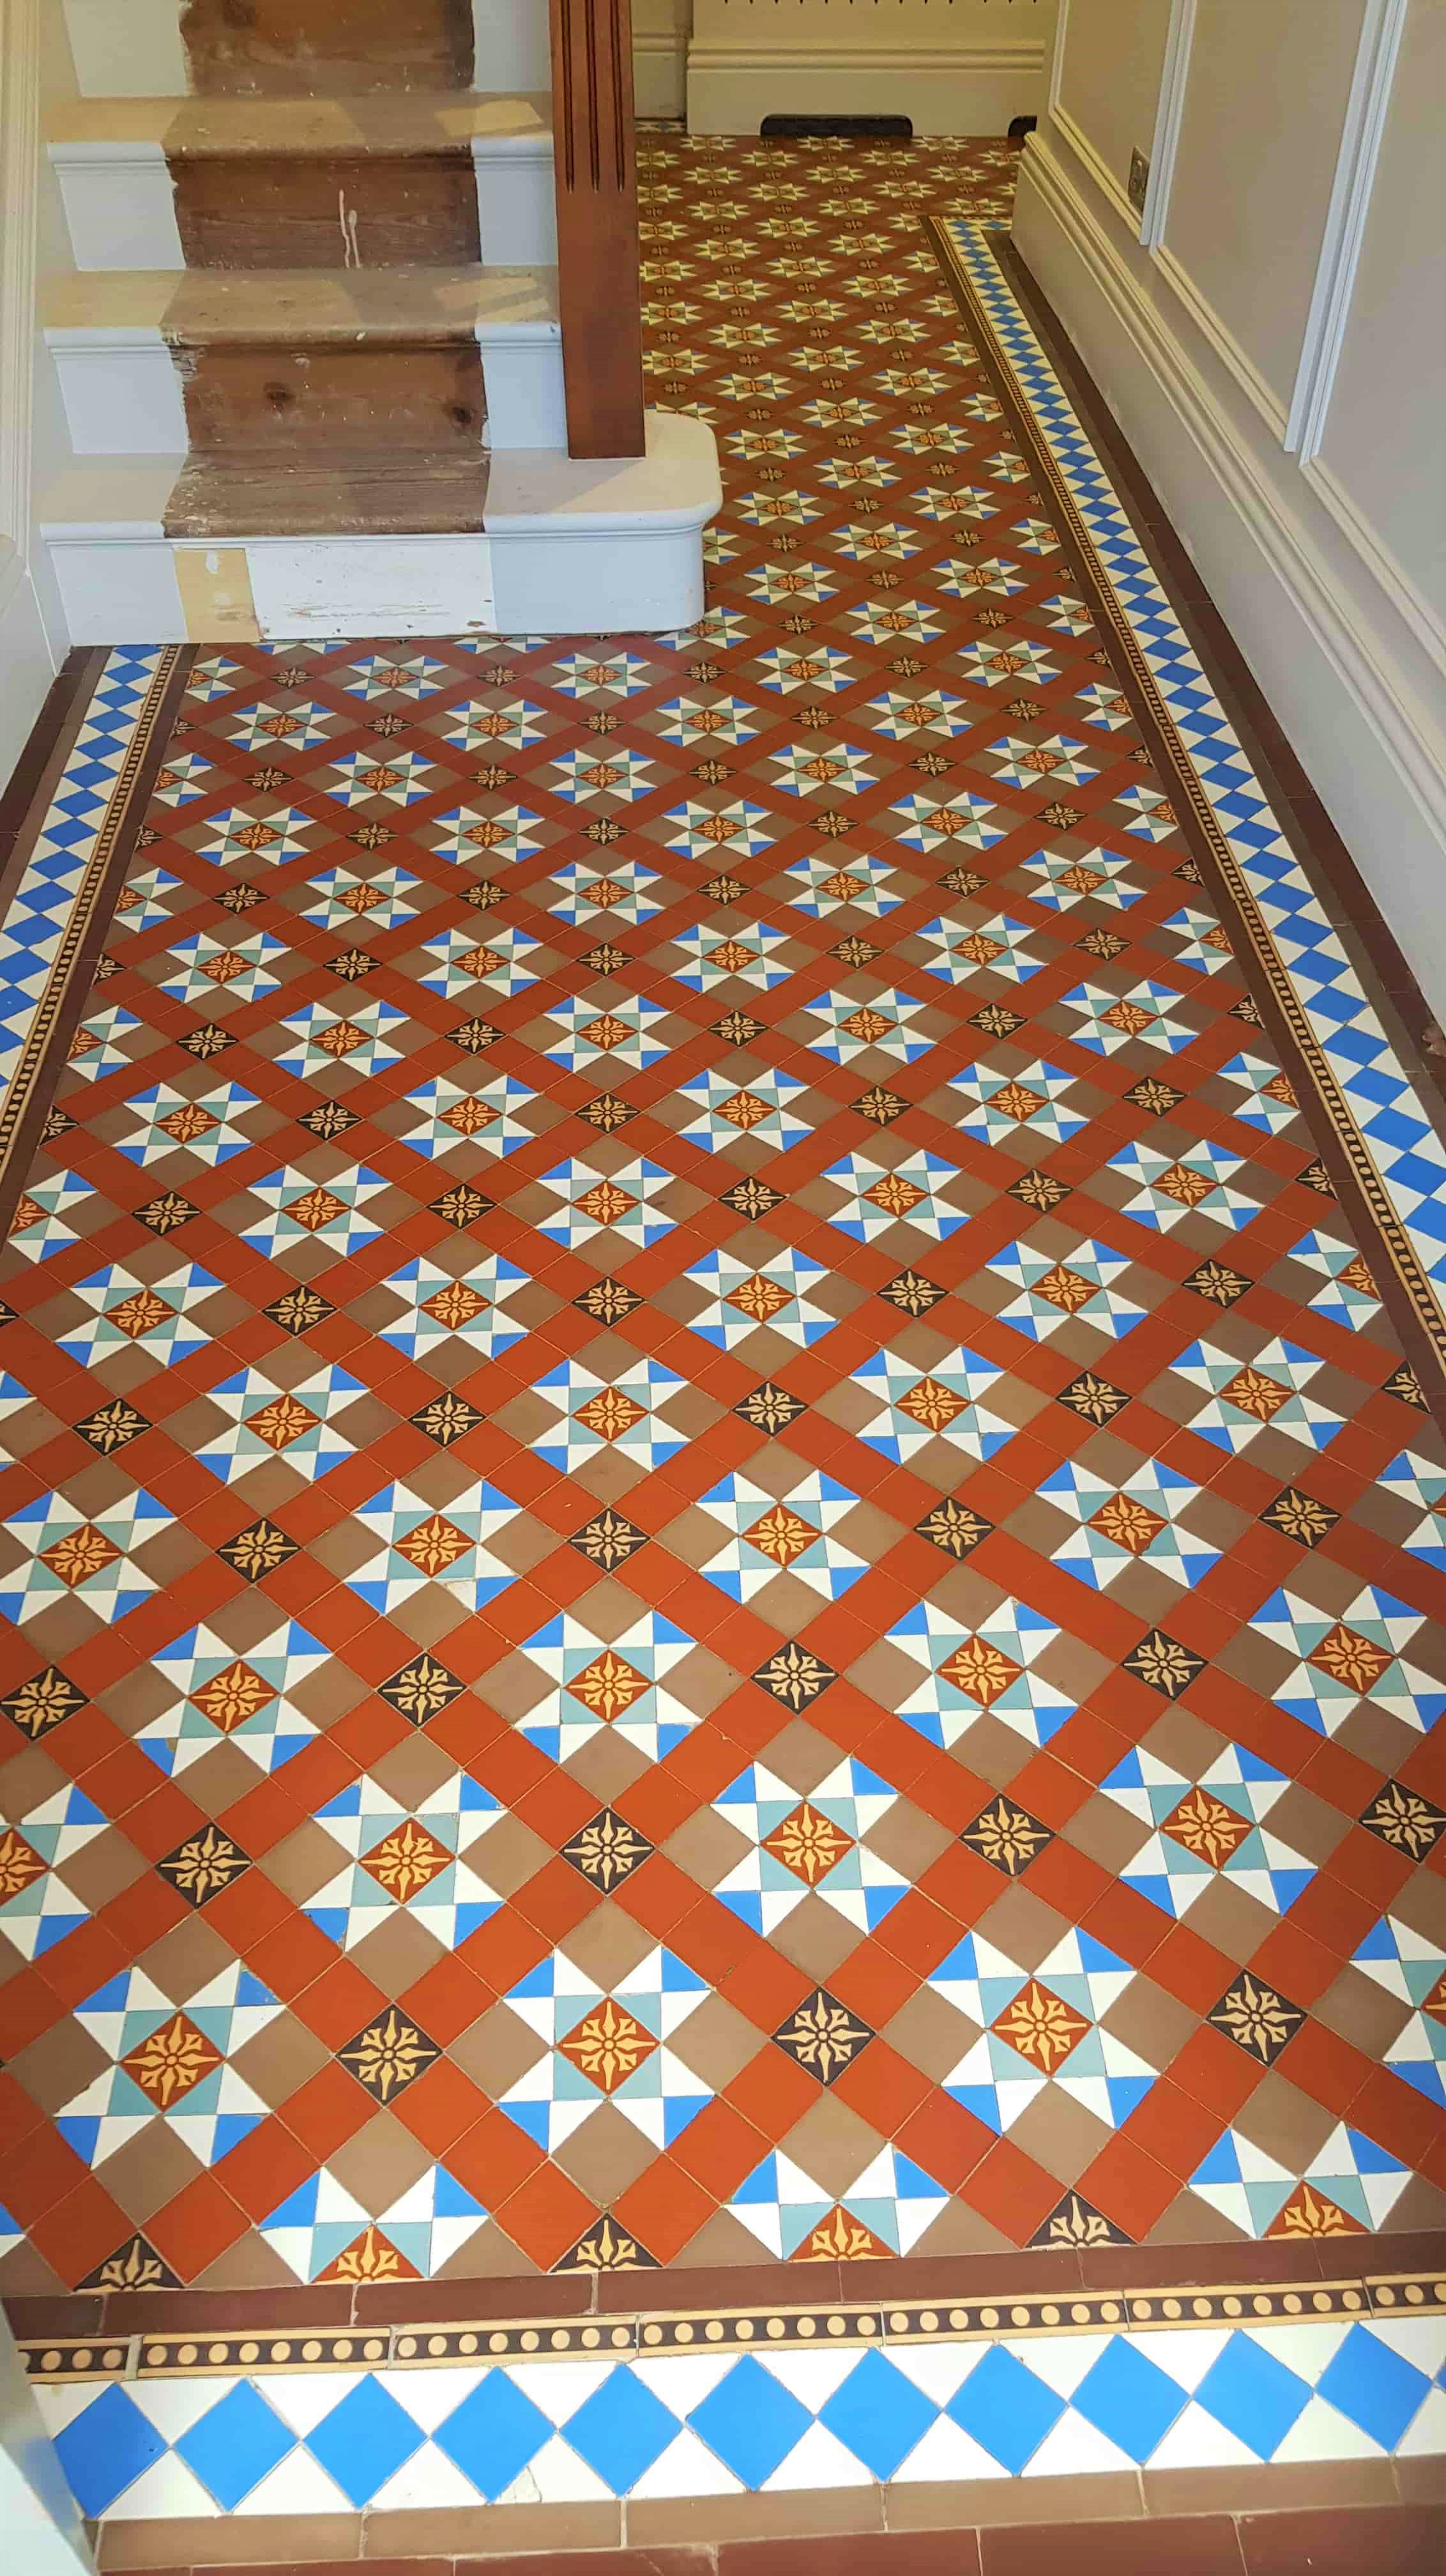
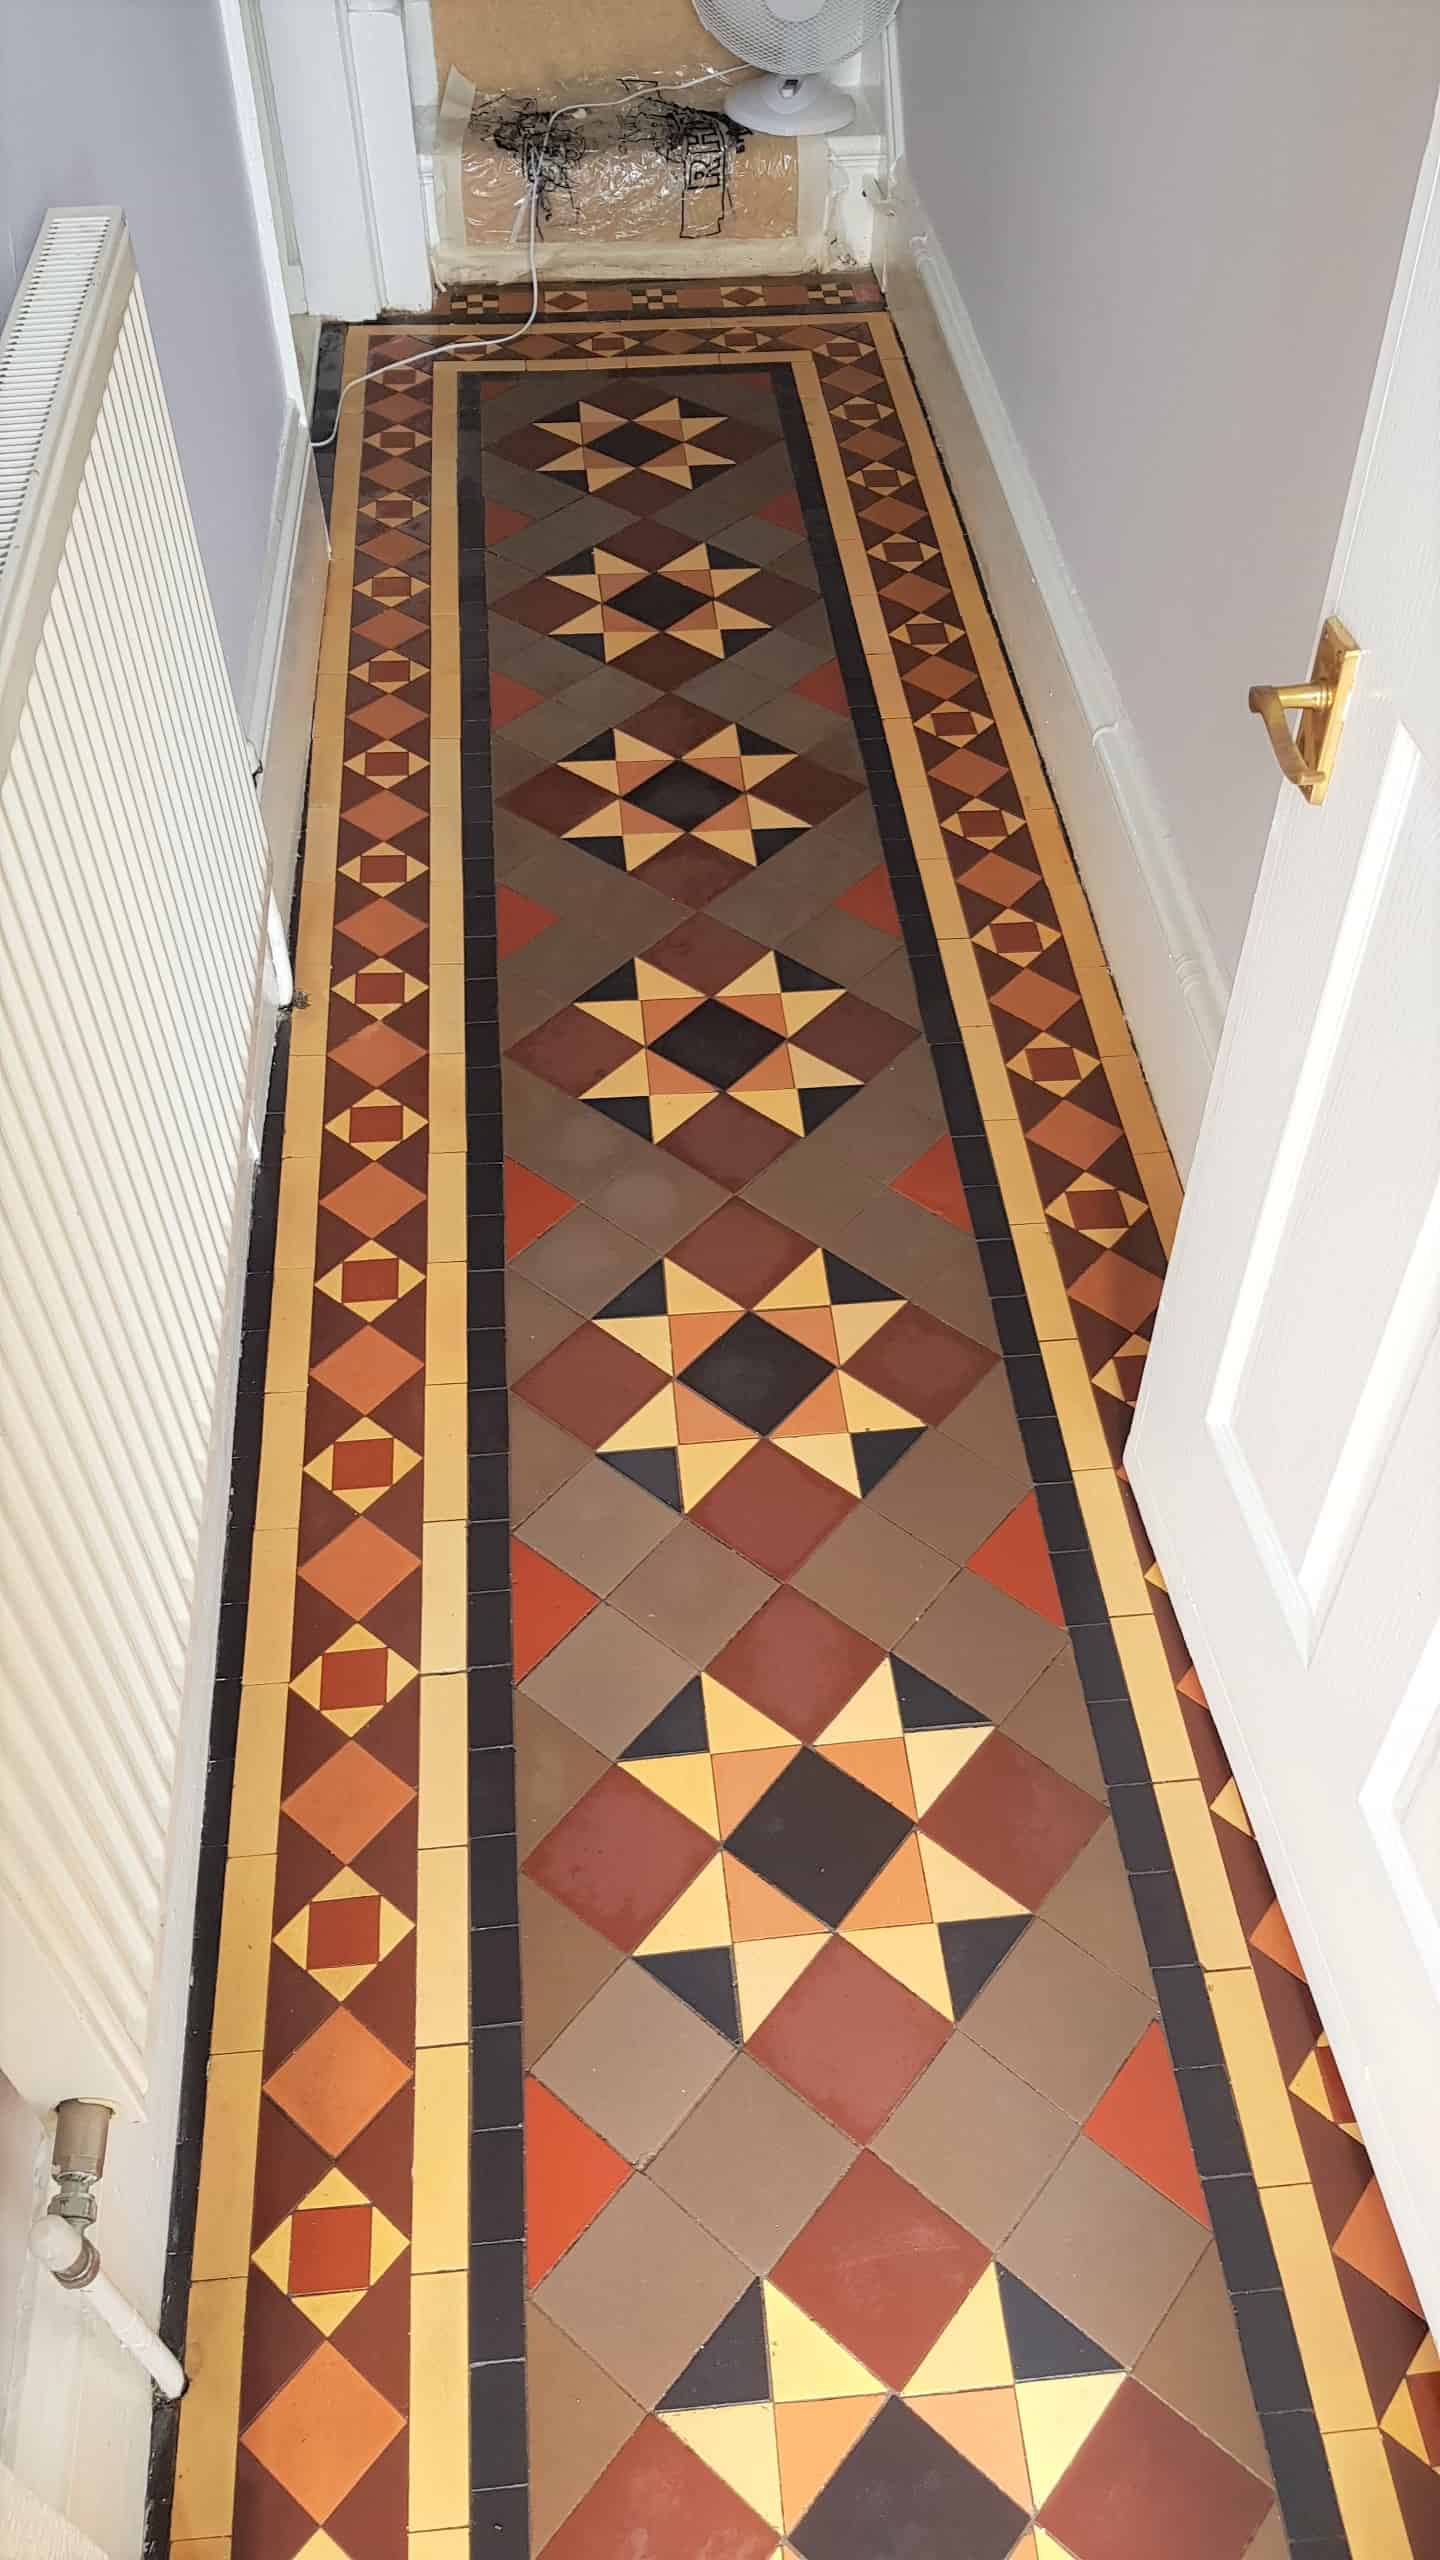
Victorian Hallway Tiles After Renovation Doncaster

This was the last step in this properties renovation, and I think you will agree that the floor responded really well to the restoration process and the colours in the tiles are now very vibrant.


Professional Restoration of a Victorian Tiled Hallway in South Yorkshire

Restoring Victorian Hallway Tiles in Doncaster Read More »

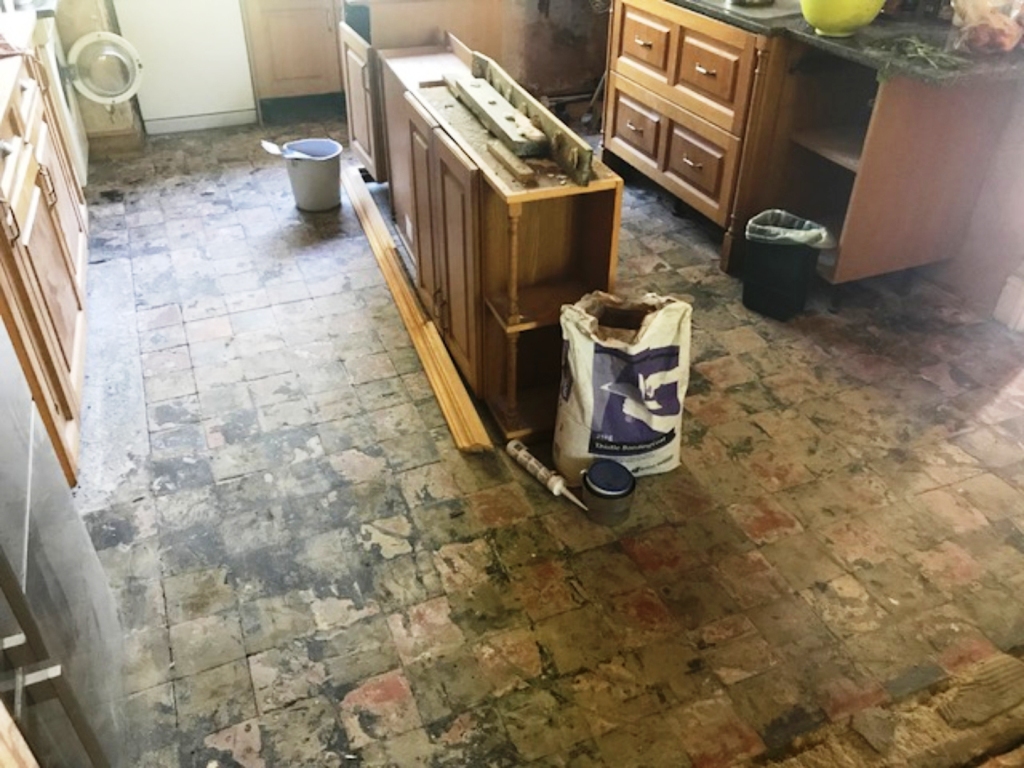
Sandstone Tiled Kitchen Floor Before After Renovation Mapplewell

Sandstone Tiled Kitchen Floor Renovated in Mapplewell, Barnsley

We were contacted by a family in the Barnsley area of South Yorkshire who were tearing their hair out trying to keep their Sandstone Tiled floor clean. The kitchen area was especially grubby and once the island had been removed during recent renovations, the dirty floor really stood out.

The house was located on the Northern tip of Barnsley in Mapplewell, close to the border of South and West Yorkshire, an area which is steeped in coal mining history. Even though all the coal mines have gone there’s still lots of evidence of its’ proud mining history in the area.

Sandstone Tiled Floor Before Renovation in Mapplewell

After inspecting the tiles, I could see their problem revolved around the fact that the Sandstone had a texture to it and the previous sealer used was an impregnating sealer, as a result the dirt had no problem sticking to the stone as you can see from the picture. At Tile Doctor we see Sandstone/flagstones used a lot as Kitchen flooring, it is a popular choice due to it being so hardwearing, however as with any natural stone it needs to be sealed to protect it and bring out its beauty and colour.

I demonstrated the cleaning process on a small part of the floor, which they were very satisfied with. The testing also enables me to understand what it would take to renovate the whole floor and provide them with an accurate price. They were happy with my proposal and keen for me to begin the work which would take two days to complete, one day to clean the floor and returning a further day to complete the sealing of the floor.

Cleaning a Sandstone Tiled Kitchen Floor

On arrival at the agreed date I set about preparing the working area by removing the kickboards and protecting other surfaces that might come into contact with the cleaning products and equipment.

My process for cleaning the floor was to spray the floor first with a strong dilution of Tile Doctor Remove and Go which was left to soak into the stone for ten minutes so it could breakdown old sealers and dirt. The solution was then scrubbed into the stone using a rotary floor buffer fitted with a 400-grit diamond encrusted burnishing pad. It didn’t take long for solution to turn grey with the soil that was released from the floor and the true beauty of the Sandstone started to appear. The dirty slurry was extracted with a wet vacuum and the floor given a thorough inspection. Stubborn stains were spot-treated using the same process and once I was satisfied the floor was given a thorough rinse to remove any trace of cleaning product and dirt. The floor was dried as much as possible with the wet vacuum and then assisted with fans left to dry off fully overnight. It was clear to me at this stage that the floor was already showing significant improvement.

Sandstone Tiled Kitchen Floor After Cleaning in Mapplewell

Sealing a Sandstone Tiled Kitchen Floor

The next day I tested the stone for moisture using a damp meter to ensure it was dry before sealing. It confirmed that the floor had dried overnight and would be able to start applying the sealer.

It was already clear that an impregnating sealer was not the best choice for a textured stone so a topical sealer would be the best option, not only does it bring out the colours of the stone it also adds a barrier between the fine pores of the stone and dirt. Six coats of Tile Doctors Seal & Go were applied to ensure the stone was fully sealed, which took some time as you have to wait for the first coat to dry before applying the next. Seal and Go is a water based acrylic satin sealer which is perfect for this type of floor. It gives a nice natural finish but allows the natural colour and beauty of the floor to shine through.

Sandstone Tiled Floor During Sealing in Mapplewell

The sandstone now looks much lighter and cleaner, certainly my client was very happy with the transformation of the floor, especially where the island had been. In fact, we have agreed with the customer we will return every year to maintain the floor to keep it looking in perfect condition. In the meantime, they should be able to easily keep it clean using Tile Doctor Neutral Tile Cleaner which is designed for the regular cleaning for sealed floors like this.

Sandstone Tiled Floor After Renovation in Mapplewell


Professional Restoration of a Sandstone Tiled Floor in South Yorkshire

Sandstone Tiled Kitchen Floor Renovated in Mapplewell, Barnsley Read More »

Victorian Floor Before After Cleaning Nether Edge Sheffield

1850’s Victorian Hallway Restored at Ex NHS Property in Nether Edge

Detailed below is the restoration of a beautiful Victorian tiled hallway that we completed for a ‘co-housing’ community who had purchased a large house in Nether Edge. Situated three miles south if Sheffield, Brincliffe House was built in 1850 and had been used as NHS offices since the end of the Second World War but had been empty since 2012. Built originally for Herbert Unwin who was the owner of Pond Street Brewery it was now subject to a three-million-pound conversion into fifteen apartments.

Victorian Tiled Hallway Before Restoration Brincliffe House Nether Edge

When we first visited the property to survey the floor, we were shown around the ground floor where they had discovered magnificent Victorian tiled floor. The new owners had no idea the floor was there as the NHS had covered it up decades earlier and glued carpet on top. Being a co-housing community, they were keen to do the restoration themselves however after several unsuccessful attempts to remove the strong carpet adhesive they thought better of it and called us in. We ran several tests and worked out the best way to remove the glue. The floor covered about 70 sqm in total so we knew we had our hands full.

Victorian Tiled Hallway Before Restoration Brincliffe House Nether Edge

Removing Carpet Glue from an Old Victorian Tiled Floor

I’d worked out that the best way to remove the carpet adhesive was a combination of coating remover products and abrasive burnishing pads, these are industrial diamond encrusted pads that are usually used to resurface stone however we find they work equally well on Victorian tiles as well.

Working in small sections the floor was treated with a Tile Doctor 200-grit 17 inch Diamond pad fitted to a rotary floor buffer using water as a lubricant. This stripped off a lot of surface dirt and glue which was then rinsed off with water and extracted with a wet vacuum. Next the floor was coated with a mixture of Tile Doctor Remove & Go and Wax Away, two powerful coating removers that are safe to use on Tile and Stone. The mixture was left to soak into the tiles for about twenty minutes before being scrubbed in with a black scrubbing pad which slowly released the glue and dirt from the pores of the tile. In some areas the glue was so thick we found it necessary to use hand scrapers as well. As before the soil was rinsed off with water and then extracted using a wet vacuum.

Victorian Tiled Hallway During Restoration Brincliffe House Nether Edge

Each section of flooring was inspected and retreated where necessary, then once happy with the result it was given a final rinse with water to remove any trace of cleaning product. After two days of hard work the results were truly amazing, and it was very satisfying to see the floor come back to life section by section.

Victorian Tiled Hallway During Restoration Brincliffe House Nether Edge

Sealing Victorian Hallway Tiles

The community were very happy with the results and thankful I had managed to achieve such an amazing transformation. They were however keen to do as much of the project as they could by themselves, so I advised them on the importance of protecting the tiles with a sealer and left that bit tot the community.

Victorian Tiled Hallway After Restoration Brincliffe House Nether Edge

With regards to sealing my recommendation was to apply a couple of coats of Tile Doctor Colour Grow as it would enhance the red and blue colours in the tiles even further. Also, being fully breathable it would be able to cope with any moisture issues which is important on these old floors which were laid without a damp proof membrane.

Victorian Tiled Hallway After Restoration Brincliffe House Nether Edge


Removing Stubborn Carpet Glue from old Victorian floor tiles in Sheffield

1850’s Victorian Hallway Restored at Ex NHS Property in Nether Edge Read More »

Old Victorian Floor Before After Restoration Sheffield

Restoring a Damaged Victorian Tiled Hallway Floor in Sheffield

I received a request to take a look at renovating this old Victorian tiled hallway at a ground floor flat in Sheffield. The home owners had recently bought the property and had uncovered the floor under an old carpet. They wondered if the floor was fixable and worth getting repaired, cleaned and sealed.

Victorian Floor Restoration Sheffield Before

The floor was in quite a serious state with patches of sunken areas which had been covered in a levelling compound. There were many cracked and loose tiles and there were a lot of stains, carpet glue and paint on the tiles. The home owner had done some research into the property and had found out that it was once used as Doctors surgery and the hallway had been the waiting room which would make sense as it had certainly seen a fair amount of wear over the years, especially around the door thresholds.

Victorian Floor Restoration Sheffield Before

Our client wanted the existing floor repairing, cleaning and sealing, ideally without replacing the cracked and sunken tiles. They were very keen to try and restore the floor as an original feature which I’m sure you will appreciate are very sought after. I discussed the work that would be needed and how we would proceed. They accepted the price for the work and worked out a date for the work to start.

Victorian Floor Restoration Sheffield Before

Cleaning/Repairing a Victorian Tiled Hallway Floor

We were able to commence work the following week and started by removing all the self-levelling compound that had been applied to the areas of sunken tiles. The tiles were also removed in these areas and a new sub floor created to lift the floor in-line with the rest of the hallway.

Victorian Floor Restoration Sheffield Chipping Away Self=Leveller Compound

The original tiles were then cleaned up and installed back in place. Nearly all the many loose tiles were removed and re fixed in place, unfortunately a few loose tiles were left as removing these would have caused more damage to the floor.

Victorian Floor Restoration Sheffield During Repair

There were many areas of discoloured and stained tiles so after the fixed areas of damage had been left to set overnight, we returned the next day to start on cleaning the tiles. To get the tiles clean we used a combination of Tile Doctor Remove & Go and Acid Gel agitated with a 17-inch 200 grit diamond burnishing pad fitted to a slow speed rotary floor polisher.

Victorian Floor Restoration Sheffield Cleaning with Acid Gel

Combined this created a powerful cleaner/stripping action that can remove sealers, epoxy grout haze, urethane coatings, synthetic finishes, glue adhesives and paints. The resulting slurry was removed with a wet vacuum and rinsed off thoroughly with water. The immediate result showed a marked improvement and you could now get a real impression of how beautiful the floor actually was.

Sealing a Victorian Tiled Hallway Floor

The floor was left to dry overnight, and we returned the next day to complete the restoration with the application of a sealer. Beforehand he floor was tested with the moisture meter to ensure the it was fully dried. We then sealed the floor with three coats of Tile Doctor Seal & Go Extra which is a full breathable sealer and gives the floor a nice satin finish. It’s important to use a breathable sealer on these old floors where no damp proof membrane has been installed otherwise moisture can become trapped under the floor and will find its way up the walls instead.

Victorian Floor Restoration Sheffield After Sealing with Seal and Go Extra

The floor looked fantastic, the client was very pleased, the natural pattern and beauty had been restored to its’ former glory.

Victorian Hallway Floor Sheffield After Restoration


Professional Restoration of a Victorian Tiled Hallway in South Yorkshire

Restoring a Damaged Victorian Tiled Hallway Floor in Sheffield Read More »

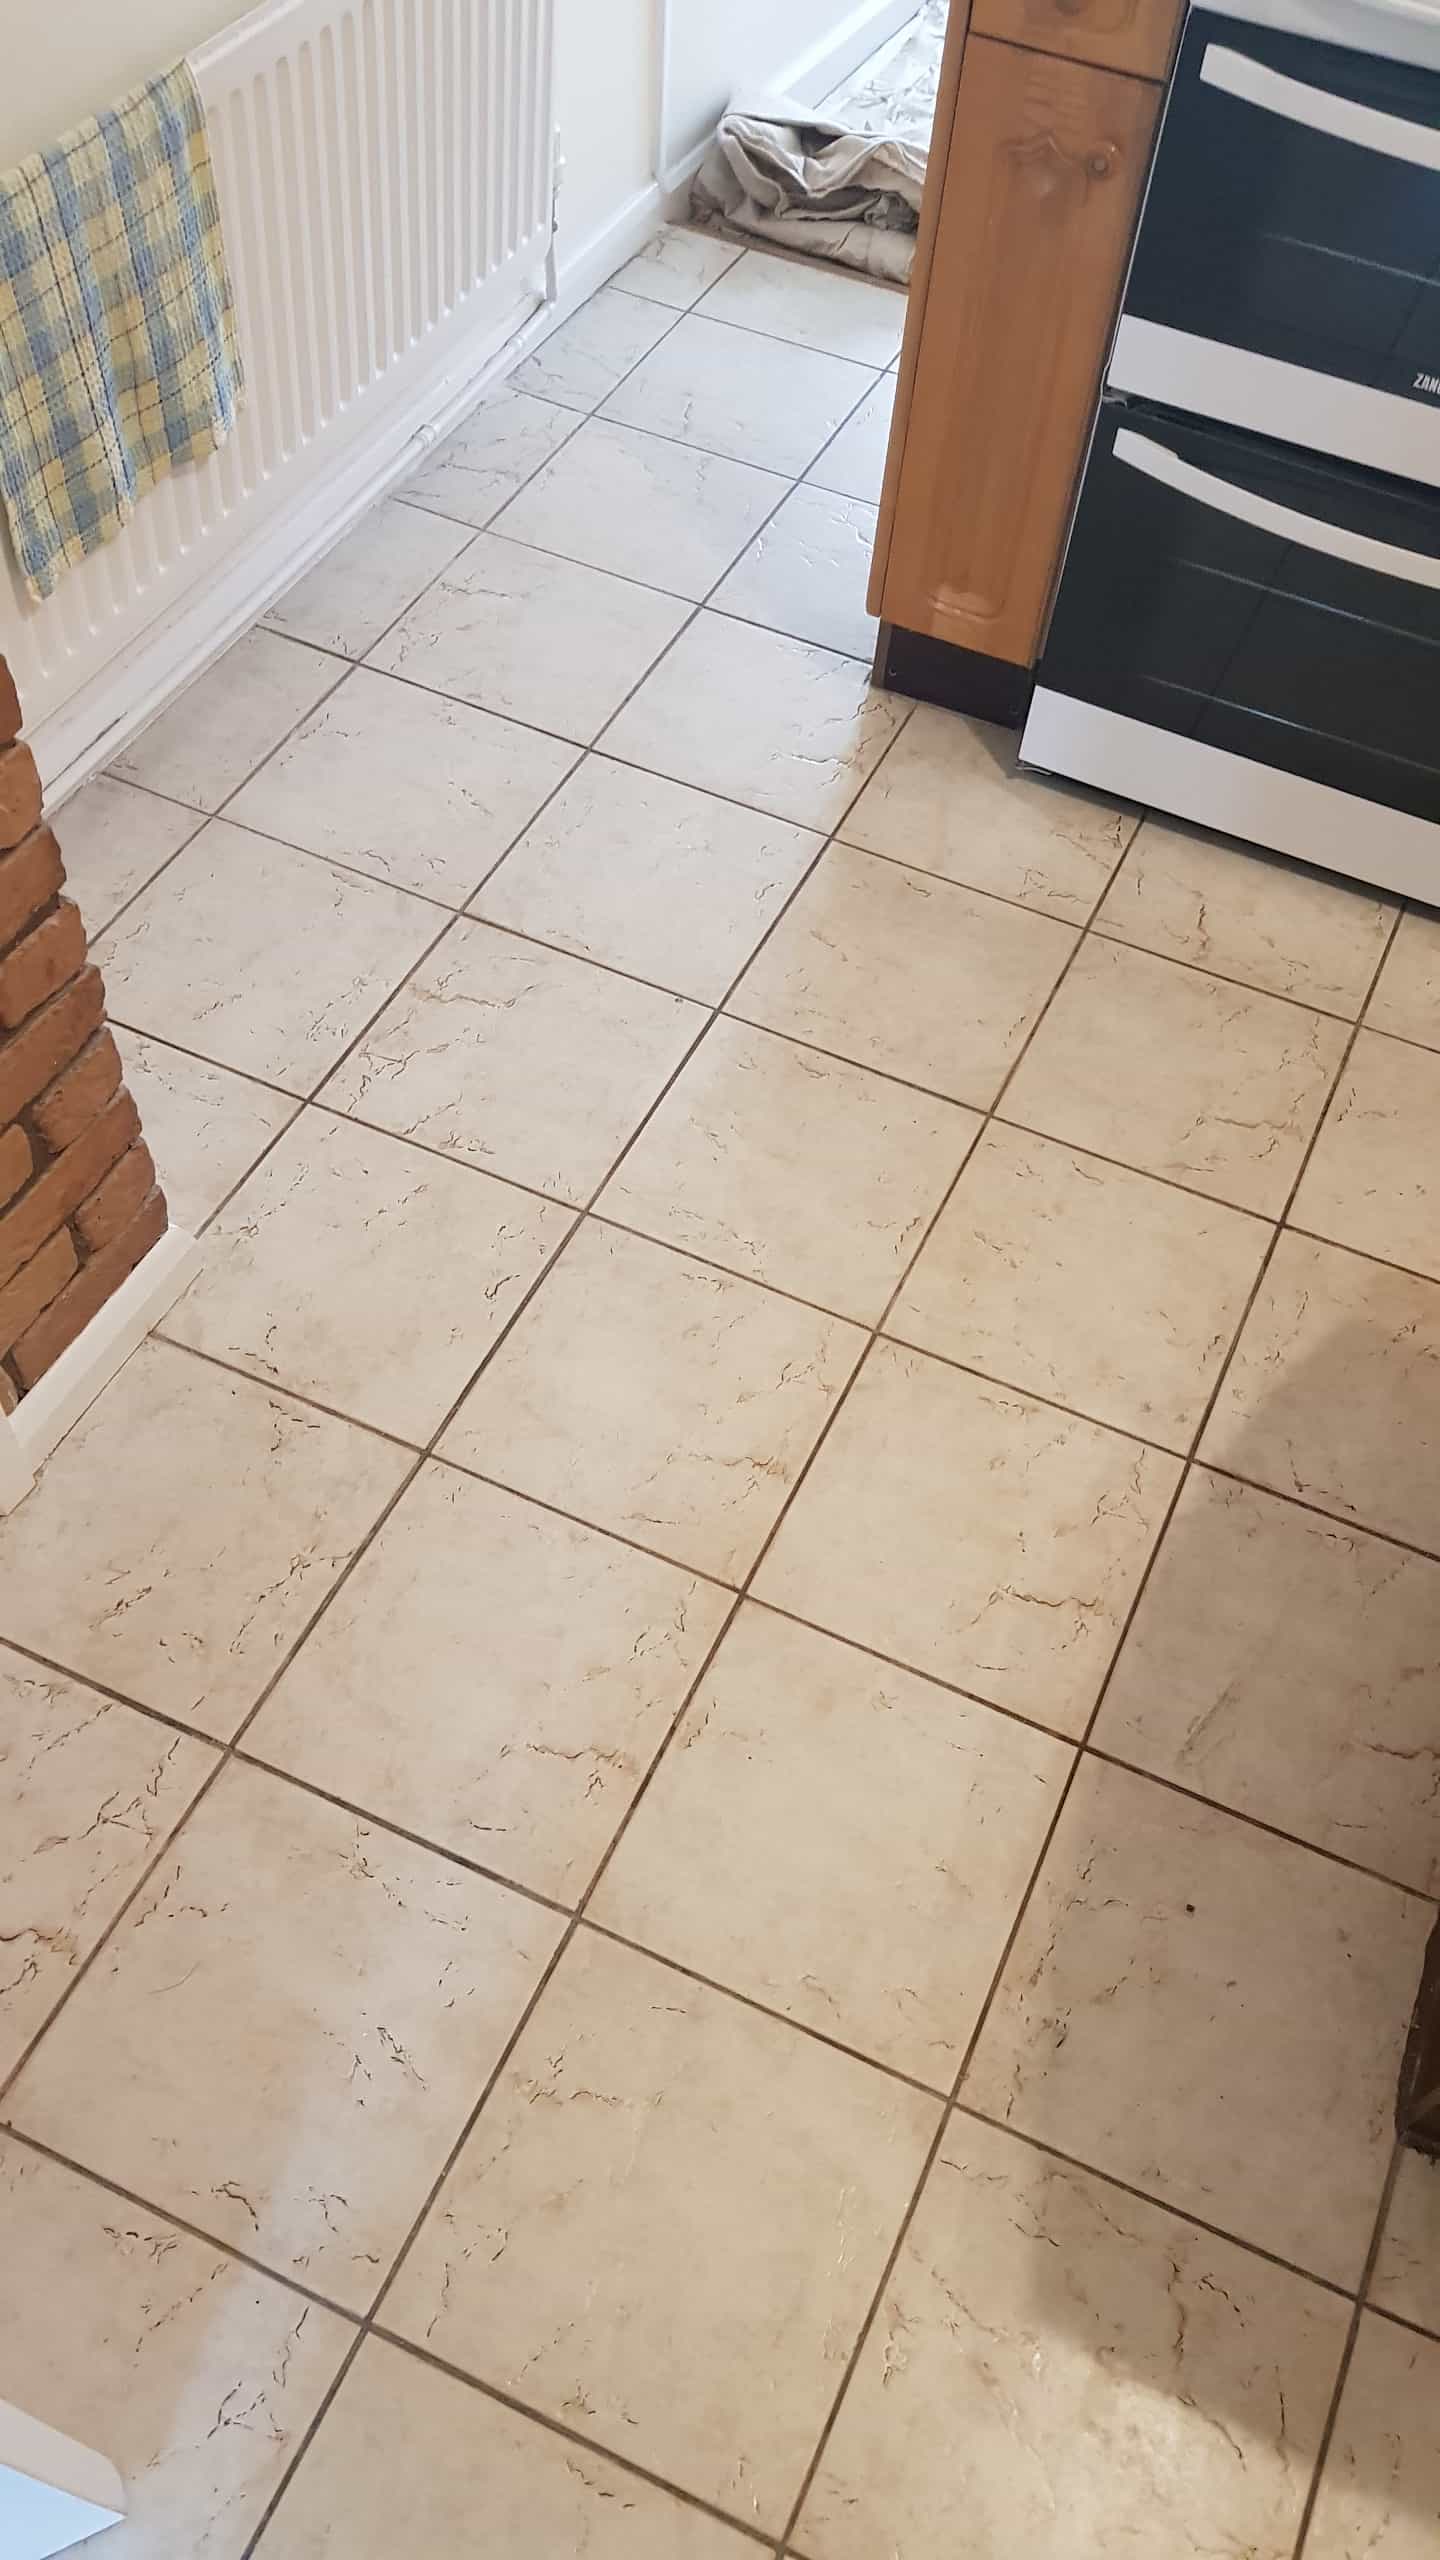
Dirty Textured Ceramic Tiles Before After Cleaning Barnsley South Yorkshire

Textured Ceramic Tile Cleaning, Barnsley

This ceramic tiled floor at a house in the old coal mining town of Barnsley was trapping dirt and bothering our client who was finding it impossible to keep clean. In fact, she got in touch with Tile Doctor to explain that however they cleaned the floor they just couldn’t get the tiles cleaned and looking bright.

Textured Ceramic Tile Barnsley Before Cleaning

Barnsley is my local town, so it wasn’t long before I was able to pop over to the property and survey the floor. When I got there I could see that the tiles, which had been laid throughout the Hallway and Kitchen, were Textured Ceramic which have the advantage of being anti-slip but the disadvantage of being a pain to keep clean. The rougher textured surface traps dirt easily and in this case no amount of mopping was going to clean them.

Textured Ceramic Tile Barnsley Before Cleaning Textured Ceramic Tile Barnsley Before Cleaning

My customer explained they had tried numerous household cleaners but had been unable to get them really looking clean. I was confident the floor could be deep cleaned and brought back to life using Tile Doctor products and that the job should only take a day to complete. Happy with the quote, we worked out a mutually convenient date for me to return and clean the floor.

Deep Cleaning a Textured Ceramic Tiled Floor

I started by giving the floor a really long soak with a medium dilution of Tile Doctor Pro-Clean, the long dwell time allows the product to soak right into every bit of dirt that was clinging to the tiles and break it down. Pro-Clean is a concentrated, multi-purpose high-alkaline cleaner, stripper and degreaser which can be diluted in different ratios dependent on the situation. In this instance we diluted with 3 to 5 parts water to use as a very effective cleaner which is the recommended strength for removing inground dirt from areas that have been neglected or subjected to heavy use.

Textured Ceramic Tile Barnsley During Cleaning Textured Ceramic Tile Barnsley During Cleaning

A black scrubbing pad was then fitted to a rotary floor buffer and run over the floor at slow speed to attack the dirt. It wasn’t long before the Pro-Clean turned dark with the loose dirt and the tiles started looking lighter in colour. The now thick brown slurry was removed using a wet vacuum and then the floor was given a rinse with water which was also extracted with the wet vacuum. The process was repeated over the entire floor and doubly so where the muck was proving stubborn to remove. After we had finished the floor looked lighter and much cleaner, the grout lines also looked cleaner too.

Textured Ceramic Tile Barnsley During Cleaning Textured Ceramic Tile Barnsley During Cleaning

Our client was so relieved to have the floor looking like new again, it had been bothering her for quite some time. As you can see from the pictures the difference was quite apparent.

Textured Ceramic Tile Barnsley After Cleaning Textured Ceramic Tile Barnsley After Cleaning

Before leaving we discussed the best way to keep the floor clean. Normally I would recommend a pH neutral tile cleaning product for cleaning tiles however in this case with no sealer present (ceramic tiles don’t usually accept a sealer) and given the textured surface I felt the continued use of Tile Doctor Pro-Clean would be their best option.


Professional Cleaning of Textured Ceramic Tiles in South Yorkshire

Textured Ceramic Tile Cleaning, Barnsley Read More »

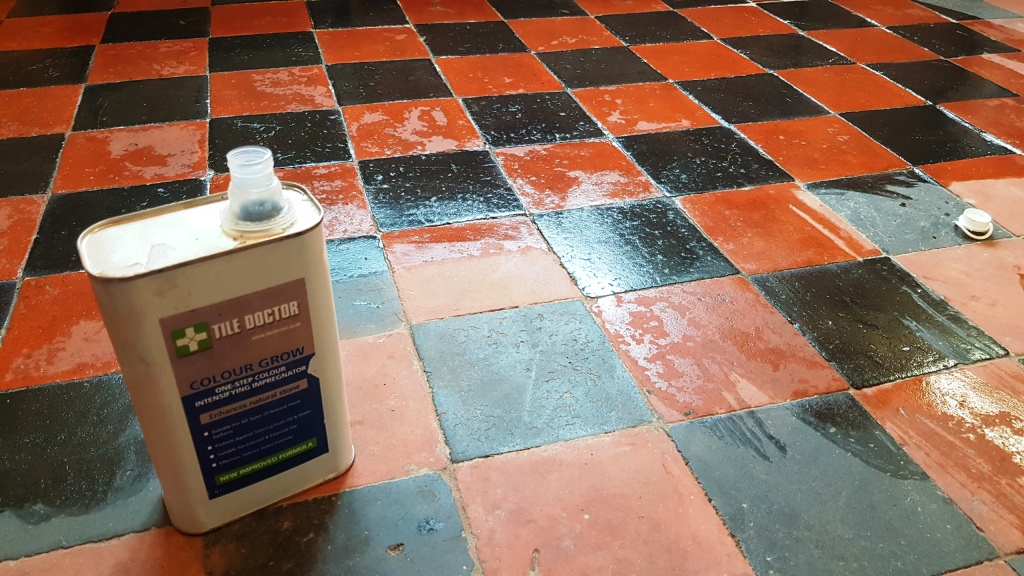
Victorian Quarry Tiled Floor Before and After Renovation Nether Edge

Victorian Quarry Tiled Floor Fully Restored in Nether Edge, Sheffield

We were called to this beautiful Victorian house in Nether Edge, Sheffield. The house sits on a tree lined street full of big Victorian homes and dates back to 1898. The current owners were keen to preserve the properties old charm and character and had made quite a few improvements sympathetic to the age of the property. They had begun by removing some tasteless ceramic tiles that had been installed sometime in the 1990’s and were shocked when the original quarry tiled floor was uncovered buried beneath two layers of tile adhesive and a layer of bitumen! They gave us a call and asked us to come and have a look and see if we could restore the floor.

Quarry Tiled Floor Sheffield Before Restoration

I went to the property and as they had described the floor was in need of some help.
After several test cleans we came to the conclusion that all the damage was repairable, and the floor was able to be rescued. I offered them a quote to complete this restoration work which they gladly accepted. Due to the nature of the work involved the job would take four days to complete.

Quarry Tiled Floor Sheffield Before Restoration

The client was also having their kitchen re fitted, so we discussed that we could use some of the original tiles that were going to be covered by a new island by lifting them up and storing them until we needed them to patch the holes up and replace the cracked tiles. The owners also managed to source some reclaimed tiles which were also a perfect match.

Quarry Tiled Floor Sheffield Before Restoration

Cleaning and Restoring a Quarry Tiled Kitchen Floor

We began by removing the old adhesives and bitumen with a combination of Tile Doctor Grout Clean-up with Pro-Clean and assisted with steam, a heat gun and good old-fashioned elbow grease. It was painstaking work but after 2 days we had uncovered the floor.

Quarry Tiled Floor Sheffield During Restoration Day 2 After Steam Cleaning

There were areas of damage, areas with no tiles, patches of loose tiles and areas where tiles had never been, like the two doorways which weren’t original, so tiles were never placed there. We used the rescued tiles and the reclaimed tiles to repair these areas, once the tiles were in you wouldn’t have known any damage had existed. There were many areas of missing grout, so we installed new grout and gave the floor one last wash. As you can see from all the pictures there was a lot to do.

Quarry Tiled Floor Sheffield During Restoration Day 3 Removing More Damaged Tiles

Sealing a Quarry Tiled Kitchen Floor

Once the floor had dried completely we returned to seal the floor, we applied one coat of Tile Doctor Colour Grow, a colour enhancing impregnating sealer which we left to soak in and cure. Then we applied 5 coats of a satin breathable sealer Tile Doctor Seal & Go Extra leaving the floor with a beautiful natural finish.

Quarry Tiled Floor Sheffield During Restoration Day 4 Applying Colour Grow

It was a long job that took four days to completed but the transformation we achieved was well worth the effort. Our clients certainly thought so and were over the moon that an original and unknown part of their house was now restored back to its’ former glory and will hopefully last another 120 years. They even left the following comment on the Tile Doctor feedback system.

”We found a layer of quarry tiles under our kitchen floor – covered in bitumen and tile adhesive. After four days of cleaning, patching gaps & replacing cracked quarry tiles we have a shiny, characterful and ‘new Victorian floor!”

Quarry Tiled Floor Sheffield During Restoration Day 4 After Sealing


Professional Restoration of a Quarry Tiled Kitchen in South Yorkshire

Victorian Quarry Tiled Floor Fully Restored in Nether Edge, Sheffield Read More »

Ceramic Tiled Shower Cubicle Before and After Cleaning Hillsborough

Ceramic Tiled Shower Cubicle Revamp in Hillsborough, Sheffield

We were contacted by a family from Hillsborough, which is a suburb of Sheffield, who had seen some of the work we do renovating shower cubicles on the internet and wanted to know if I would do the same for their shower.

Ceramic Shower Tile and Grout Before Revamp Sheffield Ceramic Shower Tile and Grout Before Revamp Sheffield

One of the biggest problems affecting bathrooms is mould which thrives in a warm damp environment, the best way to prevent it is to extract the moisture created when having a shower with adequate ventilation. Other steps you can take to reduce mould include always leaving the door open after a shower to improve cross ventilation and rinsing the shower down with cold water afterwards. Tile Doctor also have a product called Aqua-Pro that you can spray on your tiles after use.

I went over to take a look and could see that the Ceramic tiles were only slightly stained and would no doubt clean-up easily however the grout had gone black in places with mould and orange in others due to the dyes in shampoos and soaps. Ceramic tiles are glazed and so usually very easy to keep clean however grout and silicone is more vulnerable and if you now cleaned on a regular basis mould can get a grip and it can prove very stubborn to remove.

Ceramic Shower Tile and Grout Before Revamp Sheffield

Cleaning Ceramic Bathroom Tile and Grout

The home owners had tried to rectify the problem before by applying more grout and silicone to the affected areas however this hadn’t cured the ventilation issue, so it wasn’t long before the problem resurfaced. I recommended replacing all the badly affected grout and the silicone sealer strip around the base of the shower to give the cubicle a fresh look.

My first task was to see how far we could get by cleaning the tile and grout using Tile Doctor Duo-Clean which is designed for use in bathrooms where it’s effective at cleaning grout and removing mould. It comes in a spray bottle so it’s just a question of spraying it onto the tile, grout and silicone and leaving it for ten minutes before scrubbing it in with a stiff brush or scouring pad. The soil was then rinsed off the tile and grout and the shower left to dry off for a while, so we could see which areas were so badly stained would need re-grouting.

The next step was to carefully remove the old silicone sealant from around the edges of the shower cubicle using a sharp knife, then using a combination of power tools and blades we removed the grout in the affected areas and put in new white grout to match the exiting.

While the grout was drying, the shower tray was cleaned up and new silicone sealant has added around the base of the shower cubicle using a premium mould resistant silicone that should be more resistant to staining.

Ceramic Shower Tile and Grout After Revamp Sheffield

The combination of cleaning and grout replacement worked a treat and the shower looks like a brand-new installation. This doesn’t resolve the ventilation issue, so I left the customer with a bottle of Tile Doctor Aqua-Pro with instructions to spray the tiles down regularly in order to keep it looking fresh and clean.

Ceramic Shower Tile and Grout After Revamp Sheffield Ceramic Shower Tile and Grout After Revamp Sheffield


Professional Shower Tile and Grout Cleaning in Cheshire

Ceramic Tiled Shower Cubicle Revamp in Hillsborough, Sheffield Read More »

Victorian Tiled Hallway Before After Renovation Doncaster

Renovating Victorian Hallway Tiles in Doncaster

Our customer in Doncaster had lived in their house for 7 years. The property had lots of lovely period features along with a beautiful patterned Victorian tiled hallway. Since moving in they had not done anything to restore the appearance of the hallway floor, although they were very aware they wanted to preserve the floor but unsure what could be done to fix it and get it back up to scratch.

Victorian Tiled Hallway Before Cleaning Doncaster

Over time the floor had become increasingly ingrained with dirt and very difficult to keep clean, so they decided to do something about it and contacted Tile Doctor. I visited the property, came up with a plan of action, agreed a price and booked the job in for the following week.

Cleaning/Repairing a Victorian Tiled Hallway Floor

First task was to remove any old sealers or waxes that may still be present on the floor. There are several ways to do this but for this job the floor I decided to treat it with Tile Doctor Remove & Go, which was left to dwell for a good ten to fifteen minutes before being agitated with a rotary floor machine fitted with a 400-grit diamond burnishing pad.

Victorian Tiled Hallway During Cleaning Doncaster

Remove and Go is a multi- purpose stripper that breaks down most coatings and sealers. It also has the benefit of drawing out ingrained stains and any heavy grease build up. The resulting slurry was then rinsed off the floor with water and a wet vacuum.

After that the floor was inspected and it was clear more work was required to remove the years of dirt. Given the age of the property I was sure no damp proof membrane would have been installed prior to laying the floor. This can often lead to a build-up of alkaline salts in the floor that might appear as efflorescent white spots as the floor dries after cleaning.

To finish off cleaning the floor and to counter any alkaline salts I gave the tiles a clean with Tile Doctor Oxy-Gel combined with Tile Doctor Acid-Gel. I used the same process as before, allowing the products to soak into the tiles for ten minutes and then scrubbing the hallway floor with the 400-grit diamond burnishing pad fitted to a rotary floor machine. Once again, the solution was rinsed off the floor with water and then extracted with a wet vacuum.
The floor was wiped clean with damp microfibre clothes and left to dry off overnight.

Victorian Tiled Hallway During Cleaning Doncaster

Sealing a Victorian Tiled Hallway Floor

I came back a few days later to allow for the hallway floor to have fully dried out, I also double checked it was fully dry by using a moisture meter. Satisfied that the floor was ready for the sealing process I started to seal the tiles. For this I used five coats of Tile Doctor Colour Grow which is a colour enhancing impregnating sealer that leaves a matt finish and will protect the floor for years to come. This sealer is also fully breathable which makes it ideal for floors such as Victorian tiles where the age of the property means damp can be an issue.

Victorian Tiled Hallway After Cleaning Doncaster

The job was completed, and the floor had been returned to its’ previous vibrant look. The customer was very happy and could see how much easier it would now be to maintain.
The property now looked how you would expect when you opened the front door!


Professional Restoration of a Victorian Tiled Hallway in South Yorkshire

Renovating Victorian Hallway Tiles in Doncaster Read More »

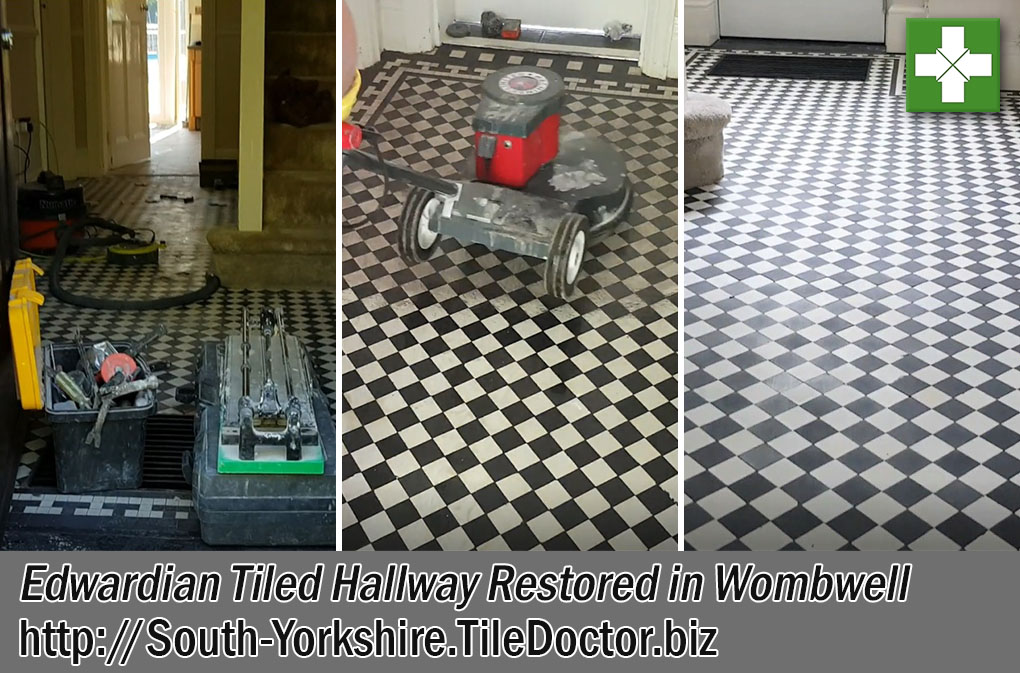
Edwardian Hallway Floor Restoration in Wombwell

Edwardian Hallway Floor Restoration, Wombwell

We were contacted by a family in Wombwell, Barnsley, South Yorkshire to come and look at their Edwardian hallway floor that needed a lot of work to restore it. The traditional black and white design had a lot of loose, chipped and broken tiles that needed replacing and repairing. Another company had cleaned the floor previously but there was hardly any sealer still present making the floor an easy target for stains and ingrained dirt.

Edwardian Hallway Floor During Restoration in Wombwell

I drew up a three-day plan to repair, clean and seal the hallway floor, but before work could start I spent time sourcing replacement tiles to perfectly matching the originals. It can be hard to track them down, but we usually can. Once that was done we were all ready to go.

Edwardian Hallway Floor Before Restoration in Wombwell

Repairing an Edwardian Tiled Hallway Floor

The first day was spent repairing the floor, we used a combination of angle grinders, multi tools and chisels to remove all the chipped and broken tiles. The loose tiles were fixed back in place and the replacement replica tiles were fixed in place of the broken tiles. A few of the less damaged tiles were left in place to ensure the floor looked true to the era. The floor was left to set overnight.

Edwardian Hallway Floor During Restoration in Wombwell

Deep Cleaning an Edwardian Tiled Hallway Floor

On the second day I got to work using Tile Doctor Remove & Go. This was applied to the floor and left to dwell for 15 minutes, this breaks down the old sealer and ingrained dirt. We then attached a 200-grit diamond pad to a weighted rotary slow speed floor polisher and went over each area several times. The slurry was extracted using a large wet vacuum.

Edwardian Hallway Floor During Restoration in Wombwell

With damp being a big issue in these big old houses we always need to take efflorescence (salt staining) into consideration, when these types of floors were fitted 100 years ago, Damp Proof Membranes didn’t exist so any moisture below the floor will eventually rise to the surface through the tiles. This can leave white salt deposits on the surface. Knowing this can be an issue I gave the floor an acid wash to neutralise the alkaline salts. This was done by applying Tile Doctor Acid Gel to the floor and leaving it for 10 minutes before the rotary machine fitted with a 200-grit diamond pad was used to work the product into the tile. Once this was done the slurry was extracted again using the wet vacuum and the floor rinsed. Then using damp cloths, we removed all the residue.

Sealing an Edwardian Tiled Hallway Floor

After being left over night to fully dry we returned the next day to seal the floor. We first tested the moisture levels to ensure it was fully dry. All was well so the first of four coats of Tile Doctor Colour Grow was applied to the floor. Colour Grow is, a colour enhancing impregnating sealer that helps bring out the natural colours in the tile whilst protecting the tile from within, this sealer is also fully breathable which is important for old tiled floors as it allows the floor to breathe and allows moisture to pass through the tile and evaporate.

Edwardian Hallway Floor During Sealing in Wombwell

You can always tell when you have applied enough sealer by adding a droplet of water to the tile, if it forms a bubble on the surface of the tile as in the photograph below then its fully sealed. Conversely if the floor becomes sticky then you have applied too much sealer.

Edwardian Hallway Floor During Sealing in Wombwell

The customer was highly delighted with the newly restored floor. The hall is now fully restored and looks clean and inviting, it will also be much easier for them to keep clean going forward.

Edwardian Hallway Floor After Sealing in Wombwell


Professional Restoration of an Edwardian Tiled Hallway in South Yorkshire

Edwardian Hallway Floor Restoration, Wombwell Read More »

Marble Bathroom Tiles Before and After Cleaning Endcliffe Sheffield

Regrouting a Marble Tiled Wet Room in Endcliffe Sheffield

The owner of this house in the village of Endcliffe Sheffield was unhappy about the state of their Marble wet room and called me in to do something about it. The main issue was that mould had built-up across the bathroom especially on the grout and silicone sealant, the Marble tiles were also looking dull and needed sprucing up.

Marble Bathroom Tiles Before Cleaning Endcliffe Sheffield

Dealing with Mould in a Wet Room

Mould thrives in moist warm conditions and without adequate ventilation it will start to take hold. Often in cases like this we advise clients to improve the power of their extractor fan or leave a window and a door open after a shower, in this case however the wet room had no windows. Another option you can try is to run the shower cold for a few minutes after you have used it, this decreases the temperature and removes moisture from the air. That tip is easily forgotten when your in a hurry so regular cleaning with Tile Doctor Duo-Clean which is a tile cleaner and mould remover should allow you to keep on top of the problem.

Marble Bathroom Tiles Before Cleaning Endcliffe Sheffield Marble Bathroom Tiles Before Cleaning Endcliffe Sheffield

In this case the Mould had really taken a hold and I knew form experience that scrubbing with a powerful cleaner like Duo Clean was unlikely to get the grout back to the pristine condition the customer wanted so I decided to strip out all the affected grout and silicone and replace with new. It took some time but I have a special electric grout removal tool that comes in handy for these situations and so it wasn’t long before I had removed the worse of it. This was followed by carefully removing the silicone sealant that ran between the shower tray and Marble wall tiles with a sharp knife.

Polishing Marble Wall and Floor Tiles

Next, I turned my attention to the Marble tiles which had lost their shine and become dull. Marble is hard stone and to get the best out of it we find its best to burnish them with a set of diamond encrusted burnishing pads that remove the dirt and slowly bring back the polished appearance. Normally when we talk about burnishing it’s in relation to stone floor tiles however these pads also come in small six-inch size as well which will fit a hand buffer or Angle Grinder.

Marble Bathroom Tiles During Cleaning Endcliffe Sheffield

Like floor burnishing the pads are applied in sequence starting with the coarse 400-grit pad and moving up through the 800, 1500 and finally the very fine 3,000-grit pad. The lower grit pads need to be lubricated with water and you rinse between each pad with water to remove the slurry that is generated.

Finishing the Marble Wet Room Renovation

With the Marble tiles now looking good it was time to protect them from future staining by sealing them with two coats of Tile Doctor Ultra-Seal which is a premium sealer that leaves a natural look that doesn’t darken the colour of the stone.

I left the re-grouting to last as its easier to remove grout from a sealed tile and then finished by putting back the silicone strip, both the grout and the silicone we chosen for their anti-mould formula and before leaving I gave some advice on how to keep on top of the mould problem going forward.

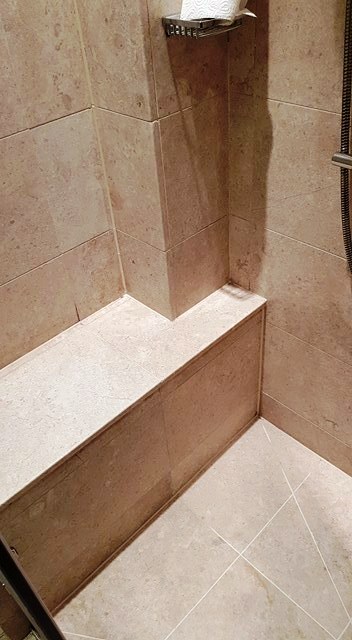
Marble Bathroom Tiles After Cleaning Endcliffe Sheffield

My client was delighted with the result and relieved that they would no longer feel embarrassed when visitors ask to use the bathroom.

Marble Bathroom Tiles After Cleaning Endcliffe Sheffield


Dealing with Mould in a Marble Tiled Wet Room in Yorkshire

Regrouting a Marble Tiled Wet Room in Endcliffe Sheffield Read More »

Scroll to Top