Barnsley Tile Cleaning

Barnsley Tile Cleaning

Welcome to my Work History archive where you will find examples of the cleaning and renovation of tiles carried out in Barnsley.

Yorkstone Tiled Floor Renovation Hoylandswaine

Yorkstone Floor Covered in Thick Varnish Renovated in Hoylandswaine

I was asked to visit a stunning old farmhouse in Hoylandswaine Barnsley to look at a Yorkstone kitchen floor which had several problems. The family who lived there were fed up with its black appearance and more importantly how dangerous it was due to a varnish covering that was applied which when wet became an ice-skating rink. The kids would regularly slip over on the very shiny floor, and it was becoming a real concern.

Yorkstone Flooring Before Varnish Removal Hoylandswaine

On my first visit to the property, I was shocked at how dark the Yorkstone floor had become in fact I thought initially it was Black Slate. Yorkstone is a variety of Sandstone that is quarried in Yorkshire and usually contains a range of pale colours visible, and at worst it can get dirty and turn grey.

Yorkstone Flooring Before Varnish Removal Hoylandswaine

After running a few cleaning tests, it was obvious the previous owners of the house had applied many coats of varnish to the floor, and it was going to be quite a job to strip it off.

Stripping Varnish off a Yorkstone Tiled Kitchen Floor

To ensure the best result I tried a range of different products and methods until I came up with a way to strip away the black dirty shiny varnish. Wood varnish isn’t something we often see applied to stone, so a combination of products including Tile Doctor Remove & Go and a heavy-duty polish stripper were applied to the floor and left to soak in.

Yorkstone Flooring During Varnish Removal Hoylandswaine

After leaving the floor for fifteen minutes to soften the varnish it was then scrubbed with a wire brush attachment fitted to a rotary buffer machine and run over each stone for a few minutes. This scraped the varnish off the surface of the stone and started to reveal the natural stone surface for the first time in years. Some areas needed treating two or three times to get rid of all the varnish.

Yorkstone Flooring During Varnish Removal Hoylandswaine

Once I was satisfied all the varnish was gone the stone was given a deep clean using a medium strength dilution of Tile Doctor Pro-Clean. The product was applied this to the floor and left it to dwell for a few minutes before using the rotary floor machine again. This time the machine was fitted with a black scrubbing pad to clean the stone. The floor was cleared of all the slurry using a wet vacuum before being given a final rinse. The floor was left to dry off overnight.
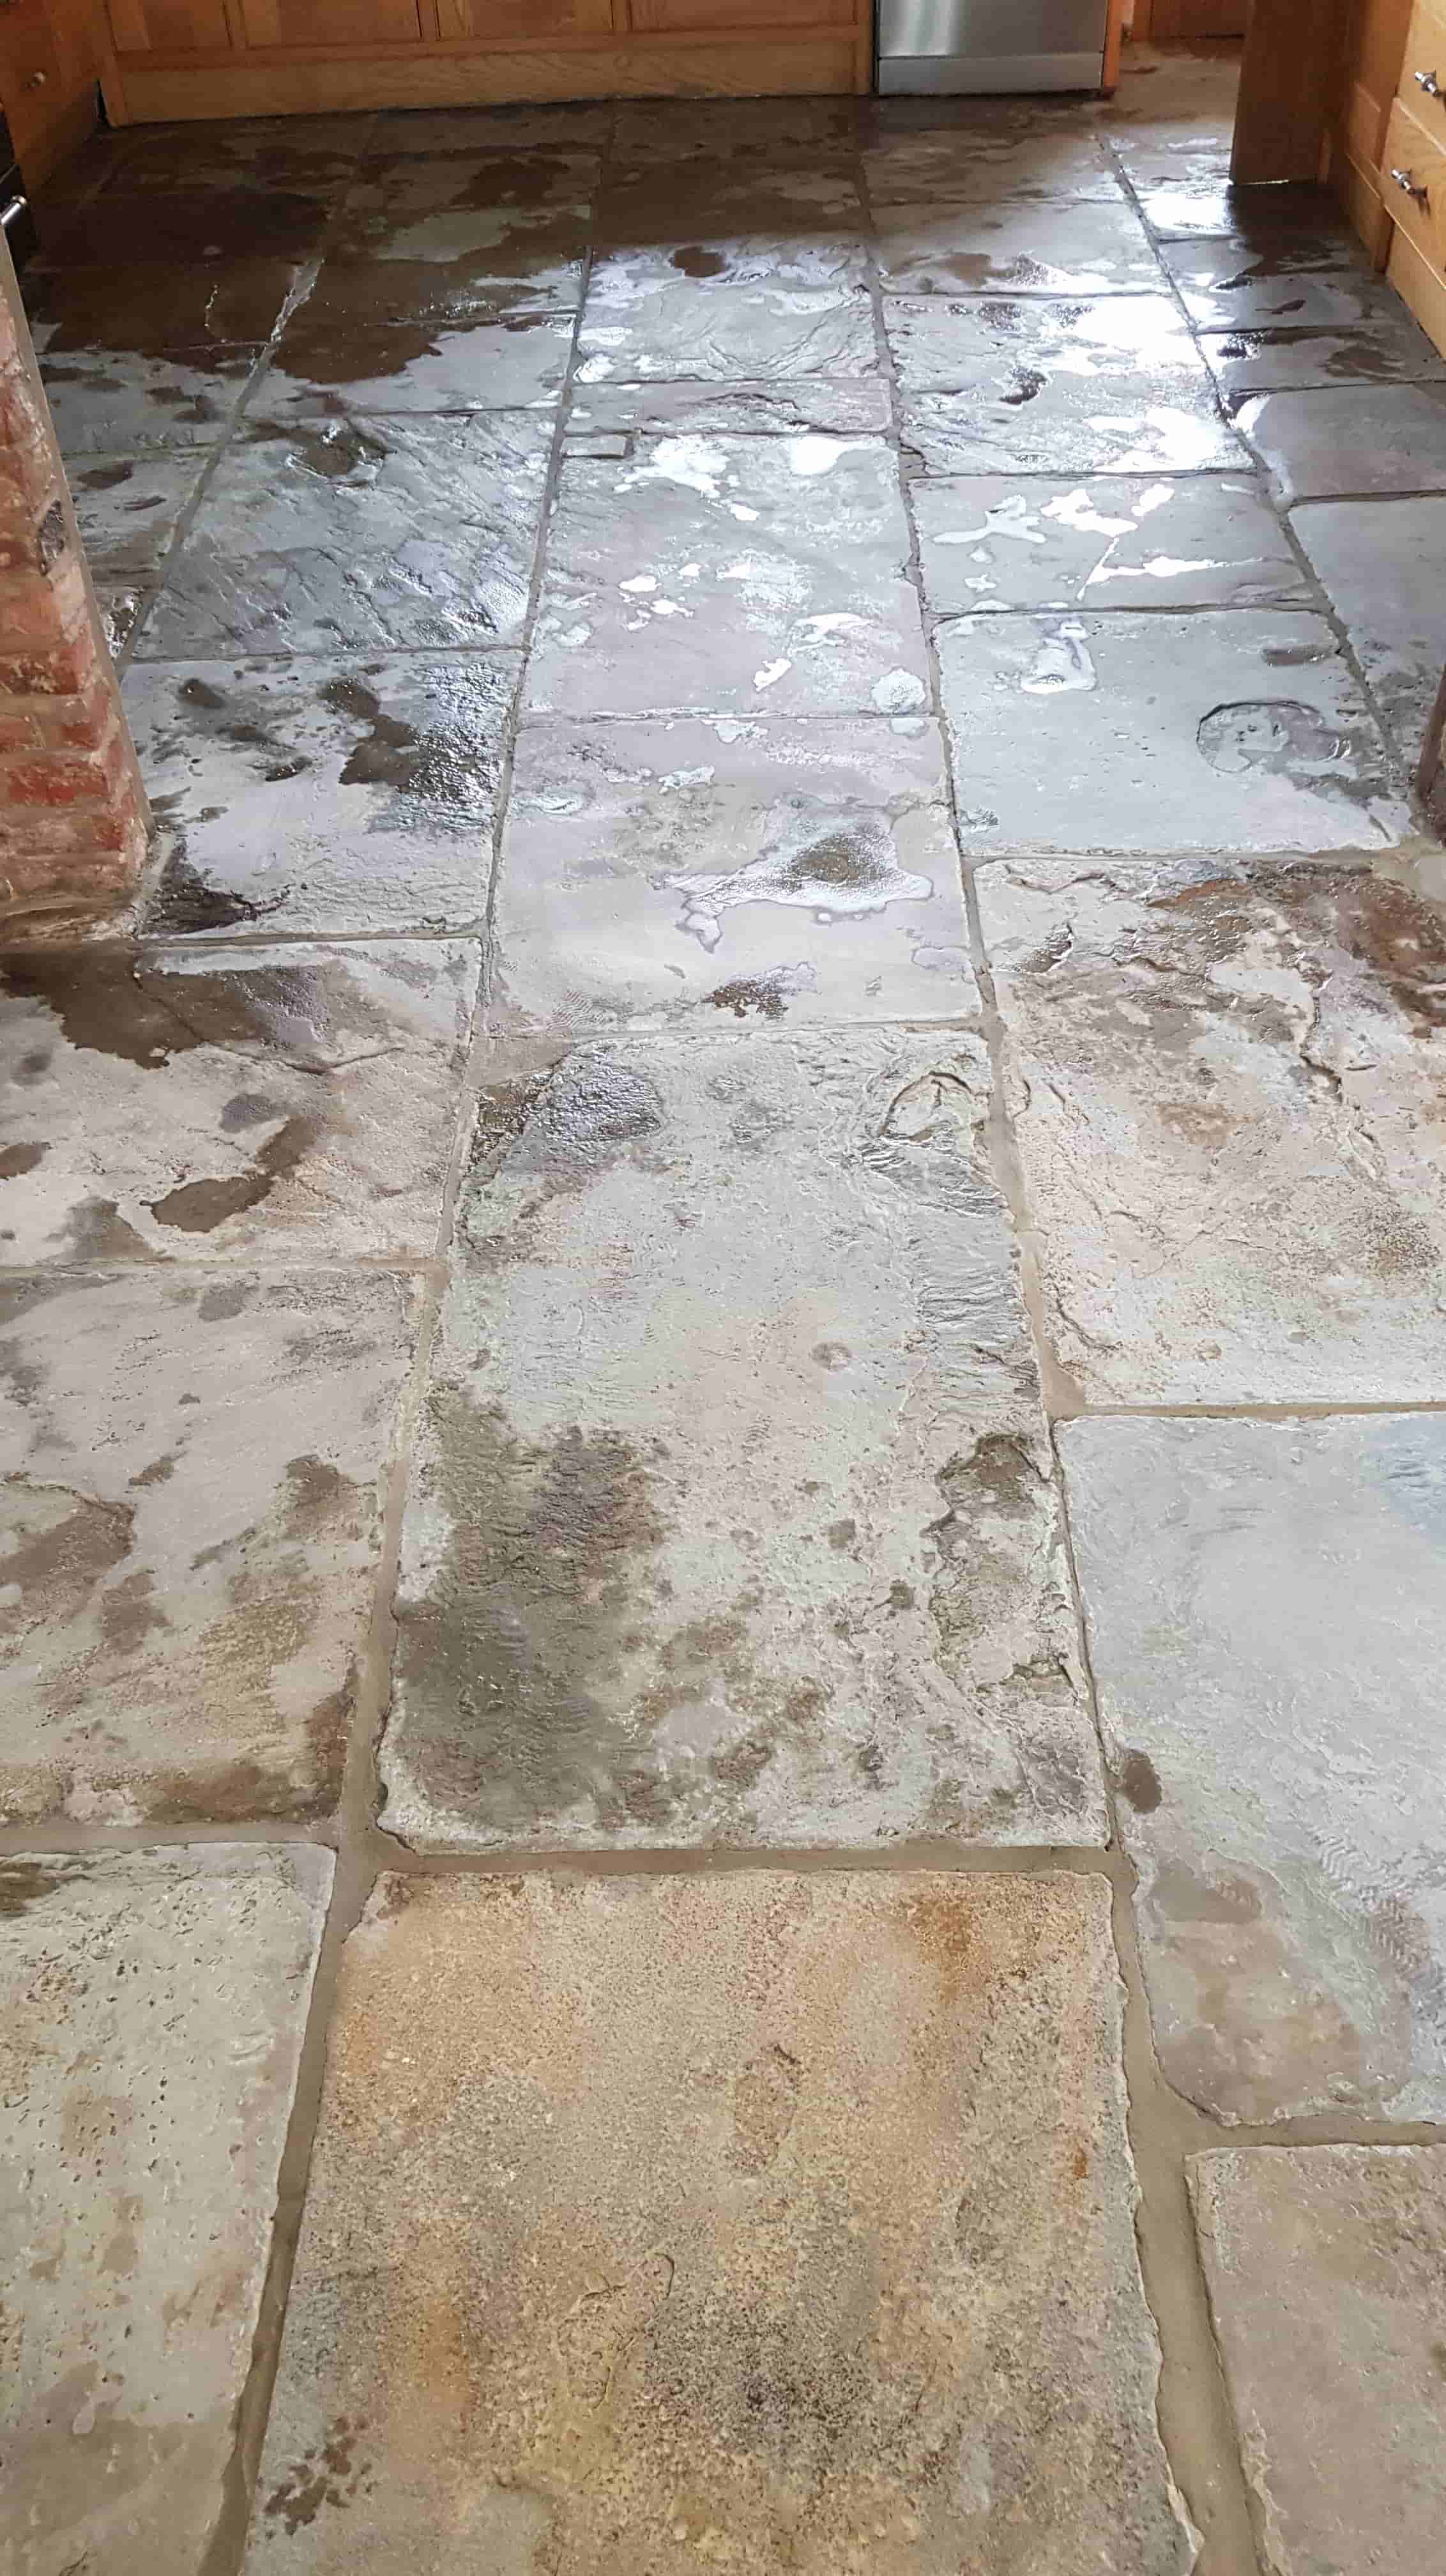
Yorkstone Flooring During Varnish Removal Floor Drying Hoylandswaine

Sealing a Yorkstone Tiled Hallway Floor

Returning the following day, I reviewed the previous day’s work and could see there were a few bits of varnish stuck in the crevices of the stone and around the edges of the room. I managed to remove these using a wire brush fitted to an angle grinder.

Once the floor was cleaned of dust and flakes of varnish it was ready to for the final step of sealing. The client had chosen an impregnating sealer for this and wanted something that would improve the colours and keep the texture in the stone. Three coats of Tile Doctor Colour Grow were applied which as its name suggests brings the colours in the Sandstone out and offers protection from within the stone leaving a lovely finish.

Yorkstone Flooring After Varnish Removal Hoylandswaine

They loved the transformation that had occurred and let the following review.

”Matt provided a professional and efficient service from start to finish. He contacted me straight after I initially emailed and made arrangements to come and look at our floor the same day. After working out what he needed to do he got a quote to me that evening. Matt did a great job removing a thick layer of varnish on our stone floor and it now looks beautiful. I would highly recommend him. Thanks so much!”


Professional Restoration of a Yorkstone Tiled Hallway in South Yorkshire

Yorkstone Floor Covered in Thick Varnish Renovated in Hoylandswaine Read More »

Yorkstone Sandstone Floor Before and After Renovation Penistone

Yorkstone Floor Deep Cleaned and Sealed in Penistone

The new owners of this converted old farmhouse in Penistone were struggling with its Yorkstone paved floor which continually looked dirty. They had tried to clean it themselves but whatever they tried seemed to have no effect. They found Tile Doctor on-line as their local representative I was asked to survey the floor and recommend a solution.

Dirty Yorkstone Floor Before Cleaning in Penistone

I paid a visit to the house and whilst there conducted a small test clean to show the owners what results could be achieved. I tested a few different products and methods to see what would work best and they were overjoyed with the difference. Happy and confident the stone floor could be renovated we agreed a price and booked at date in to do all 150 square meters.

Penistone is a small market town to the west of Barnsley nestled in the foothills of the Pennines, as it turns out there used to be a Sandstone quarry here so this Yorkstone floor could well have originated from that very quarry.

Cleaning a Yorkstone Tiled Kitchen Floor

Before doing any work, the area was prepped, woodwork was protected, and furniture was moved out of the way so there would be a clear space in which to work.

Dirty Yorkstone Floor Before Cleaning in Penistone

To get the floor clean I started by applying a strong dilution of Tile Doctor Pro-Clean to the floor which was left to dwell and soak into the pores of the stone for about ten minutes. Then a rotary floor machine was fitted with various diamond pads and brushes to scrub the floor. The Pro-clean and scrubbing action released what felt like decades of dirt from the Yorkshire floor and the true beauty of the sandstone started to show through. The resulting brown slurry was then removed with a wet vacuum before a final rinse was done. The floor was large, the work had to be done in small sections scrubbing and extracting until the whole area was clean and repeating the process where necessary.

Dirty Yorkstone Floor During Cleaning in Penistone

There were a few areas with missing and loose mortar between the joints of the stone, so these were raked out and sympathetically repaired.

Dirty Yorkstone Floor During Cleaning in Penistone

By the end of the first day the floor was looking so much cleaner. The next step would be to seal the stone, but it would need to dry out before I could do that.

Sealing a Yorkstone Tiled Kitchen Floor

To allow plenty of time for drying I returned a few days later to seal the floor, first checking the stone was dry with the help of a damp meter. I know from experience that applying sealer to damp stone is a bad idea as it will affect the way the sealer cures and mar the overall finish.

The readings from the damp meter were fine so I proceeded to seal the Yorkstone flagstones with several coats of Tile Doctor Seal & Go. Natural stone like this is slightly porous so it’s important to prevent dirt from becoming ingrained in the stone by applying a sealer and make the floor easier to keep clean. I recommend Seal and Go for Sandstone floors as it adds a nice subtle shine and brings out the natural colours in the stone.

Dirty Yorkstone Floor After Cleaning Sealing in Penistone

The client was over the moon with the result, the floor looked superb and to ensure it stayed that way I took time to discuss aftercare cleaning. I make a point of doing this as I often find homeowners with stone floors don’t realise that most supermarket floor cleaning products are simply too strong for a sealed floor. Its always worth reading the label before buying a cleaning product as many are so strong, they can strip a protective sealer away with constant use leaving it vulnerable.

Dirty Yorkstone Floor After Cleaning in Penistone Dirty Yorkstone Floor After Cleaning in Penistone

For the regular cleaning of Sandstone type floors, we recommended the use of Tile Doctor Neutral Tile Cleaner. This product is pH neutral and so won’t compromise the newly applied sealer.


Professional Cleaning of a Yorkstone Tiled Hallway in South Yorkshire

Yorkstone Floor Deep Cleaned and Sealed in Penistone Read More »

Victorian Hallway Floor Restoration Barnsley

Unloved Victorian Hallway Floor Renovation in Barnsley

A young couple recently bought a house in Barnsley and were renovating it from top to bottom, included in the plan was the desire to have the previously unloved Victorian floor made beautiful again. The house stands in an area of Barnsley famous for its’ big Victorian villas and quite rightly they felt it was important to ensure period features like this original floor were correctly maintained.

Unloved Victorian Hallway Floor Before Renovation

Due to the floor being covered up for many years the floor had developed damp staining, it also had a lot of paint splattered on it. There were also some loose tiles that needed fixing back in place and the layer of old floor polish was present which would need removing.

Cleaning a Victorian Tiled Hallway Floor

I started by protecting all the skirting boards, doors and carpets bordering the tiles from splashing. The loose tiles were then cleaned up and then secured back in place using a fast-setting adhesive.

Once the adhesive was set, I turned my attention to stripping and cleaning the floor starting with the application of a coarse 200-grit diamond pad fitted to a weighted rotary buffing machine. The pad was lubricated using a dilution of Tile Doctor Remove & Go which was applied to small sections of the floor and left to soak in for ten minutes first. I run the buffing machine at a slow speed to minimise splashing. Remove & Go is amazing at removing old floor coatings (i.e. sealers), dirt and grime from the floor. When the diamond pad had been used on each section of the floor for five minutes the slurry was vacuumed up using a wet vac machine and I moved onto the next section. Once the whole floor had been cleaned in this way it was time to start the next step.

Old floors like this which don’t have the benefit of a damp proof membrane, and have been covered up for a long time, can suffer from efflorescence issues due to moisture being trapped in the tile. This will result in white salt staining appearing on the tiles for days, weeks and sometimes months afterwards. To counter this the alkaline salts are neutralised by giving the floor an acid rinse using Tile Doctor Acid Gel and leaving it to dwell for five minutes before going over the floor again with the coarse diamond pad. The slurry was again removed with a wet vacuum and the floor was scrubbed clean with damp cloths.

Sealing a Victorian Tiled Hallway Floor

I returned a few days later once the floor had dried to seal the floor. The client wanted a satin finish so knowing the floor had damp and efflorescence issues I opted for Tile Doctor Seal and Go Extra. This is a topical sealer which leaves a lovely satin finish but also allows for the floor to breathe. six coats were required to make the floor look perfect, allowing the lovely colours to come through.

Unloved Victorian Hallway Floor After Renovation Unloved Victorian Hallway Floor After Sealing

Once complete the floor looked much brighter and the colours really shone through. The owners were really happy with the renovation we carried out and before leaving I took time to discuss how best to maintain the tiles going forward including the use of Neutral Tile cleaner.


Professional Renovation of a Victorian Tiled Hallway in South Yorkshire

Unloved Victorian Hallway Floor Renovation in Barnsley Read More »

Porcelain Floor Tile Grout Before After Renovation Darton

Patchy Grout on Porcelain Floor Restored in Darton New Build

Recently it seems I am getting called out to an increasing number of new builds to sort out patchy grout issues. The reason why there have been so many issues arising is a bit of a mystery, but I put it down to a combination of things like poor quality grout, rushed installations, wet subfloors and the use of different batches.

Patchy Grout Before Applying Light Grey Grout Colourant

This recently built house in the village of Darton is a great example and in this case, I suspect two different batches of the same grout had been applied. Darton by the way is a small village in the Borough of Barnsley.

Invariably these problems are picked up by the new owner on their snagging list, with the tiler long gone and the builder keen to get their final payment it is always a tricky situation to resolve. I find the best solution is to apply a Tile Doctor Grout Colourant, it’s a much quicker process than removing the old grout and replacing with new. Most new homeowners would not appreciate us ripping up their brand-new rooms and generating lots of dust in the process! Also, by using the Tile Doctor Grout Colourant it adds a barrier of the grout preventing dirt from discolouring it further down the line.

Restoring grout a Porcelain Tiled Kitchen Floor

Even though the house was brand new, the Porcelain Tiled floor was not looking great. The client was happy for me to go ahead and would take up the bill with the housebuilder. I first pre-treated it with Tile Doctors Grout Colourant Pre-Treatment. This removes any contamination from the grout which might affect the adhesion of the colourant and being an acid, it also etches the surface of the grout to ensure a superior bond with the colourant.

The client chose our Light Grey colour which is one of 10 colours we offer. Once the pre-treatment had been applied, scrubbed, rinsed, and vacuumed away the floor was left to dry. Once dry we started applying the colourant, this is done with a small brush (a toothbrush is ideal) carefully scrubbing colourant into each grout joint and wiping off any excess that gets on the tiles before it is able to dry.

Patchy Grout During Application of Light Grey Grout Colourant

Once complete the newly coloured grout lines totally transformed the floor and because the grout colorant is epoxy based the grout lines will stay stain free and never get dirty.
The porcelain tiles were factory sealed so there is no need to apply a seal to the floor.

I recommended the use of Tile Doctor Neutral Tile Cleaner to keep the floor in the best condition. It is pH neutral so is far less harsh on the surface than the everyday household cleaners available. It has a minty fragrance and is mild enough to use daily. They were very happy that the floor now looked as it should have from the start and was the finishing touch to their beautiful new home.

Patchy Grout After Applying Light Grey Grout Colourant


Professional Kitchen Grout Restoration in South Yorkshire Kitchen

Patchy Grout on Porcelain Floor Restored in Darton New Build Read More »

Shower Cubicle Before After Renovation Bolton-Upon-Dearne

Shower Cubicle Renovation in Bolton Upon Dearne

The pictures below detail the renovation of Ceramic Tiled Shower Cubicle at a property in Bolton Upon Dearne South Yorkshire. I was called in as the homeowners dreaded using the shower due to the state of the tiles, grout and cubicle in general.

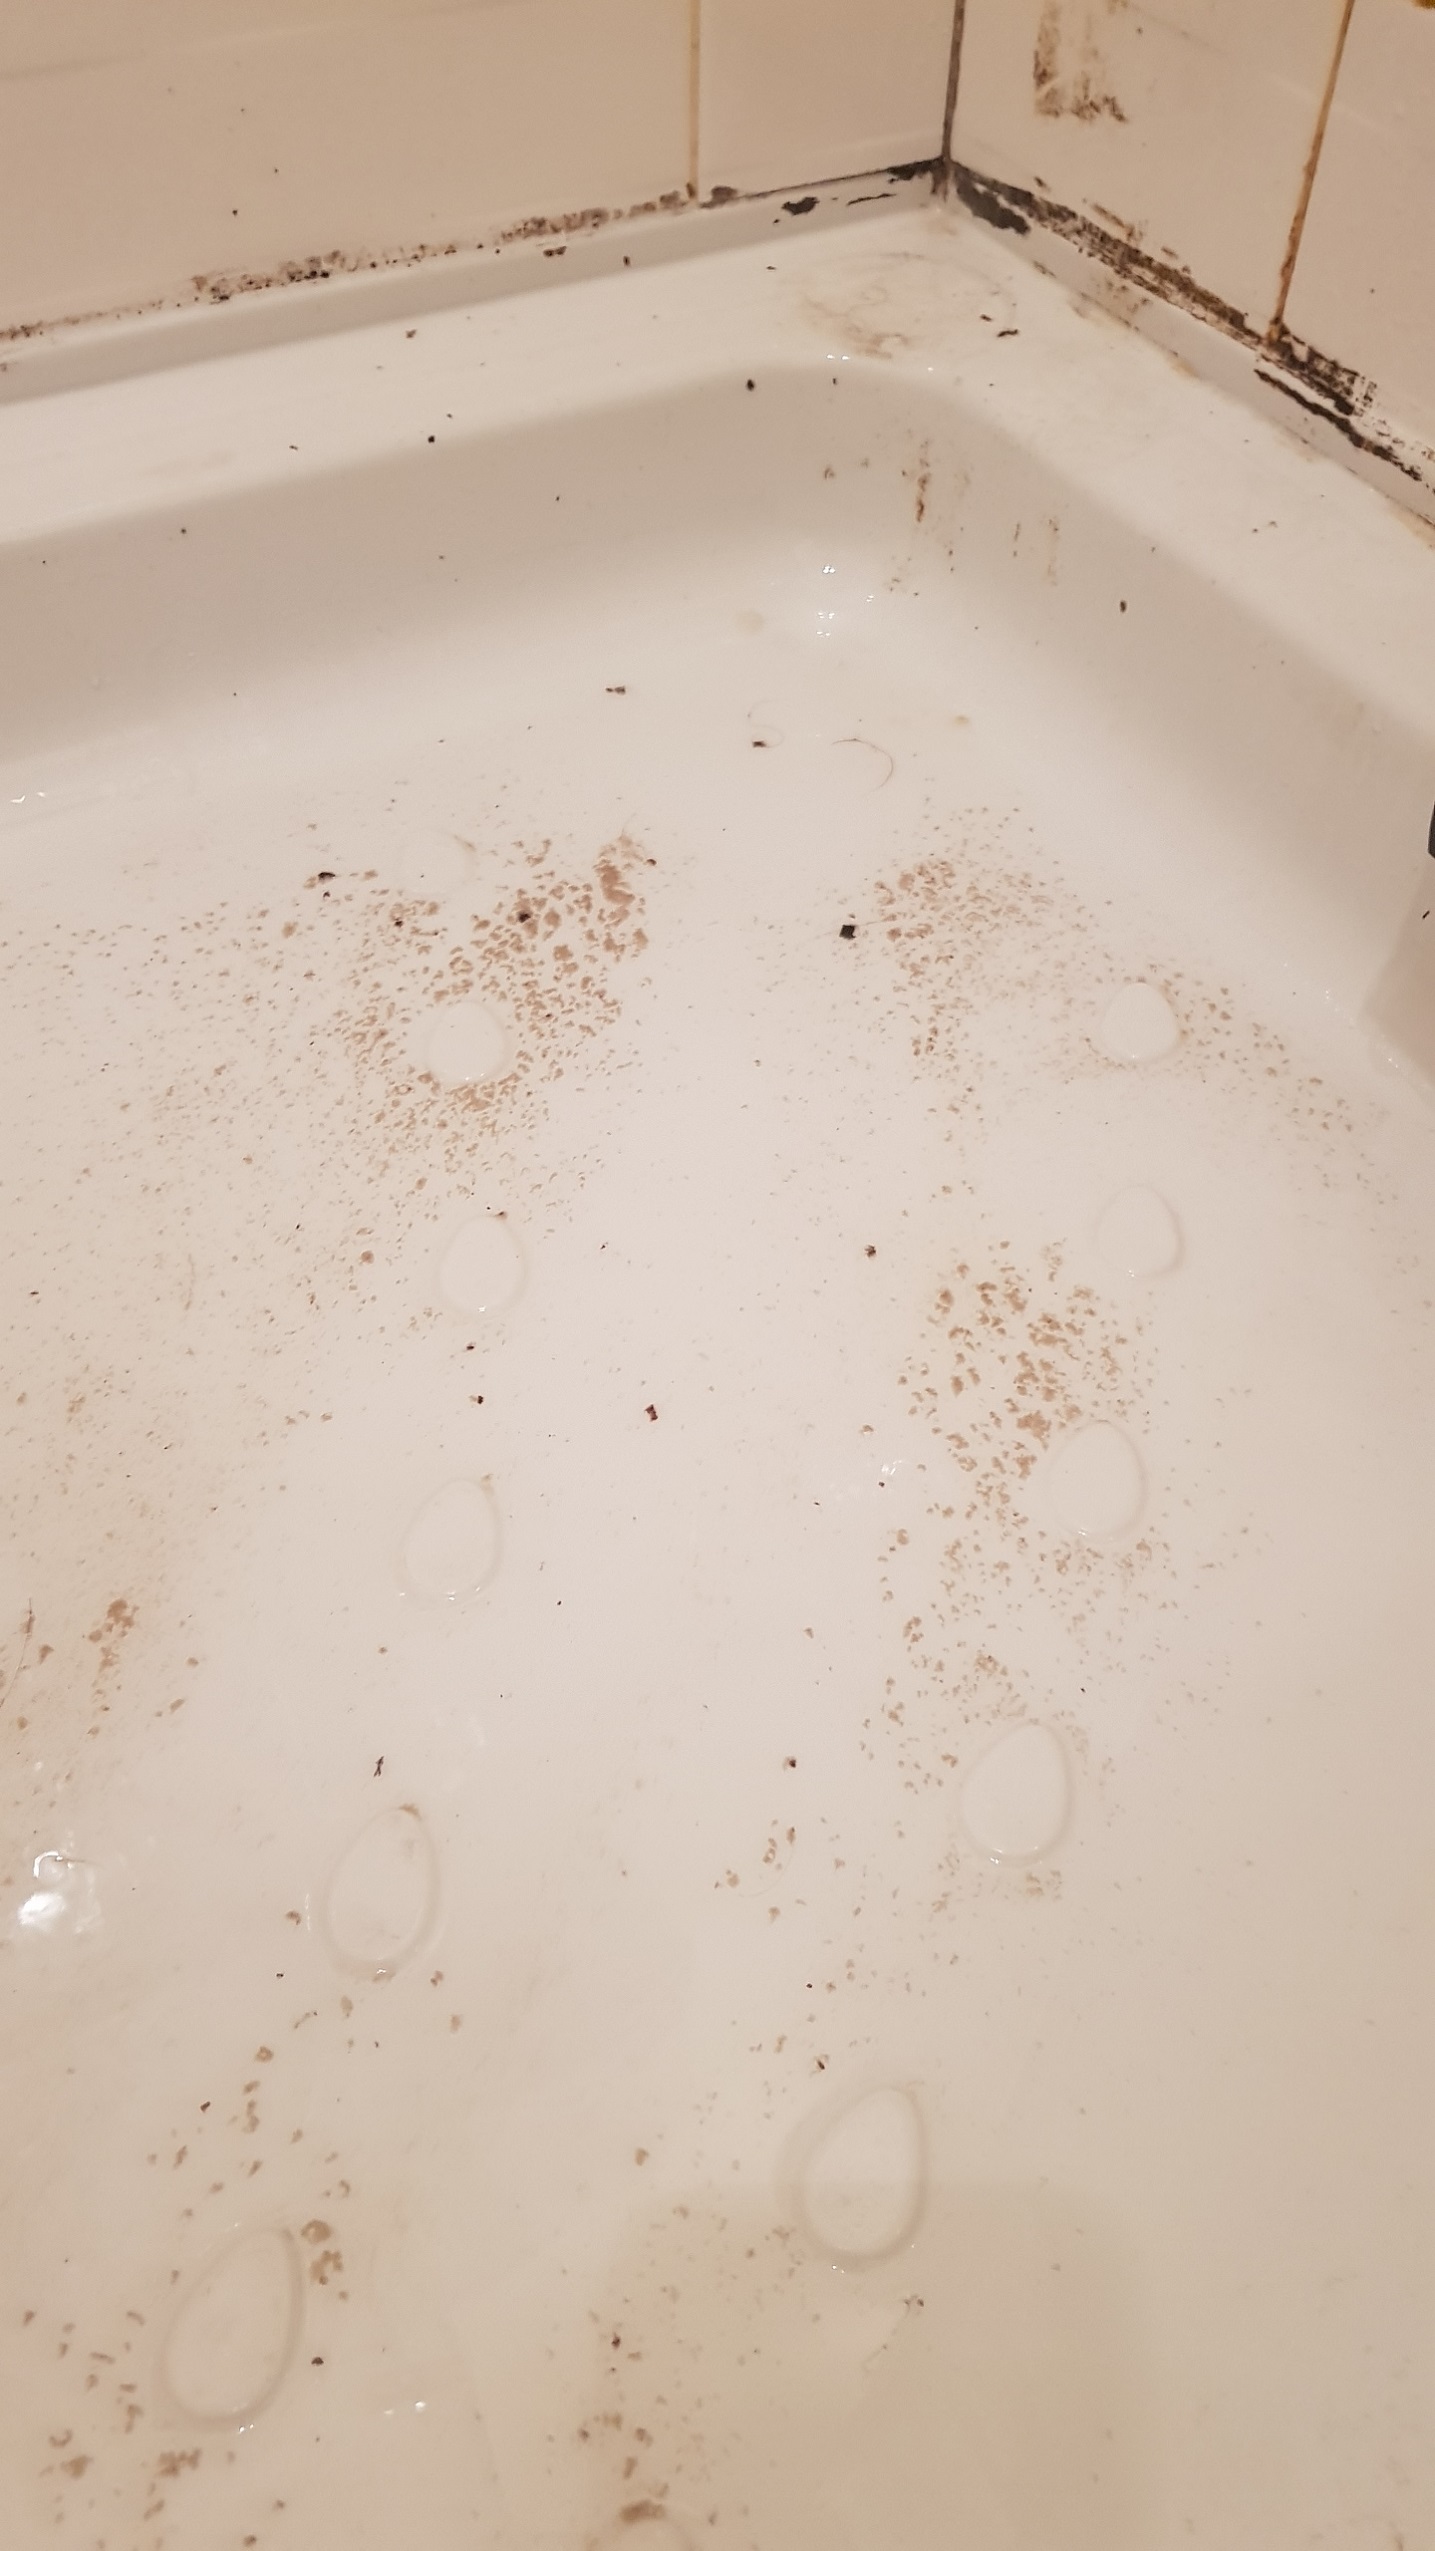
Grubby Shower Cubicle Before Cleaning Bolton-Upon-Dearne
As you can see from the photograph the grout was filthy, the silicone was mouldy, and the shower frame was caked in mouldy dirt. Over the years there had been a build-up of hard water and staining from products which leave a residue. They had used everyday cleaning products, but these had not been able to touch the problem as it had been left for too long.

I discussed with the clients how Tile Doctor could help, and how we would be able to deep clean the shower area and replace the mouldy silicone. I was confident we could get the renovate the cubicle and get it looking like new again. They were happy to accept my price and we arranged a time to complete the job. It would certainly be far cheaper than ripping out the shower cubicle and replacing with new.

Bolton Upon Dearne is a small village in the very middle of South Yorkshire, it is almost the same distance away from the centres of Barnsley, Rotherham and Doncaster. It has a rich history of coal mining but like many pit villages it has suffered since the pit closures of the 80’s and 90’s.

Cleaning/Repairing a Ceramic Tiled Shower Cubicle

To start the shower was treated with Tile Doctor Oxy Gel, being a gel this product sticks well to the vertical surfaces giving it time to break down grease and grime, you’ll see from the picture just how much dirt was released.

This was followed with a strong dilution of Tile Doctor Duo Clean which is great for restoring lighter coloured grout back to its original state as well as removing mould. After scrubbing the soiled water was easily drained away using the shower hose. The transformation was amazing, the area already looked so much more inviting!

Grubby Shower Cubicle During Grout Cleaning Bolton-Upon-Dearne

Sealing a Ceramic Tiled Shower Cubicle

Next the old silicone that had gone mouldy was removed with a sharp knife, this is a slow work as you have avoid damaging the tile or the shower tray. Additionally, a clean and dry surface is required for the new silicone to adhere well.

The tiles were Ceramic which are given a glazed surface during manufacture, so they don’t need a specialist sealant like natural stone. However, the surface of grout is cementous and attracts dirt easily so the whole shower wall was sealed using a can of Tile Doctor Wall and Grout Sealer. This gives a layer which will protect the tiles and grout and will ensure the tiles are easier to keep clean.

Grubby Shower Cubicle After Cleaning Bolton-Upon-Dearne
For everyday cleaning I recommended they use Tile Doctor Aqua-Pro which is an effective, yet pH neutral tile and grout cleaner designed for everyday use in Bathrooms and Kitchens. The formula eliminates soap scum build-up and hard water deposits and its neutral formula won’t prematurely degrade the sealer. Used regularly this will prevent the build-up they had previously experienced and will keep the tiles looking good for some time to come.

As you can imagine my client was very happy with the completed work.


Professional Restoration of a Ceramic Tiled Shower Cubicle in South Yorkshire

Shower Cubicle Renovation in Bolton Upon Dearne Read More »

Slate Tiled Floor Before During After Refurb Darfield

Dull and Dirty Slate Floor Stripped, Cleaned and Sealed in Darfield, Barnsley

The new owners of this property in Darfield were disappointed with the state of the Slate tiled kitchen floor which looked like it had never been cleaned. Since moving in they tried lots of different products to get it clean, but nothing had the desired effect.

After discussing the problem over the phone, I visited the house to run some product tests on the floor and discuss the options. After a few tests I could tell the floor had been sealed many times over trapping in layers and layers of dirt each time. It looked as if the floor had not been effectively cleaned prior to the numerous coats of seal being applied.

Slate Floor Before Cleaning Darfield Barnsley

Darfield’s is a village on the outskirts of Barnsley with a history that stretches back to Roman times, quite a few roman artefacts have been found around the village and are now on show at the local museum. But Darfield is most known for the 2 huge collieries that once stood there, below Darfield is a huge seam of coal that supplied the nation with coal for decades. These have long since closed but the mining history of the area remains.

The tests enabled me to work out which products would be the most effective and from that I was able to provide an accurate price for completing the work. All that was left was to schedule a date for my return.

Deep Cleaning a Slate Tiled Kitchen Floor in Darfield

With everything agreed I returned a few weeks later and set about stripping the slate of its’ very thick layer of old floor sealers. To do this a combination of Tile Doctor Remove and Go combined with Tile Doctor Pro-Clean was applied to the floor and left to dwell. These two products are powerful solutions that break down sealants and dirt, when used together they make short work of the job.

Slate Floor Cleaning Starts Darfield Barnsley

The slate floor was then scrubbed with a rotary floor machine fitted with a Black scrubbing pad. This abrasive action breaks the sealer down further until the cleaning solution turns black with dirt and old sealants. I kept working the floor in this way until all the old sealer and ingrained dirt was stripped away leaving the bare stone. The floor was then thoroughly rinsed with water, and all the slurry was removed with a wet vacuum. There was an awful lot of this as the floor really was dirty underneath.

Slate Floor During Sealing Removal Darfield Barnsley

Sealing a Slate Tiled Kitchen Floor in Darfield

After leaving the floor to dry off overnight I returned the next day to seal the floor using Tile Doctors High Shine Sealer. This product leaves a high shine almost glossy appearance which was the affect my customer was looking for. High Shine is a specially formulated water-based blend of acrylic polymers that provides durable stain resistance, its ideal for Slate floors and you can see from the photos on this page that it made an incredible difference to the floor and really brought out the beautiful natural colours in the stone.

Slate Floor During Sealing Darfield Barnsley

My client was very happy with the new floor, the natural colours of the floor now shone through, in fact the floor looked as if it had been laid recently, quite the transformation.

Slate Floor After Cleaning Sealing Darfield Barnsley

Before leaving I recommended, they use Tile Doctor Neutral Tile Cleaner to clean the floor going forward. This product is pH neutral so it won’t erode the newly applied sealer and will ensure the floor is protected for longer. The same could not be said for most household cleaning products which are not meant for use on natural stone and can remove the sealer over time.


Professional Restoration of a Slate Tiled Kitchen in South Yorkshire

Dull and Dirty Slate Floor Stripped, Cleaned and Sealed in Darfield, Barnsley Read More »

Dirty Quarry Tile Grout Before After Renovation Royston

Deep Cleaning Kitchen Quarry Tile and Grout in Royston

We were contacted about this modern quarry tile floor in the kitchen of a farmhouse in Royston, Barnsley. They were fed up of the grout making the floor look grotty and whatever they tried they couldn’t get the grout to look any better. They explained they had used lots of different cleaning products on the market, and had spent a fortune, but the floor still looked the same. Royston is a village right on the border of Barnsley and Wakefield, it’s situated in South Yorkshire but is historically a part of the West Riding of Yorkshire.

The trouble with Grout is its cementitious texture which traps dirt and I suspect that they were using a single bucket to apply and rinse their mop during cleaning. This results in the mop being rinsed in increasingly dirty water which is put back on the floor where it is brushed into the grout where it gets trapped. Ideally you should use two buckets, one containing the cleaning fluid and the second containing water where you rinse your mop afterwards.

Quarry Tiled Kitchen Floor Before Cleaning

There are several solutions ranging from continual grout cleaning through to replacing the grout which is expensive. In this case the Quarry tiles were the small 6in x 6in format which covered the entire ground floor of this old farmhouse and with the grout lines being 10mm wide replacing the grout would have been a mammoth effort.

My recommendation was to deep clean the Quarry tiles and grout, removing any sealer from the tiles in the process and then reseal the tiles and the grout to protect both from ingrained dirt. I demonstrated the process on a small test area to see how the floor would respond and much to the client’s surprise there was an immediately and dramatic improvement. They were more than happy to go ahead with my quote and get the floor sorted.

Deep Cleaning Quarry Tiled Kitchen Tiles and Grout Floor

We started by soaking manageable areas of the floor in a strong dilution of Tile Doctor Pro-Clean, it was left to work its magic for ten minutes before a rotary machine fitted with a rotary brush was used to scrub the floor. The slurry was then extracted using a wet vac before the floor was thoroughly rinsed with clean water then extracted with the wet vac again.

Quarry Tiled Kitchen Floor During Cleaning

The floor was quite large, so it took most of the day to repeat this process across the entire area scrubbing by hand where necessary to remove stubborn staining. By the end of the day the Quarry tile and grout was looking much cleaner and brighter and I had now doubt that once the floor had been sealed the customer would be really pleased with the result. The floor was left overnight so it would be ready for sealing the next day.

Quarry Tiled Kitchen Floor During Cleaning

Sealing a Quarry Tiled Kitchen Floor

I returned the following morning and started by testing the floor was dry using a moisture meter. Applying a sealer to a damp floor would be counter productive as the seal would not cure. The floor was dry, so we applied an impregnating sealer to the Quarry tile and Grout called Tile Doctor Ultra-Seal. This is a penetrating sealer which doesn’t affect the look of the tile or darken the grout. It’s a natural look sealer which won’t make the floor shiny but is formulated to provide maximum stain protection. It is also an excellent grout sealer so will help keep the grout lines looking great.

Quarry Tiled Kitchen Floor After Cleaning

They were over the moon with the new look floor!

For after I recommended the use of Tile Doctor Neutral Tile Cleaner which will keep the floor in the best condition. It is pH balanced so will won’t prematurely erode the sealer like the stronger products you find in supermarkets which can break down sealers with constant use.


Professional Restoration of a Quarry Tiled Kitchen in South Yorkshire

Deep Cleaning Kitchen Quarry Tile and Grout in Royston Read More »

Sandstone Tiled Kitchen Floor Before After Renovation Mapplewell

Sandstone Tiled Kitchen Floor Renovated in Mapplewell, Barnsley

We were contacted by a family in the Barnsley area of South Yorkshire who were tearing their hair out trying to keep their Sandstone Tiled floor clean. The kitchen area was especially grubby and once the island had been removed during recent renovations, the dirty floor really stood out.

The house was located on the Northern tip of Barnsley in Mapplewell, close to the border of South and West Yorkshire, an area which is steeped in coal mining history. Even though all the coal mines have gone there’s still lots of evidence of its’ proud mining history in the area.

Sandstone Tiled Floor Before Renovation in Mapplewell

After inspecting the tiles, I could see their problem revolved around the fact that the Sandstone had a texture to it and the previous sealer used was an impregnating sealer, as a result the dirt had no problem sticking to the stone as you can see from the picture. At Tile Doctor we see Sandstone/flagstones used a lot as Kitchen flooring, it is a popular choice due to it being so hardwearing, however as with any natural stone it needs to be sealed to protect it and bring out its beauty and colour.

I demonstrated the cleaning process on a small part of the floor, which they were very satisfied with. The testing also enables me to understand what it would take to renovate the whole floor and provide them with an accurate price. They were happy with my proposal and keen for me to begin the work which would take two days to complete, one day to clean the floor and returning a further day to complete the sealing of the floor.

Cleaning a Sandstone Tiled Kitchen Floor

On arrival at the agreed date I set about preparing the working area by removing the kickboards and protecting other surfaces that might come into contact with the cleaning products and equipment.

My process for cleaning the floor was to spray the floor first with a strong dilution of Tile Doctor Remove and Go which was left to soak into the stone for ten minutes so it could breakdown old sealers and dirt. The solution was then scrubbed into the stone using a rotary floor buffer fitted with a 400-grit diamond encrusted burnishing pad. It didn’t take long for solution to turn grey with the soil that was released from the floor and the true beauty of the Sandstone started to appear. The dirty slurry was extracted with a wet vacuum and the floor given a thorough inspection. Stubborn stains were spot-treated using the same process and once I was satisfied the floor was given a thorough rinse to remove any trace of cleaning product and dirt. The floor was dried as much as possible with the wet vacuum and then assisted with fans left to dry off fully overnight. It was clear to me at this stage that the floor was already showing significant improvement.

Sandstone Tiled Kitchen Floor After Cleaning in Mapplewell

Sealing a Sandstone Tiled Kitchen Floor

The next day I tested the stone for moisture using a damp meter to ensure it was dry before sealing. It confirmed that the floor had dried overnight and would be able to start applying the sealer.

It was already clear that an impregnating sealer was not the best choice for a textured stone so a topical sealer would be the best option, not only does it bring out the colours of the stone it also adds a barrier between the fine pores of the stone and dirt. Six coats of Tile Doctors Seal & Go were applied to ensure the stone was fully sealed, which took some time as you have to wait for the first coat to dry before applying the next. Seal and Go is a water based acrylic satin sealer which is perfect for this type of floor. It gives a nice natural finish but allows the natural colour and beauty of the floor to shine through.

Sandstone Tiled Floor During Sealing in Mapplewell

The sandstone now looks much lighter and cleaner, certainly my client was very happy with the transformation of the floor, especially where the island had been. In fact, we have agreed with the customer we will return every year to maintain the floor to keep it looking in perfect condition. In the meantime, they should be able to easily keep it clean using Tile Doctor Neutral Tile Cleaner which is designed for the regular cleaning for sealed floors like this.

Sandstone Tiled Floor After Renovation in Mapplewell


Professional Restoration of a Sandstone Tiled Floor in South Yorkshire

Sandstone Tiled Kitchen Floor Renovated in Mapplewell, Barnsley Read More »

Dirty Textured Ceramic Tiles Before After Cleaning Barnsley South Yorkshire

Textured Ceramic Tile Cleaning, Barnsley

This ceramic tiled floor at a house in the old coal mining town of Barnsley was trapping dirt and bothering our client who was finding it impossible to keep clean. In fact, she got in touch with Tile Doctor to explain that however they cleaned the floor they just couldn’t get the tiles cleaned and looking bright.

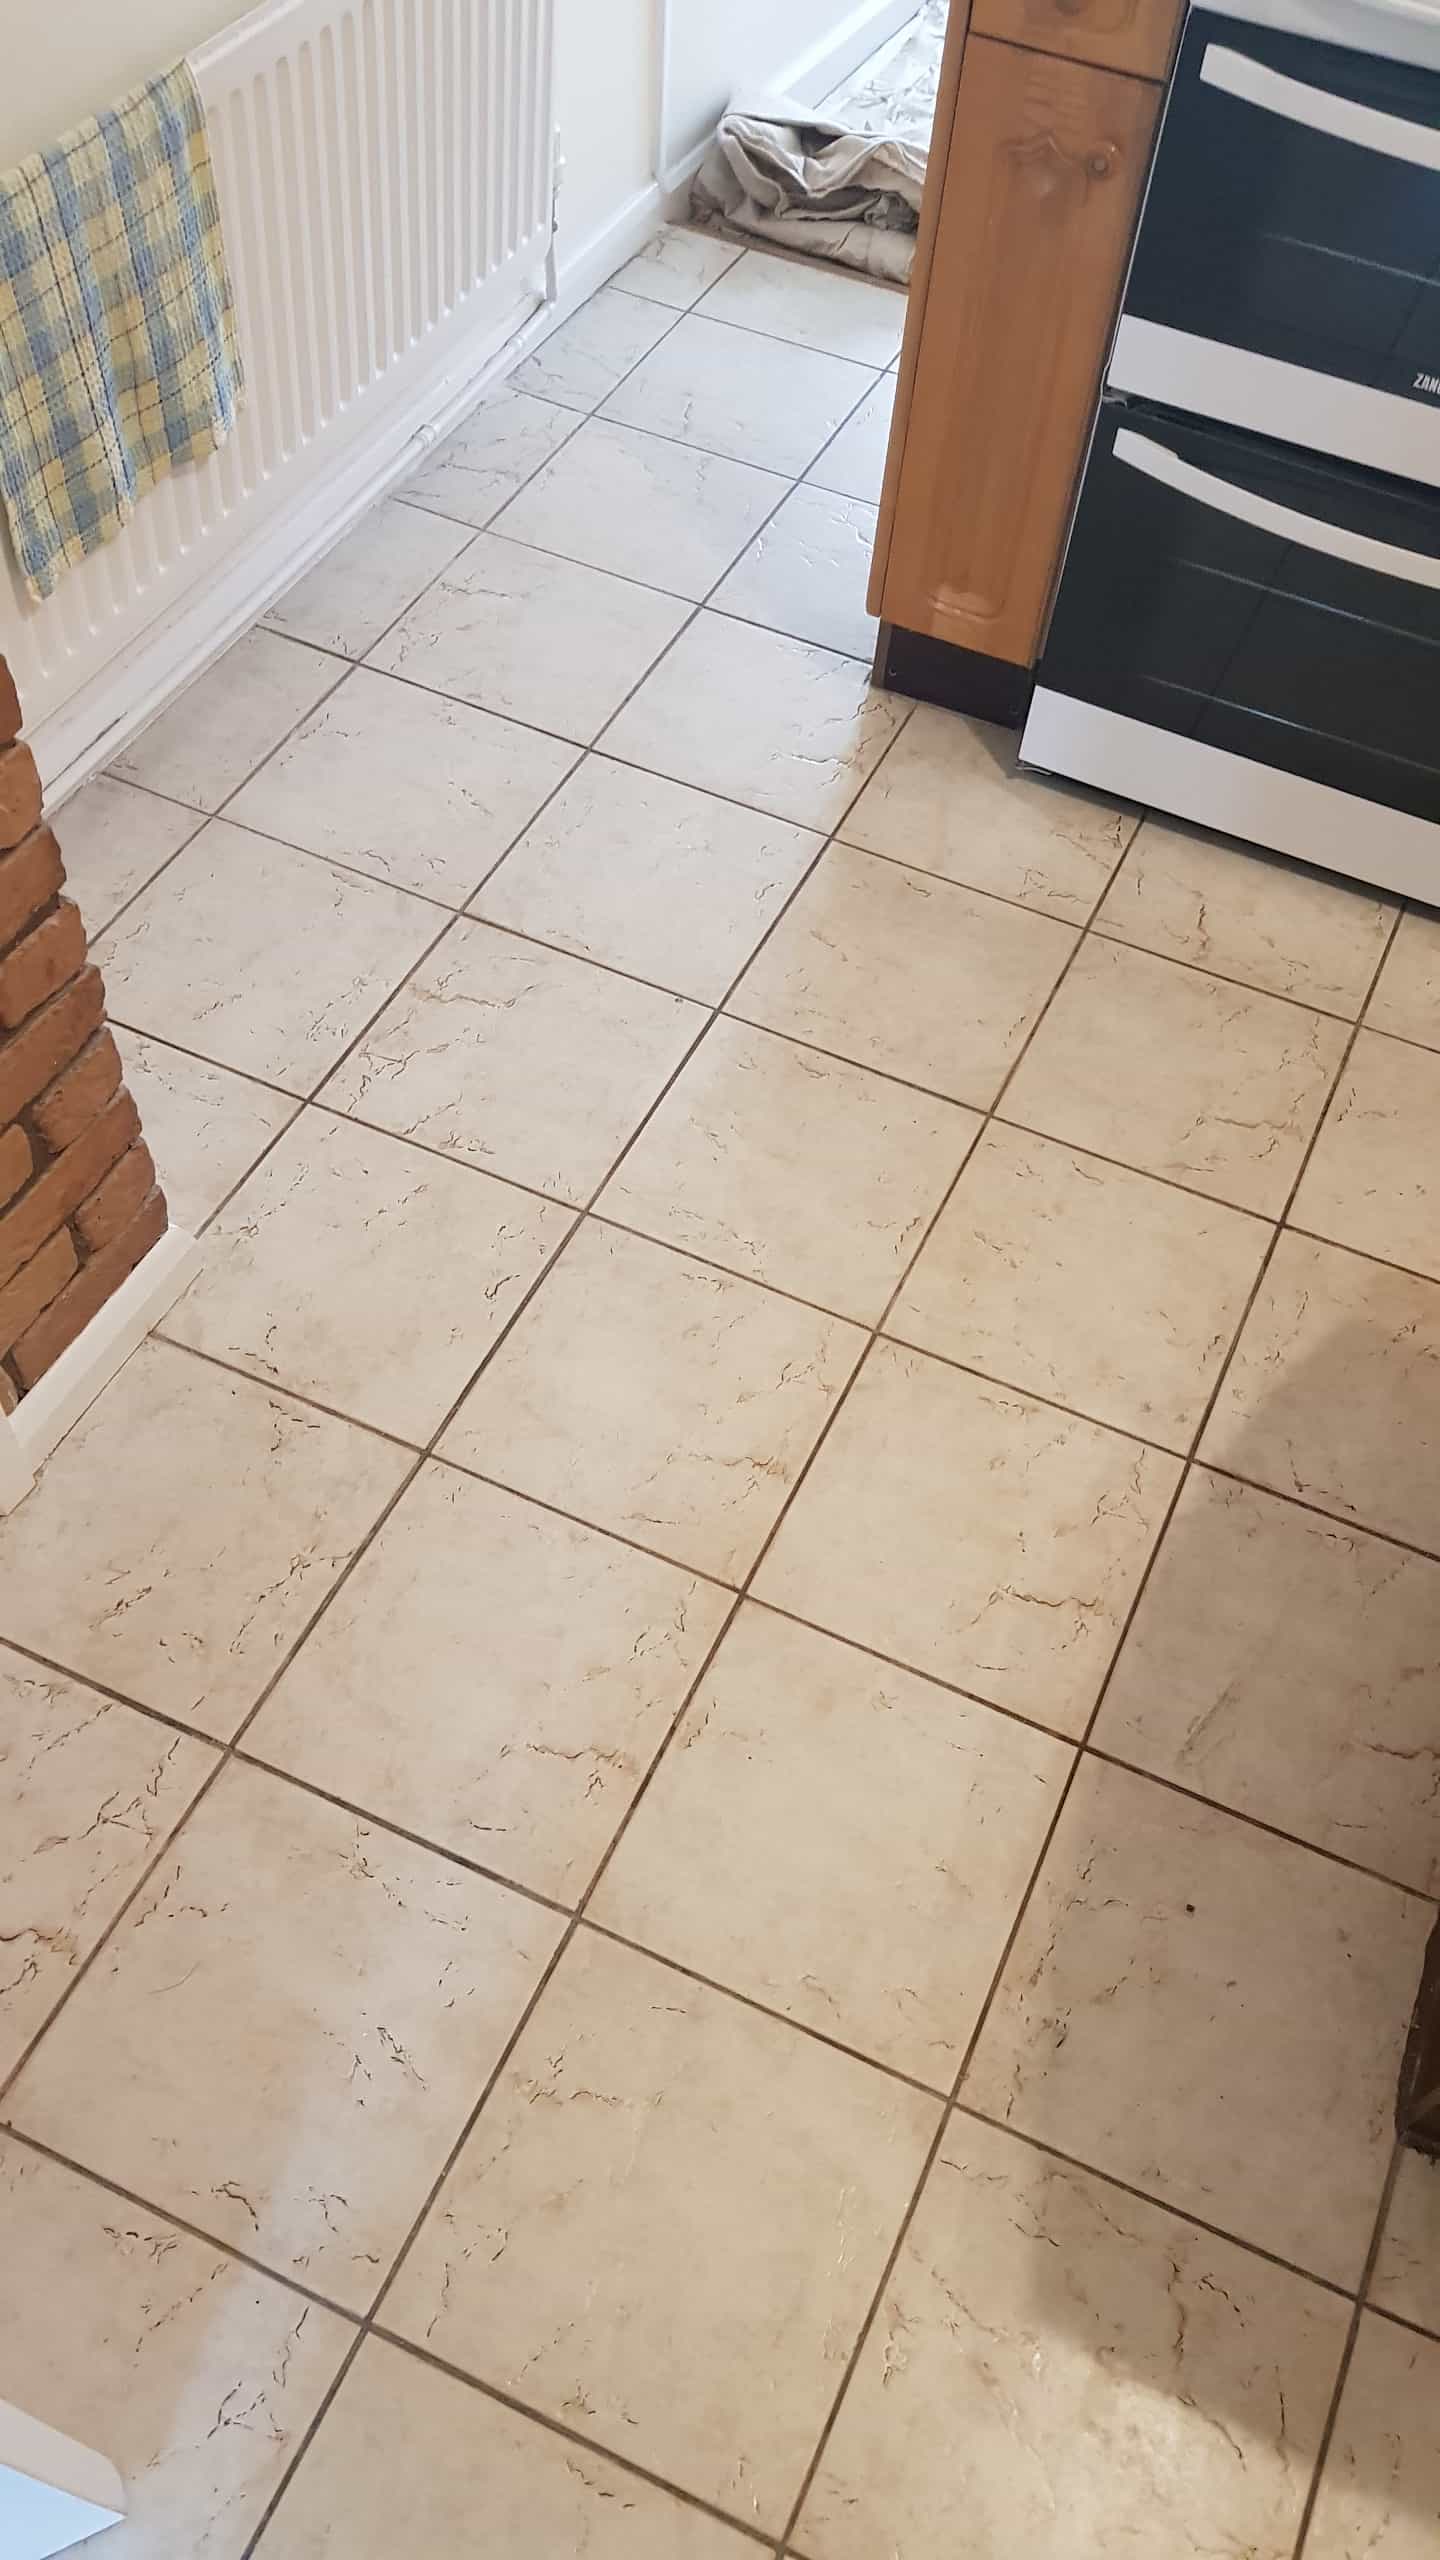
Textured Ceramic Tile Barnsley Before Cleaning

Barnsley is my local town, so it wasn’t long before I was able to pop over to the property and survey the floor. When I got there I could see that the tiles, which had been laid throughout the Hallway and Kitchen, were Textured Ceramic which have the advantage of being anti-slip but the disadvantage of being a pain to keep clean. The rougher textured surface traps dirt easily and in this case no amount of mopping was going to clean them.

Textured Ceramic Tile Barnsley Before Cleaning Textured Ceramic Tile Barnsley Before Cleaning

My customer explained they had tried numerous household cleaners but had been unable to get them really looking clean. I was confident the floor could be deep cleaned and brought back to life using Tile Doctor products and that the job should only take a day to complete. Happy with the quote, we worked out a mutually convenient date for me to return and clean the floor.

Deep Cleaning a Textured Ceramic Tiled Floor

I started by giving the floor a really long soak with a medium dilution of Tile Doctor Pro-Clean, the long dwell time allows the product to soak right into every bit of dirt that was clinging to the tiles and break it down. Pro-Clean is a concentrated, multi-purpose high-alkaline cleaner, stripper and degreaser which can be diluted in different ratios dependent on the situation. In this instance we diluted with 3 to 5 parts water to use as a very effective cleaner which is the recommended strength for removing inground dirt from areas that have been neglected or subjected to heavy use.

Textured Ceramic Tile Barnsley During Cleaning Textured Ceramic Tile Barnsley During Cleaning

A black scrubbing pad was then fitted to a rotary floor buffer and run over the floor at slow speed to attack the dirt. It wasn’t long before the Pro-Clean turned dark with the loose dirt and the tiles started looking lighter in colour. The now thick brown slurry was removed using a wet vacuum and then the floor was given a rinse with water which was also extracted with the wet vacuum. The process was repeated over the entire floor and doubly so where the muck was proving stubborn to remove. After we had finished the floor looked lighter and much cleaner, the grout lines also looked cleaner too.

Textured Ceramic Tile Barnsley During Cleaning Textured Ceramic Tile Barnsley During Cleaning

Our client was so relieved to have the floor looking like new again, it had been bothering her for quite some time. As you can see from the pictures the difference was quite apparent.

Textured Ceramic Tile Barnsley After Cleaning Textured Ceramic Tile Barnsley After Cleaning

Before leaving we discussed the best way to keep the floor clean. Normally I would recommend a pH neutral tile cleaning product for cleaning tiles however in this case with no sealer present (ceramic tiles don’t usually accept a sealer) and given the textured surface I felt the continued use of Tile Doctor Pro-Clean would be their best option.


Professional Cleaning of Textured Ceramic Tiles in South Yorkshire

Textured Ceramic Tile Cleaning, Barnsley Read More »

Slate Tiled Kitchen Barnsley Before and After Cleaning

Restoring a Beautiful Slate Tiled Kitchen Floor in Silkstone, Barnsley

The owner of this house in Silkstone, which is a village situated in the foothills of the Pennines a few miles West of Barnsley, had inherited this Kitchen Slate floor from the previous owner of the house and in the years, they’d lived at the house they hadn’t done anything with the floor. Slate tiles are beautiful but like any natural stone you really need to maintain the sealer if you want them to stay that way, once the sealer wears off dirt can penetrate the pores of the stone resulting in a floor that always looks dull and dirty.

Slate Tiled Kitchen Barnsley Before Cleaning

In this case of this Slate floor the sealer had worn off many years prior and a thick layer of grime had built up on top of what was once an amazing looking floor. Stone floors never come with a care guide and the process of degradation happens so slowly, so you can understand how this could happen over time.

Slate Tiled Kitchen Barnsley Before Cleaning

Cleaning Dirty Slate Kitchen Tiles

Before starting I protected the wooden kitchen units from splashing using plastic sheeting. Next step was to soak the tiles in a strong dilution of Tile Doctor Remove and Go and Pro-Clean combined into a strong cleaning and stripping cocktail. The solution was left to dwell for ten minutes before being scrubbed in using a black scrubbing pad fitted to a rotary floor machine running at slow speed to break through the grime and the sealers and oils that the previous owner had used on the slate.

The pad is good at scrubbing the tiles but struggles to get into the grout so after the tiles were scrubbed I followed by running a stiff brush along the grout lines to give them a thorough clean.

The soiled cleaning solution was rinsed off the tiles with water and then extracted off the floor using a wet vacuum. With the floor clear it was inspected, and problem areas re-treated using the same process.

Once I was satisfied that the Slate and the Grout was clean and clear of old sealers I gave the whole floor a final rinse to remove any trace of cleaning products and then dried as much as possible using the wet vacuum. The floor was then left to dry out fully overnight.

Sealing Kitchen Slate Tiles

Returning to the property the next day, I ran some quick damp tests to check for any excess moisture that might have prevented me from sealing the floor. We will always do this as excess moisture can affect the sealer curing.

Our client had previously decided that they liked the look of our High Shine Sealer due to how it brings the stunning colours of the Slate out. High Shine Sealer is a specially formulated water-based blend of acrylic polymers that provides both a stain resistant surface seal and a durable high-sheen finish. Four coats of sealer were applied and when the customer arrived home later that day they were totally blown away by the floor and how amazing it looked.

Slate Tiled Kitchen Barnsley After Cleaning Slate Tiled Kitchen Barnsley After Cleaning


Rejuvenating a Multicoloured Slate Tiled Kitchen Floor in Yorkshire

Restoring a Beautiful Slate Tiled Kitchen Floor in Silkstone, Barnsley Read More »
Scroll to Top