Work by Category

South-Yorkshire-Tile-Doctor

Welcome to my Work History archive where you will find detailed examples of Tile, Grout and Stone Cleaning and Renovation work carried out through South-Yorkshire.

To make things easier to find I have organised the posts by the most popular types of Tile and Stone. I also renovate other materials so if you’re looking for something else do get in touch as it’s highly likely we have the solution.

Popular requests include Ceramic Tile, Encaustic Cement, Fireplaces, Flagstone Pavers, Grout Cleaning, Limestone, Marble, Porcelain Tile, Quarry Tile, Sandstone, Slate, Terracotta Tile, Terrazzo Floors, Travertine, Victorian Flooring and Vinyl Floors.

Ceramic Tiled Floor Grout Recoloured Wickersley Rotherham

Light Grey Grout Re-Colouring in a Wickersley Kitchen

This Ceramic Tiled kitchen floor at a property in Wickersley was proving to be a pain for our clients, whatever they did the grout just looked dark, dirty, and unsightly. No amount of scrubbing would make a difference and eager to find a solution they wasted a lot of money on various products trying to clean the grout lines, but nothing had worked. Ceramic tiles are glazed which makes them very easy to clean, grout however is a different story.

Ceramic Tiled Floor Before Grout ReColour Wickersley Rotherham

Wickersley is in Rotherham close to the 3 main motorways in South Yorkshire, the M1, M18 and A1. The village took its’ name from the Wickersley family who eventually moved to Sheffield and built the famous Broom Hall, incredibly we restored 100sqm of stone flooring in that very house not too long back. It was a beautiful restoration.

On the first visit we tried a few of our products to clean the grout lines up but sometimes grout just can’t be cleaned, if the staining has penetrated the surface layer and gone right down into the grout it is stained forever. Grinding the grout out and putting in new grout is a big messy expensive job. For this reason, our grout recolouring service is an ideal option and the best thing about it is once it is recoloured the grout is protected and stain resistant.

Tile Doctor have a range of ten grout colours to choose from and in this case our client chose the light grey colour. They were happy to go ahead with our quote and just thankful that we were able to do it relatively inexpensively and without making a huge mess!

Applying Light Grey Grout Colourant to Ceramic Kitchen Tiles

Work started by treating the grout lines with an acidic pre-treater that comes with the Grout Colourant kit that Tile Doctor sell, Tile Doctor Grout Colourant Pre-Treat cleaner, this gets rid of any contamination and prepares the grout for the colourant, so you get a superior bond.

Once dry the Light Grey Grout Colourant was applied the grout lines with a small brush. A steady hand is required, and you need to ensure any excess is immediately wiped away before it dries. It is quite a slow job, but very satisfying when you see the difference it makes. Glazed tiles are sealed during manufacture, so we do not need to apply a sealer like we do on most of our jobs.
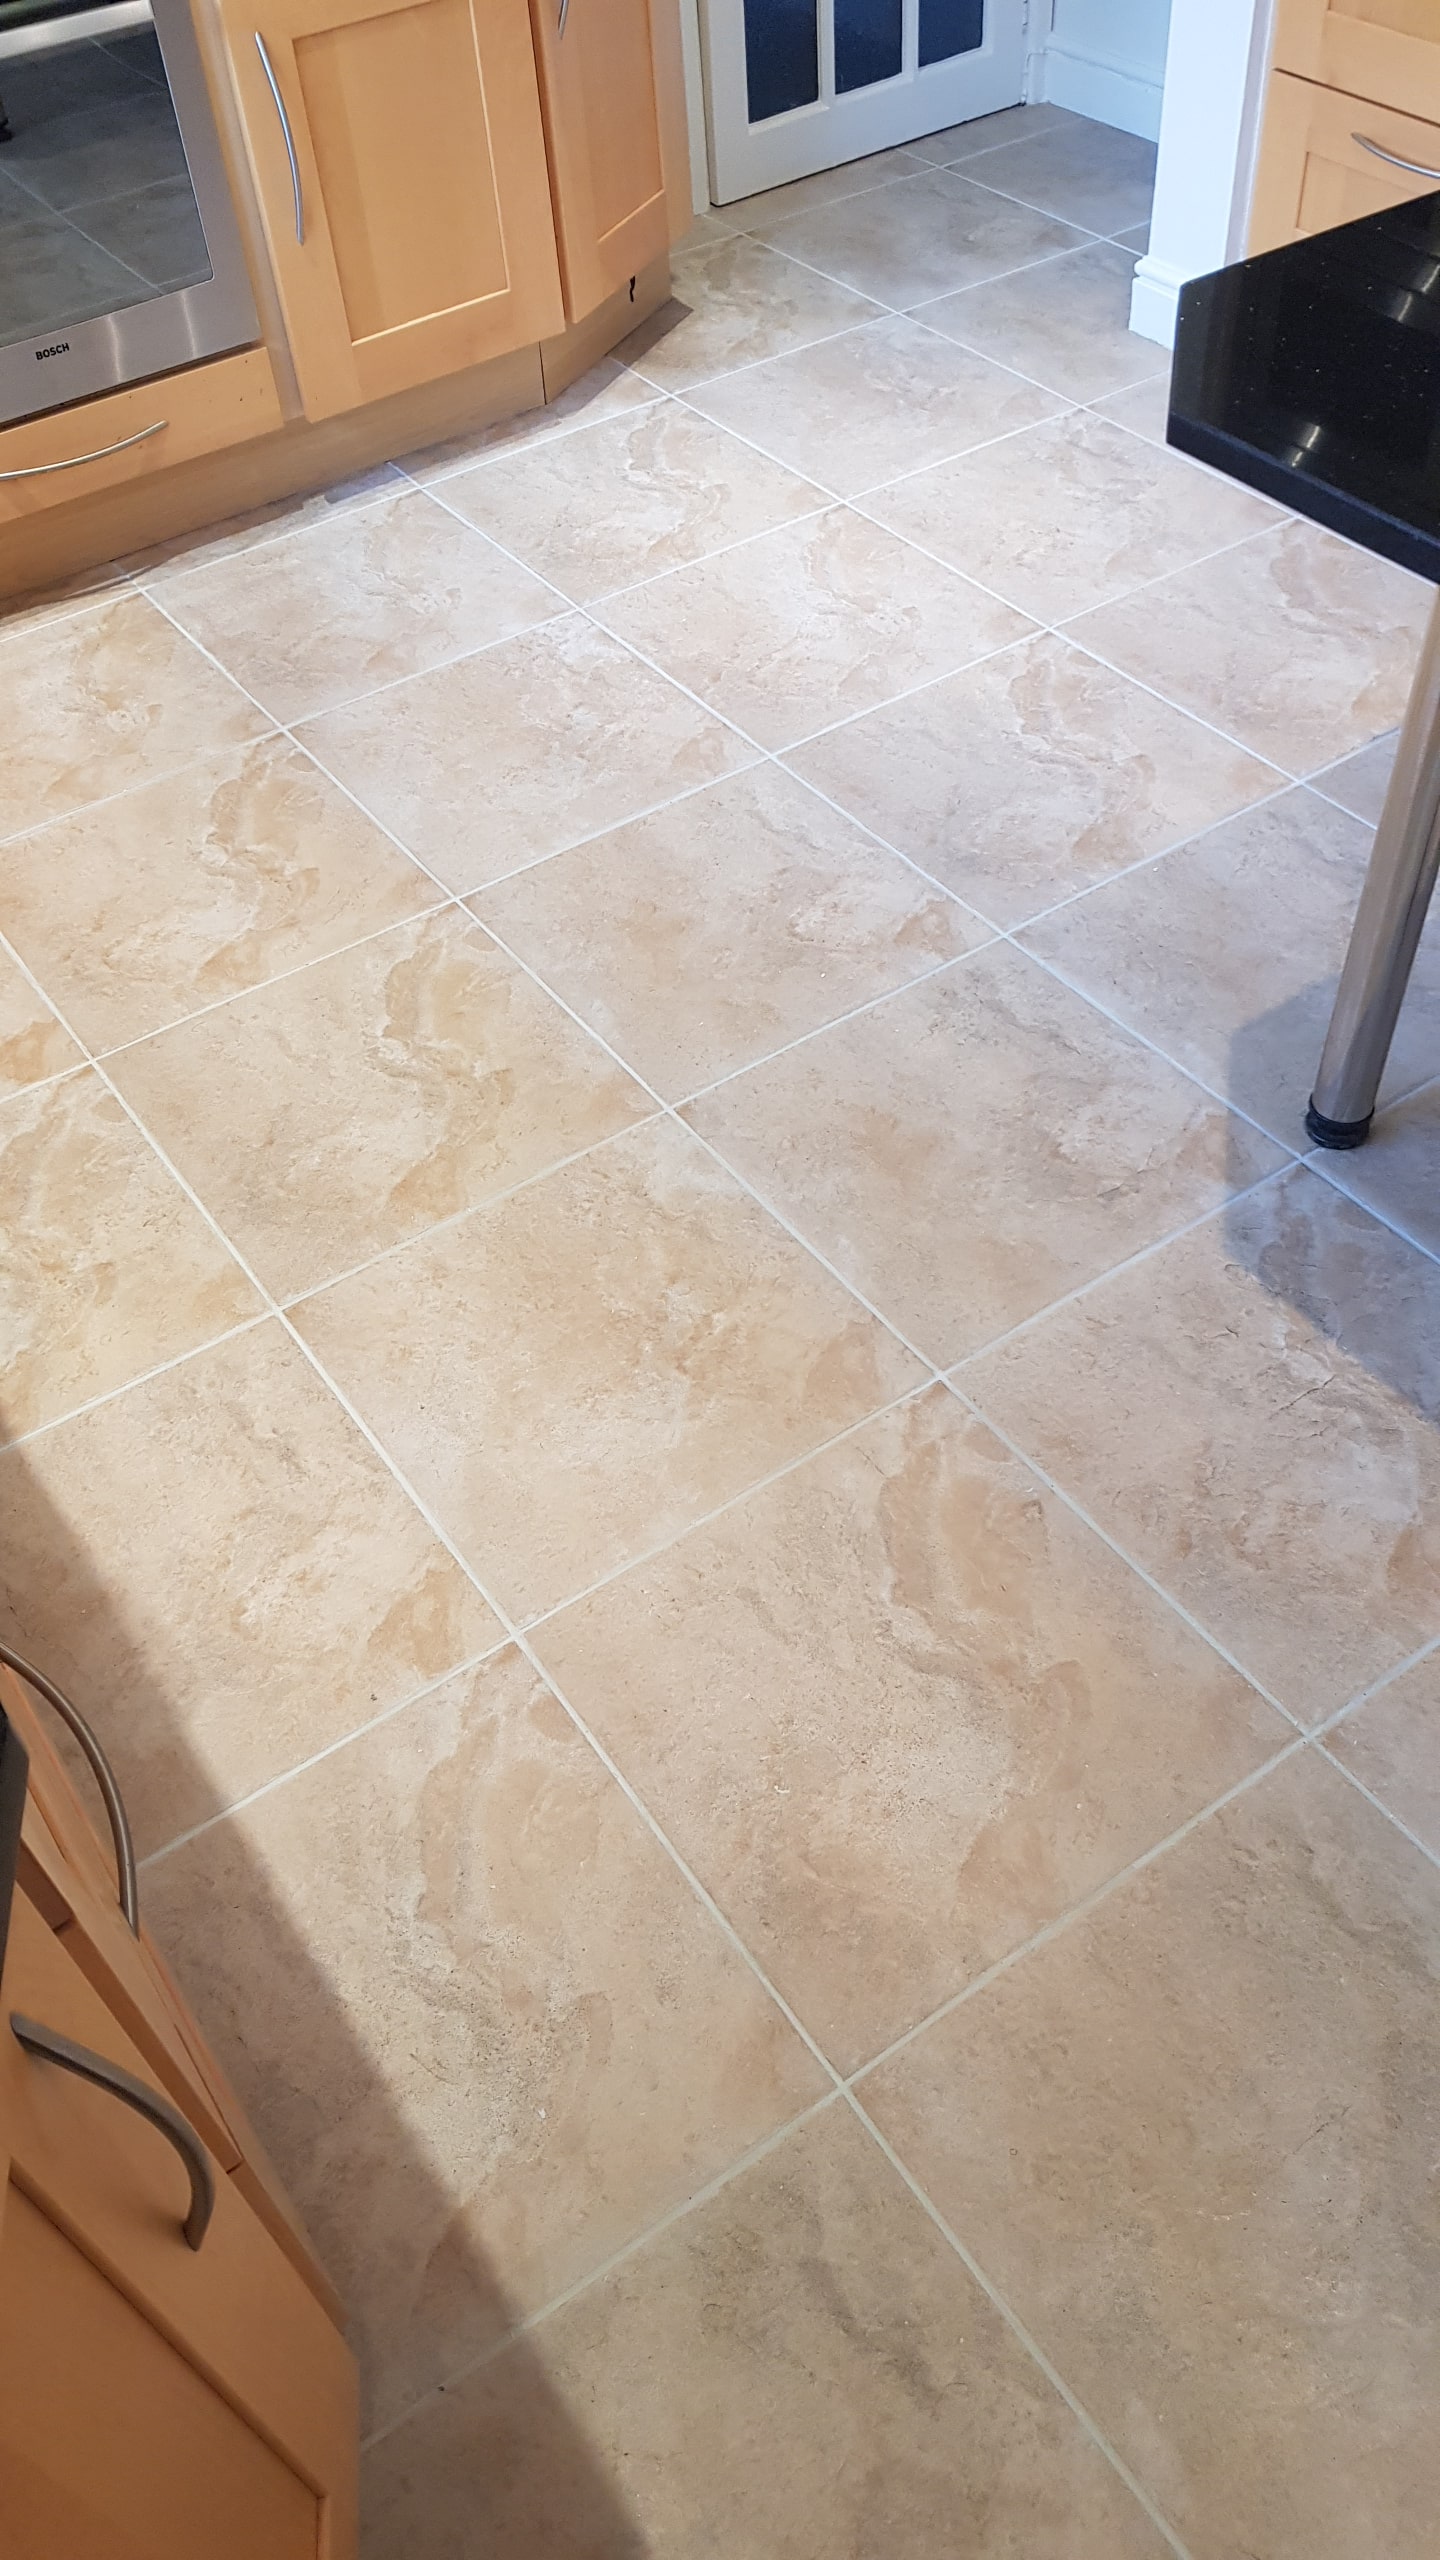
Ceramic Tiled Floor After Grout ReColour Wickersley Rotherham

The customer was over the moon with the transformation, the grubby grout lines had been irradicated and because the grout colourant forms a barrier over the grout, they will remain looking good for a long time to come. For aftercare cleaning I recommended using Tile Doctor Neutral Tile Cleaner which is pH neutral and gentle enough to use on a regular basis, it also has a nice fresh smell.


Professional Grout Cleaning Service in Rotherham

Light Grey Grout Re-Colouring in a Wickersley Kitchen Read More »

Quarry Tiled Floor Renovation Askern Doncaster

Full Restoration of a 150-Year-old Clay Quarry Tiled Floor in Askern

The owner of this house in Askern north of Doncaster was unhappy with the state of its Quarry Tiled Kitchen floor and was contemplating having it ripped up. The house was around 150-years old so this would have been a real shame and after a long conversation I managed to persuade the owner into letting us restore it. Restoring the floor is not only a much cheaper option than having a new floor installed, but it is also much better for the environment. On top of that original features like these original clay Quarry tiles are much sought after and add character to the property which otherwise would have been lost.

A previous owner of this property had taken out some of the old thick clay Quarry tiles and replaced them with some modern Quarry tiles that looked very out of place, they ruined the look of the floor and the current owner wanted them replacing as well as numerous tile which were damaged. In addition, there were two areas where renovations had taken place which had exposed concreted sections of floor which needed to be tiled too. All in all, about 150 tiles were to be installed, fortunately I managed to source a batch of suitable reclaimed tiles which would match well with originals.

Clay Quarry Tiled Floor Before Restoration Askern

Askern is right on the edge of the Borough of Doncaster and is only a stone’s throw away from the North Yorkshire border. The history of Askern can be traced back to the 14th century. It really started to grow however in the 19th century when this property was built, due to the local mineral water which made it famous as a Spa town.

Repairing a Clay Quarry Tiled Kitchen Floor

The restoration began with the removal of the poorly matched red Quarry tiles and the cracked tiles. Another factor I had to contend with here was the difference in the thickness of the more recent tiles compared with that of the original tiles which were much thicker.

Clay Quarry Tiled Floor Tile Thickness

The concreted areas were also carefully dug out so they would be deep enough for a new level subfloor to be poured giving the replacement tiles a good bed to lay on.

Clay Quarry Tiled Floor During Tile Removal Askern Clay Quarry Tiled Floor Installing New Subfloor Askern

As I mentioned earlier there were roughly 150 tiles in different parts of the Kitchen to be installed, grouted, and finally left to set so it took some time to complete.

Clay Quarry Tiled Floor Fitting Replacement Tiles Askern

Cleaning and repairing a Clay Quarry Tiled Kitchen Floor

We returned a few days later to start cleaning the floor. My process for this was to apply a strong dilution of Tile Doctor Pro-Clean to the floor and then leave it to soak in for about ten minutes. Then I followed up by scrubbing the floor with a rotary floor buffer fitted with a black stripping pad.

After scrubbing each tile several times, the slurry generated was rinsed off with water and then extracted with an industrial wet vacuum. For the more stubborn areas this process was repeated until I was satisfied the floor was as clean as it could be and that all the decades of muck and grime stuck to the old tiles had been removed.

Sealing a Clay Tiled Kitchen Floor

Once I was happy with the floor it was left to dry over a week, this is important as clay tiles can take a long time to dry and the floor needed to be bone dry to achieve the best results when sealing. When I eventually returned six coats of Tile Doctor Seal & Go Extra were applied to the floor giving the floor a beautifully satin look and protecting the floor for years to come.

Clay Quarry Tiled Floor After Restoration Askern

The client was very happy with the work we had carried out and is looking forward to continuing the renovation of the property including the installation of a new kitchen. For after care I recommended Tile Doctor Neutral Tile Cleaner. This is an effective cleaner that has a neutral pH formula that will not prematurely erode the newly applied sealer like many stronger supermarket products.


Professional Restoration of Old Clay Quarry Tiled Kitchen Floor in South Yorkshire

Full Restoration of a 150-Year-old Clay Quarry Tiled Floor in Askern Read More »

Porcelain Kitchen Tile Replacement Sheffield South Yorkshire

Kitchen Tile Replaced and Grout Recoloured on Ecclesall Road, Sheffield

The owners of this property in Sheffield’s famous Ecclesall Road were so fed up with the discoloured White grout in their Porcelain Tiled Kitchen they decided to replace it themselves. So, armed with new grout and a grout removal tool from a budget supermarket chain they set about the work. Unfortunately, twelve of the tiles became chipped at the edges during the process and what started as a good idea soon turned into a DIY disaster.

Having given up on the project they called Tile Doctor to see if we could get it restored for them. Having completed a lot of tile renovation work in Sheffield I got the call to visit the property and come up with a plan to resolve the situation. It’s difficult to repair chips in Porcelain tiles, especially along the edges so I recommended removing and replacing the chipped tiles and then give the floor a facelift by recolouring the grout back to white. I also recommended throwing the cheap grout removal tool in the bin in case they were tempted to use it again.

If you’re not familiar with Sheffield, you should know that the Ecclesall Road stretches 3.6 miles from the city centre South West of Sheffield to Whirlow. It’s a busy trading area with shops, restaurants and many green spaces, its also considered to be one of the most affluent districts.

Cleaning and Repairing a Polished Porcelain Tiled Bathroom

We started by removing all the grout from around the damaged area taking care to avoid damaging the neighbouring tiles as we chiselled the damaged tiles out. Once all 12 polished Porcelain tiles were removed and the debris cleared up replacements were fixed in place then and grouted them.

Porcelain Tiled Floor During Tile Removal Sheffield Porcelain Tiled Floor During Tile Removal Sheffield

Luckily, the client had been able to source some of the same tiles, which avoided the need for a complete renovation.

Porcelain Tiled Floor During Tile Removal Sheffield Porcelain Tiled Floor During Tile Replacement Sheffield

We left the tiles to set and dry overnight and returned the next morning to compete the next part of the job to renovate the grout.

Grout Colouring a Porcelain Tiled Kitchen

Before applying the Grout Colourant, the floor was given a general clean and then the grout given a scrub using Tile Doctor’s Grout Colourant Pre-Treater. This product cleans and slightly etches the surface of the grout to ensure a stronger bond with the colourant.

Porcelain Tiled Floor During Grout Recolouring Sheffield

Once the grout was dry a White Tile Doctor Grout Colourant was applied over all the grout joints. This is a delicate job which needs patience, and you have to remember to remove any excess colourant off the tile quickly before it dries. It’s worth mentioning that the Tile Doctor Grout Colourant range is available in 10 different popular shades, so it is a very versatile product, which can bring back to life many tiled surfaces. In this instance it made the grout look sparkling white, now the grout lines have been coloured the grout will stay stain free and bright white.

Porcelain Tiled Floor After Tile Replacement and Grout Colouring Sheffield


Professional Restoration of a Polished Porcelain Tiled Bathroom in South Yorkshire

Kitchen Tile Replaced and Grout Recoloured on Ecclesall Road, Sheffield Read More »

Victorian Hallway Floor Restoration Barnsley

Unloved Victorian Hallway Floor Renovation in Barnsley

A young couple recently bought a house in Barnsley and were renovating it from top to bottom, included in the plan was the desire to have the previously unloved Victorian floor made beautiful again. The house stands in an area of Barnsley famous for its’ big Victorian villas and quite rightly they felt it was important to ensure period features like this original floor were correctly maintained.

Unloved Victorian Hallway Floor Before Renovation

Due to the floor being covered up for many years the floor had developed damp staining, it also had a lot of paint splattered on it. There were also some loose tiles that needed fixing back in place and the layer of old floor polish was present which would need removing.

Cleaning a Victorian Tiled Hallway Floor

I started by protecting all the skirting boards, doors and carpets bordering the tiles from splashing. The loose tiles were then cleaned up and then secured back in place using a fast-setting adhesive.

Once the adhesive was set, I turned my attention to stripping and cleaning the floor starting with the application of a coarse 200-grit diamond pad fitted to a weighted rotary buffing machine. The pad was lubricated using a dilution of Tile Doctor Remove & Go which was applied to small sections of the floor and left to soak in for ten minutes first. I run the buffing machine at a slow speed to minimise splashing. Remove & Go is amazing at removing old floor coatings (i.e. sealers), dirt and grime from the floor. When the diamond pad had been used on each section of the floor for five minutes the slurry was vacuumed up using a wet vac machine and I moved onto the next section. Once the whole floor had been cleaned in this way it was time to start the next step.

Old floors like this which don’t have the benefit of a damp proof membrane, and have been covered up for a long time, can suffer from efflorescence issues due to moisture being trapped in the tile. This will result in white salt staining appearing on the tiles for days, weeks and sometimes months afterwards. To counter this the alkaline salts are neutralised by giving the floor an acid rinse using Tile Doctor Acid Gel and leaving it to dwell for five minutes before going over the floor again with the coarse diamond pad. The slurry was again removed with a wet vacuum and the floor was scrubbed clean with damp cloths.

Sealing a Victorian Tiled Hallway Floor

I returned a few days later once the floor had dried to seal the floor. The client wanted a satin finish so knowing the floor had damp and efflorescence issues I opted for Tile Doctor Seal and Go Extra. This is a topical sealer which leaves a lovely satin finish but also allows for the floor to breathe. six coats were required to make the floor look perfect, allowing the lovely colours to come through.

Unloved Victorian Hallway Floor After Renovation Unloved Victorian Hallway Floor After Sealing

Once complete the floor looked much brighter and the colours really shone through. The owners were really happy with the renovation we carried out and before leaving I took time to discuss how best to maintain the tiles going forward including the use of Neutral Tile cleaner.


Professional Renovation of a Victorian Tiled Hallway in South Yorkshire

Unloved Victorian Hallway Floor Renovation in Barnsley Read More »

Terrazzo Hallway Floor Restoration Doncaster

Restoration of an iconic Terrazzo Floor in Doncaster

This beautiful Terrazzo floor was uncovered in the hallway of a house in Doncaster, as you can see it had taken a bit of a beating over the years, but the owners were keen on having it restored. Restoring period features like these are a great idea as they are very sought after and can add a lot of value to a property.

The floor had spent many years below carpet and nails had been hammered through the floor to hold carpet grippers in place. Along with this there was a lot of glue and paint to remove. However, I was confident that we could get the floor restored, I gave them a quotation for the work, and they were happy to proceed as soon as possible.

Terrazzo Hallway Before Renovation

Doncaster is a hot spot for terrazzo floors, apparently there was a big Italian community there in the early part of the 1900s. Doncaster is also famous for its rich rail heritage; the main Doncaster train station is on the East Coast mainline and you find many original station buildings have Terrazzo floors in the public areas.

Cleaning a Terrazzo Tiled Hallway Floor

The first job was to remove as much of the paint, glue and other contaminates as possible. These were scraped off the floor by hand using a razor-sharp scraper.

We then moved onto using a set of five diamond burnishing pads of different grits to cut through the top layers and grime to eventually bring this floor back up to its’ former glory. Starting off with the most coarse pad first I started to go over the floor a pad at a time, each pad is fitted to a rotary machine which has extra weight added to it to make the pads work ever better. Each time a pad is changed, it is slightly less coarse, this starts to polish the floor up to a shine eventually ended with a very fine diamond pad. Water is added at each stage and removed with the wet vacuum before the next pad is used.

Gradually the original floor started to shine through, the colours were quite pronounced, and you could see the floor was a lovely example of terrazzo. After a final rinse to remove the soiling generated by burnishing, I turned my attention to filling the many holes where the nails had been.

Terrazzo Hallway Doncaster During Renovation

Sealing a Terrazzo Tiled Hallway Floor

The floor was left to dry off overnight and the following morning I returned to seal the floor with several coats of Tile Doctor Colour Grow. I choose this product as its designed to enhance the subtle colours in the floor and its fully breathable which is an important consideration when sealing floors in older properties. Damp proof membranes are a common feature these days but are a relatively recent invention. With older floors you need to allow the floor to breathe so the moisture in the sub floor can rise and evaporate at the surface, without this the moisture will reach out to the walls where it can cause rising damp.

Terrazzo Hallway Doncaster After Renovation

The result was a highly polished floor just the way it would have looked when it was first installed 90 years ago. As you can imagine the owners were over the moon with the transformation.

Terrazzo Hallway Doncaster After Renovation


Professional Restoration of a Terrazzo Tiled Hallway in South Yorkshire

Restoration of an iconic Terrazzo Floor in Doncaster Read More »

Yorkstone Flagstone Floor Before After Restoration Sheffield

Gorgeous Yorkstone Floor uncovered at Sheffield Rental Property

A property investor recently purchased a house in Sheffield with a Yorkstone floor. His plan was to renovate the house and then let it as student accommodation. Not such a bad plan considering Sheffield is home to two universities and 60,000 students making it a real student city. The Universities here rank in the top 100 worldwide and Sheffield Hallam University is the 11th largest in the UK.

The Yorkstone floor had been covered up for a very long time and having ripped out the kitchen units decided not only was it a lovely feature he’d like to keep but it also made financial sense to restore the floor as to replace it would have cost a lot more. Having searched the internet for a solution he came across Tile Doctor and I was asked to call in to quote for restoring the floor.

Yorkstone Floor Before Renovation Sheffield

On inspection the floor looked to be in good physical condition, it had been protected by the floor coverings but was very dirty. Additionally, I could see adhesive residue where the flooring had been laid on top of the stone. I conducted a test clean which went well so we agreed a price for the work and got the job booked in. Naturally, he was keen to fit in the work with the schedule of the new kitchen going in, fortunately we were able to work around the dates.

Yorkstone Floor Before Renovation Sheffield

Cleaning and Restoring a Yorkstone Tiled Kitchen Floor

A nice empty room always makes a job easier, as we don’t need to do too much preparation to protect existing fittings. We started with a strong dilution of Tile Doctor Pro-Clean which was applied to the floor and left to dwell for ten minutes. During this time, the Pro-Clean gets to work breaking down the old floor coatings including dirt and grime. The solution was then scrubbed into the floor using a Black pad fitted to a rotary floor buffer. The Black pad does a fantastic job of scrubbing away all the old dirt and getting the stone clean. Once this was done the thick brown slurry generated was extracted using the wet vacuum and the floor was thoroughly rinsed with water. After inspecting the Yorkstone I repeated the process in a couple of the areas where there were some stubborn stains until I was happy the stone was as clean as it possible could be. After a final rinse and extraction, the floor was left overnight to dry.

Sealing a Yorkstone Tiled Kitchen Floor

Returning the following morning, I used a digital moisture meter to test if the floor was dry enough to seal. You shouldn’t apply a sealer if the floor has a high moisture reading as it will impact the sealer curing which can lead to unexpected results.

To seal the Yorkstone and add protection from ingrained dirt I selected Tile Doctor Seal & Go which leaves a beautiful satin finish that adds a protective barrier over the stone. This will ensure that the floor stands up to the heavy traffic of the new tenants moving in, additionally it’s a water-based sealer so it doesn’t give off a smell as it dries.

Yorkstone Floor After Renovation Sheffield

It was amazing to see the transformation of the Yorkstone flagstones and my client was very pleased with the work. For aftercare cleaning of these floors I recommended the use of Tile Doctor Neutral Tile Cleaner however I find with rental properties there is no guarantee the tenants will use it.


Professional Restoration of a Yorkstone Tiled Kitchen in South Yorkshire

Gorgeous Yorkstone Floor uncovered at Sheffield Rental Property Read More »

Porcelain Floor Tile Grout Before After Renovation Darton

Patchy Grout on Porcelain Floor Restored in Darton New Build

Recently it seems I am getting called out to an increasing number of new builds to sort out patchy grout issues. The reason why there have been so many issues arising is a bit of a mystery, but I put it down to a combination of things like poor quality grout, rushed installations, wet subfloors and the use of different batches.

Patchy Grout Before Applying Light Grey Grout Colourant

This recently built house in the village of Darton is a great example and in this case, I suspect two different batches of the same grout had been applied. Darton by the way is a small village in the Borough of Barnsley.

Invariably these problems are picked up by the new owner on their snagging list, with the tiler long gone and the builder keen to get their final payment it is always a tricky situation to resolve. I find the best solution is to apply a Tile Doctor Grout Colourant, it’s a much quicker process than removing the old grout and replacing with new. Most new homeowners would not appreciate us ripping up their brand-new rooms and generating lots of dust in the process! Also, by using the Tile Doctor Grout Colourant it adds a barrier of the grout preventing dirt from discolouring it further down the line.

Restoring grout a Porcelain Tiled Kitchen Floor

Even though the house was brand new, the Porcelain Tiled floor was not looking great. The client was happy for me to go ahead and would take up the bill with the housebuilder. I first pre-treated it with Tile Doctors Grout Colourant Pre-Treatment. This removes any contamination from the grout which might affect the adhesion of the colourant and being an acid, it also etches the surface of the grout to ensure a superior bond with the colourant.

The client chose our Light Grey colour which is one of 10 colours we offer. Once the pre-treatment had been applied, scrubbed, rinsed, and vacuumed away the floor was left to dry. Once dry we started applying the colourant, this is done with a small brush (a toothbrush is ideal) carefully scrubbing colourant into each grout joint and wiping off any excess that gets on the tiles before it is able to dry.

Patchy Grout During Application of Light Grey Grout Colourant

Once complete the newly coloured grout lines totally transformed the floor and because the grout colorant is epoxy based the grout lines will stay stain free and never get dirty.
The porcelain tiles were factory sealed so there is no need to apply a seal to the floor.

I recommended the use of Tile Doctor Neutral Tile Cleaner to keep the floor in the best condition. It is pH neutral so is far less harsh on the surface than the everyday household cleaners available. It has a minty fragrance and is mild enough to use daily. They were very happy that the floor now looked as it should have from the start and was the finishing touch to their beautiful new home.

Patchy Grout After Applying Light Grey Grout Colourant


Professional Kitchen Grout Restoration in South Yorkshire Kitchen

Patchy Grout on Porcelain Floor Restored in Darton New Build Read More »

Victorian Hallway Tiles Before After Restoration Doncaster

Victorian Hallway Tile Restoration at Ex Railway Property in Doncaster

Pictures below are from the restoration of Victorian Hallway Tiles that I carried out at a marvellous old property just south of Doncaster last year. The property was originally built and owed by the railways in fact its located metres away from the East Coast mainline which links Edinburgh with London and calls at places like Doncaster, York, and Newcastle.

The owner of this property was left a very old photograph by the previous owners showing two people stood by the front door and the floor tiles are just visible in the photograph.

Victorian Hallway Original Photo Doncaster Railway Property Victorian Hallway Before Renovation Doncaster Railway Property

Even though the house had been kept in great condition by the railways for well over one hundred years the large Victorian floor had unfortunately taken a hammering. In total around 130 damaged tiles would need removing and replacing with replicas. This would be a painstaking task but would make all the difference to the overall look of the floor.

Victorian Hallway Showing Damage Doncaster Railway Property

Replacing Victorian Hallway Tiles

The current owner was keen to have the floor renovated and I was asked to do the work, old floors like these are a sought-after period feature and can add a lot of value to a property once restored. Fortunately, Victorian tiles are still popular today, and I was able to source replacements without too much trouble.

I started the restoration by removing the old cracked tiles and cleaning up the base. With this done I started the lengthy process of carefully cutting tiles to fit the original pattern and then fixing them in place with a modern adhesive.

Victorian Hallway Showing Damage Repair Doncaster Railway Property

Deep Cleaning Victorian Hallway Tiles

After leaving the tile adhesive to set overnight I came back the next day to deep clean the floor, by cleaning the old and new tiles together it will ensure the floor has a consistent appearance when finished.

Sometime in the past layers and layers of an old sealer had been applied to the floor, the sealer was flaking off and holding on to decades of dirt. To remove the old sealers, we used Remove and Go, it was sprayed on to the tiles and then left it to dwell and soak in for ten minutes.

Victorian Hallway Before Renovation Showing Failed Sealer Doncaster Railway Property

The tiles were then scrubbed using a rotary floor buffer fitted with a 200-grit diamond pad which made short work of the old floor sealers. The floor was then treated with Tile Doctor Pro-Clean to clean the tiles further, again a diamond pad was used to go over the tiles.

Victorian Hallway During Sealer Removal Doncaster Railway Property

Once happy the Victorian tiles were as clean as the could be it was time to give the floor an acid wash which would remove any old mineral deposits including grout smears. We also recommended this for old Victorian floors which do not have a damp-proof membrane installed and can suffer from white efflorescent salt deposits as moisture rises through the tile. To do this Tile Doctor Acid Gel was scrubbed into the to the floor again using a 200-grit burnishing pad to make the acid gel work hard. Afterwards we rinsed the floor several times removing the slurry with a wet vacuum. This kept the mess to a minimum and the floor was already looking great.

Victorian Hallway During Renovation Doncaster Railway Property

Sealing Victorian Hallway Tiles

The property was left for a few days to let the floor dry out completely and when I returned seal the floor my first job was to check the moisture readings in the floor with a damp meter. I needed to ensure it was as dry as possible before applying a sealer and in this case, I didn’t have to worry.

Next, I applied four coats of Tile Doctor Colour Grow which works by seeping into the pores of the tile protecting it from within. I consider this to be best choice for sealing old Victorian tiles like these as it does a nice job of improving colour and its fully breathable. Being breathable is important due to the lack of the damp proof membrane and will allow moisture to pass through the tile and sealer and not become trapped under the floor where it could spread to the walls and cause rising damp.

Victorian Hallway After Renovation Doncaster Railway Property

PS.. If you have ever wondered if you have applied enough sealer all you need to do is drop some water onto the floor, if the tile is sealed sufficiently the water will form a bubble on the surface.

Victorian Hallway After Sealing Water Test Doncaster Railway Property


Professional Renovation of a Victorian Hallway Tiles in Doncaster

Victorian Hallway Tile Restoration at Ex Railway Property in Doncaster Read More »

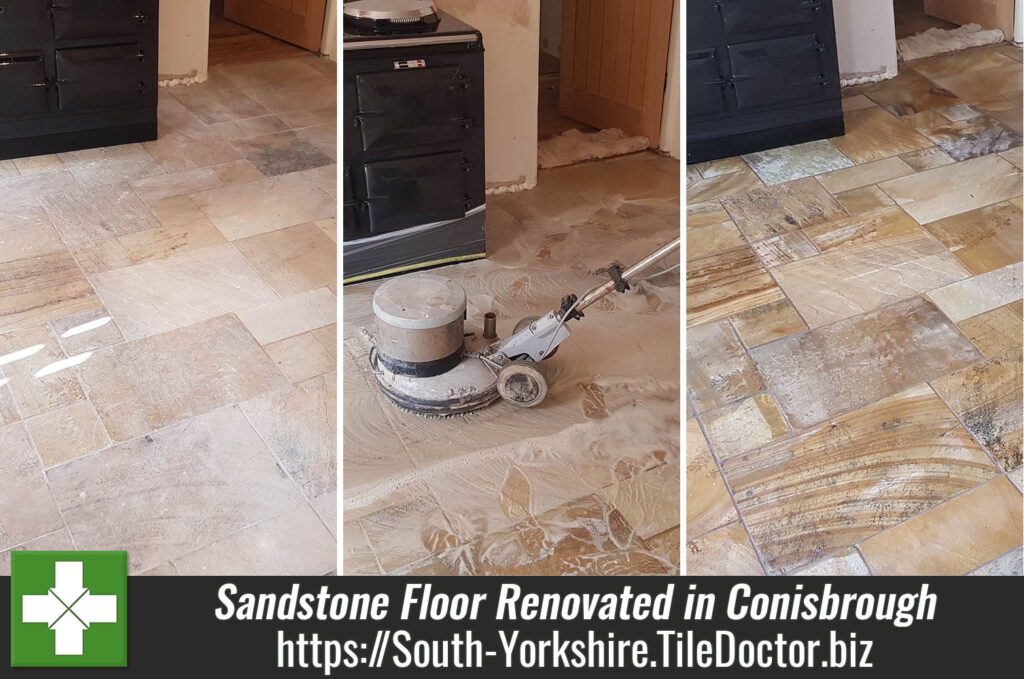
Sandstone Kitchen Floor Before and After Cleaning Sealing Conisbrough

Sandstone floor clean and seal in Conisbrough, Doncaster

The owners of this stunning 400-year old property in Conisbrough had occupied it for a few years and were now having a lot of work done to the interior. They never liked the Sandstone Kitchen floor as it always looked dull and unclean, and this was made worse during the renovations. As a result, they had decided they would try and have it professionally cleaned and if not happy would look to replace it.

Sandstone Floor Before Clean and Seal Conisbrough Doncaster

Conisbrough is a town within the borough of Doncaster. It’s most famous for its’ spectacular castle, Conisbrough Castle. It was originally built in the 11th Century after the Norman Conquest of England in 1066. Needless to say, the area has a lot of history including the residential property.

Even though the house was 400 years old this floor was part of a recent addition which used to be a tearoom. It was immediately obvious from our initial inspection the floor had never been sealed properly leaving it susceptible to stains, ingrained dirt and grime. We gave them a quote for the work which they were happy to accept, and we arranged a convenient date to return.

Deep Cleaning a Sandstone Tiled Kitchen Floor in Conisbrough

To ger the dirt out of the stone I decided to start with a medium strength dilution of Tile Doctor Pro-Clean. It was sprayed onto the floor and then left it to soak in for about ten minutes so it could get to work on breaking down the soiling. After the 10 minutes was up it was worked into every inch of the stone using a scrubbing brush fitted to a rotary floor machine. This product is perfect for removing built up grease and deep ingrained dirt. As the floor had no seal for protection it was pretty dirty.

Sandstone Floor During Clean and Seal Conisbrough Doncaster

This action released a dark brown soil from the stone, and this was extracted with an industrial wet vacuum and quickly rinsed the floor with water. It was a reasonably large floor, so it was cleaned in sections working our way across the room making sure the floor was 100% clean as we went. After cleaning the floor twice, it was inspected, and further work carried out to the high traffic and stubborn areas.

Sandstone Floor During Clean and Seal Conisbrough Doncaster

Sealing a Sandstone Tiled Kitchen Floor in Conisbrough

The floor was left to dry out overnight and then checked with a damp meter then next day to ensure the moisture level had returned to normal. Applying a sealer to a damp floor is not recommend and can lead to an inconsistent result so I always check first.

To seal I applied Tile Doctor Colour Grow to the floor, this in an impregnating sealer that soaks into the pores of the stone protecting it from within and enhancing the natural colours in the stone in the process. It really brings out the beautiful colours and patterns of the stone transforming its appearance.

Sandstone Floor After Clean and Seal Conisbrough Doncaster

The floor looked great and the client was very happy with the overall appearance and decided they would stick with the floor, actually Sandstone is quite nice!

I recommended to the client they should use Tile Doctor Neutral Tile Cleaner to keep the floor looking good, this is a pH neutral cleaner which will not compromise the newly applied seal and will keep it in place, preventing the problems they had previously experienced. It has a fresh smell and is suitable for regular use.


Professional Restoration of a Sandstone Tiled Kitchen in South Yorkshire

Sandstone floor clean and seal in Conisbrough, Doncaster Read More »

Travertine Tiled Kitchen Floor Before After Renovation Stocksbridge

Dull Travertine Floor Filled, Polished and Sealed in Stocksbridge

Late last year I was called to a property in Stocksbridge, near Sheffield, to survey a Travertine tiled floor which had become dull, grubby and had completely lost its appeal. Over the years the floor had lost its shine, the grout lines were filthy and worse still holes had appeared in the stone which had then filled with dirt making it difficult to clean.

Travertine Floor Before Renovation Stocksbridge

I discussed with the client what we could do to restore the Travertine floor back to its’ former glory. I explained holes or pitting as it’s known is quite common with Travertine and is normally sold with the holes filled with a colour matching resin. In this case it’s possible the filler had come loose, or the Travertine had become eroded due to the constant use acidic cleaning products. To restore the floor, I would re-fill the holes, hone the floor and polish it and then finally seal it. I showed them a small test area and they were suitably impressed and were happy to go ahead with my quote. We arranged a convenient time for the work to be carried out.

Cleaning and Repairing a Travertine Tiled Kitchen Floor

We started by preparing the Kitchen for floor cleaning which involves removing the kick boards under the units and protecting any exposed areas from splashing. Next, I sprayed the stone tile and grout with a strong dilution of Tile Doctor Pro-Clean, left it to soak in for then minutes and then scrubbed the area with a rotary machine fitted with a black pad. This action was designed to get the dirt out of the holes and give the grout lines a good scrub. Once done the floor was rinsed with water and the soil extracted with a wet vacuum.

Travertine Floor Cleaning Grout Lines Stocksbridge

I then set about filling the many holes that had appeared in the floor, a colour matched epoxy resin is used to fill the holes so once filled they’re almost invisible. When the resin had set, we began honing and polishing the floor using the Tile Doctor burnishing system which involves the application of specialist floor pads encrusted with industrial diamonds.

Filling Pitted with Travertine Tile with Resin Stocksbridge

Four burnishing pads are used for this, each of a different grade from coarse to extra fine which slowly refine the stone. The first pad which is coarse 400-grit pad removes old sealers, grime and stains. We then start building the polish of the stone back up with the 800 and 1500-grit pads. You need to lubricate the process with water and then extract the fine slurry that is generated with a wet vacuum after each pad. This always makes a huge overall difference to the look of the floor and by the end of the first day the floor was starting to get its appearance back.

Sealing a Travertine Tiled Kitchen Floor

The floor was then left overnight to dry out and we returned the following morning to finish off polishing the floor with our highest grade 3000-grit diamond pad. This last pad is applied with a little water which is sprayed on to the floor during application. This process leaves the floor dry, polished and ready for sealing.

To seal the floor three coats of Tile Doctor Colour Grow were applied to the floor, you have to wait for the sealer to dry (usually 30 minutes) before applying the next so this took some time to complete. Colour Grow is an impregnating sealer that protects the floor from staining from within by soaking into the pores of the stone thereby preventing dirt from becoming ingrained. It contains a colour enhancing formula that improves the colour and tone of the stone, additionally it will protect the floor against grime and stains and will ensure the floor is easier to keep clean.

Travertine Floor During Sealer Application Stocksbridge

For aftercare I recommended they should use Stone Soap for day to day cleaning. Unlike everyday household cleaners it has a pH neutral formula so will not prematurely erode the newly applied seal. It can be used regularly and will also help maintain the patina.

Travertine Floor After Renovation Stocksbridge

My client was over the moon with the new floor, the kitchen area had been transformed and they said they would happily recommend Tile Doctor to their friends.


Professional Restoration of a Travertine Tiled Kitchen in South Yorkshire

Dull Travertine Floor Filled, Polished and Sealed in Stocksbridge Read More »

Scroll to Top